# Catalog administration
# Login
# Using the web interface
A login link is provided at the top-right of the NADA catalog site. This login will be used by administrators to access the administrator web interface, or by registered users who need to login to request access to non- public datasets. The web interface will only be accessible to users who have been granted some administrative role in the catalog (full administrator, collection administrator, reviewer, or data request approver; the specific administrator privileges are defined by the full administrator in the "Users" section of the web interface).

After login as administrator, the login button will display a menu as follows:
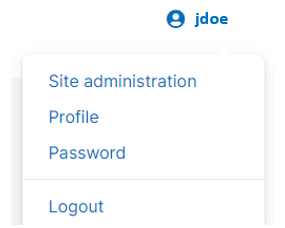
The Site administration link will open the web interface ("Dashboard").
The Profile link will display your profile, with an option to edit its content and to generate your API keys. An API key will be required to programmatically add, edit, extract, or delete information from the NADA catalog, using R or Python for example. The privileges that the API key will provide depend on the permissions you have to administer the catalog or specific component of it.
NOTE
API keys have administrator privileges attached to them, and are therefore like your password. They must be kept strictly confidential. If you have any reason to believe that your API key has been compromised, cancel it immediately, and generate a new key.
As an additional security, the API use can be restricted to some specific IP addresses. See ...

# Using the API
The profile can only be edited in the web interface; it cannot be edited using the API.
The equivalent of a login when using the API is to provide the catalog URL and an API authentication key. This is done in R (NADAR package) and in Python (library PyNADA) using the functions set_api_key and set_api_url.
Using R:
library(nadar)

# Setting the API key for authenticating as administrator (equivalent to "login")
# The API key should never be entered in clear in a script; this information is like a
# password that should never be revealed. A common practice is to store the key in an external,
# confidential file (e.g., CSV) and to have the script read it from there.

my_keys <- read.csv("C:/CONFIDENTIAL/my_keys.csv", header = F, stringsAsFactors = F)
set_api_key(my_keys[5,1])  # Assuming the key is in cell A5

# Providing the catalog URL:

set_api_url("http://nada-demo.ihsn.org/index.php/api/")
set_api_verbose(FALSE)
Using Python:
import pynada as nada
import pandas as pd

# Setting the API key for authenticating as administrator (equivalent to "login")
# The API key should never be entered in clear in a script; this information is like a
# password that should never be revealed. A common practice is to store the key in an external,
# confidential file (e.g., CSV) and to have the script read it from there.

my_keys = pd.read_csv("C:/CONFIDENTIAL/my_keys.csv", header = None)
nada.set_api_key(my_keys.iat[4, 0])  # Assuming the key is in cell A5

# Providing the catalog URL:

nada.set_api_url('https://nada-demo.ihsn.org/index.php/api/')
nada.set_api_verbose(FALSE)
# Dashboard
# Using the web interface
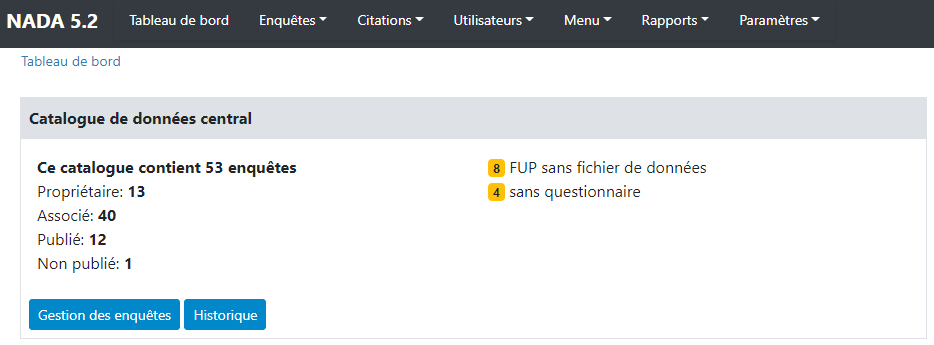
After logging in to the site with administrator credentials, you will be taken to the Dashboard page of the administrator web interface. The page also includes the menu that provides access to all sections of the web interface.

The Dashboard provides a quick glance summary for administrators to get an overall picture of the content of the catalog as well as of pending tasks for the administrator.
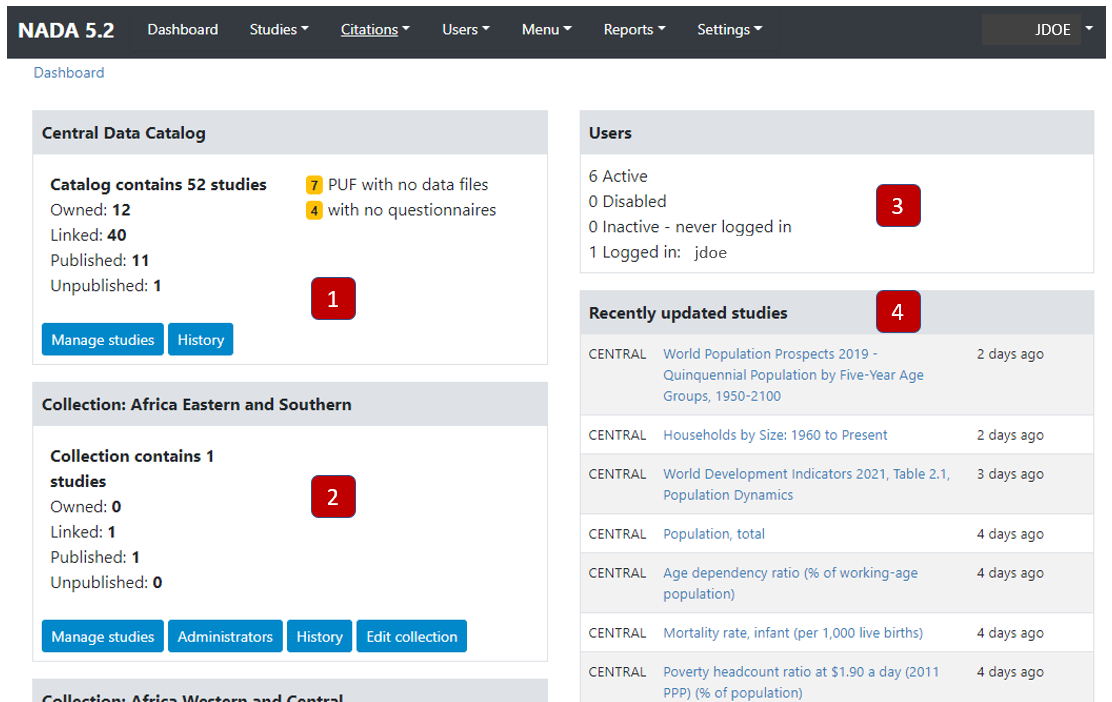
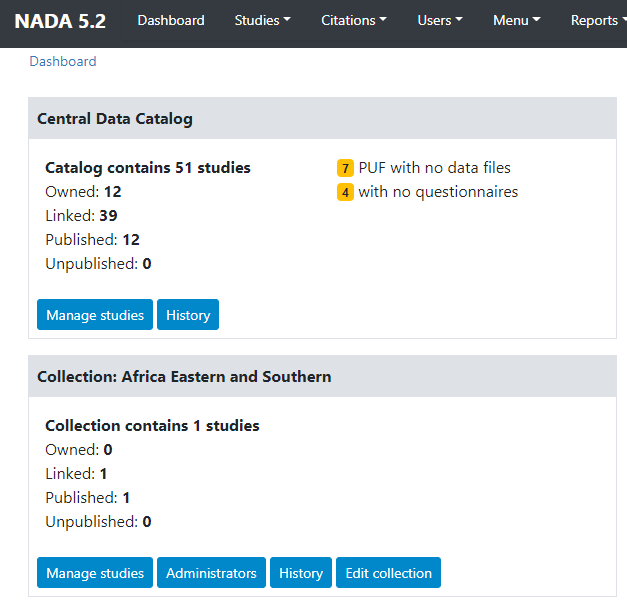
Box 1 (Central Data Catalog) provides information on the total number of entries (of any type) listed in the catalog. It distinguishes the entries that are "owned" by the Central Catalog (entries managed by the Central Catalog administrator, that are not owned by a specific collection or "sub-catalog) from the "linked" entries (those that are owned by a collection but displayed in the Central catalog). It also distinguishes the entries that are published (i.e., visible by visitors of the catalog site) from those that are in draft ("unpublished") mode, only visible to the administrators and reviewers. The box also contains some warnings. It will for example indicate the number of micro-datasets published as "Public Use Files" but for which no data files are available in the catalog, or the number of microdata entries for which no document of type "questionnaire" is provided.
The button Manage studies will open the catalog administration page that provides the tools for adding, editing, and deleting catalog entries (described in section Manage studies of this Guide). The button History provides a listing of additions to the Collection (in this case the Central Catalog), with information on the date when the entry was created and last modified (the buttons displayed in this page are described in section Manage collections).

Box 2 (Collection: [collection name]) will only be displayed when your catalog contains Collections. One box will be displayed per collection, with the same information as in Box 1. Two additional buttons are provided, which provide access respectively to a page allowing the catalog administrator(s) with appropriate credentials to edit the permissions attached to the collection, and to edit the description of the collection (see Managing collections section).
Box 3 (Users) provides summary information on the number of users registered to the catalog (which includes not only the catalog and collections administrators, but also users who registered to the catalog to obtain or request access to non-public data).
Box 4 (Recently updated studies) is a listing of the most-recently added (or modified) entries in the catalog, with a link to the entry page allowing administrators to edit it.
# Using the API
There is no real equivalent to the dashboard in the API. But the content of the dashboard can be generated using the API as follows:
[... to do ...]
# Settings
# Using the web interface
All settings for the application are controlled via the Settings menu at the top of the Site Administration page.
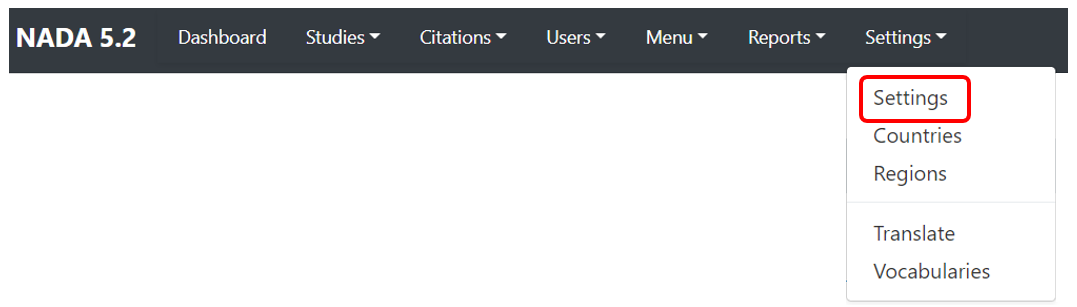
There are seven main settings sections.
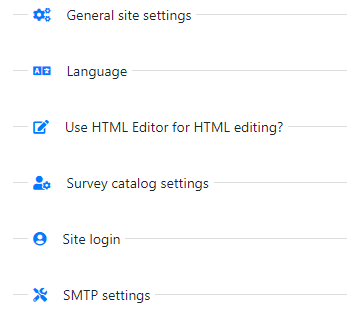
# General site settings
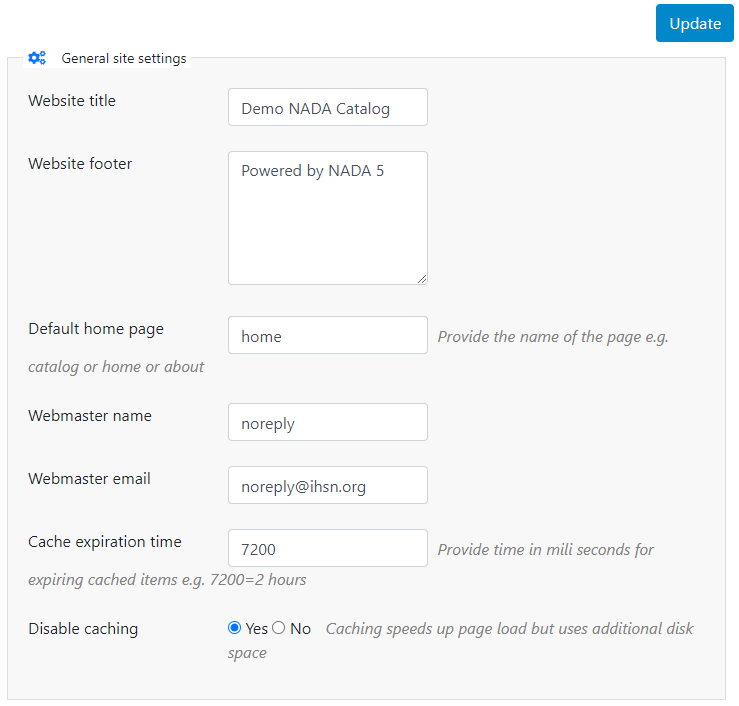
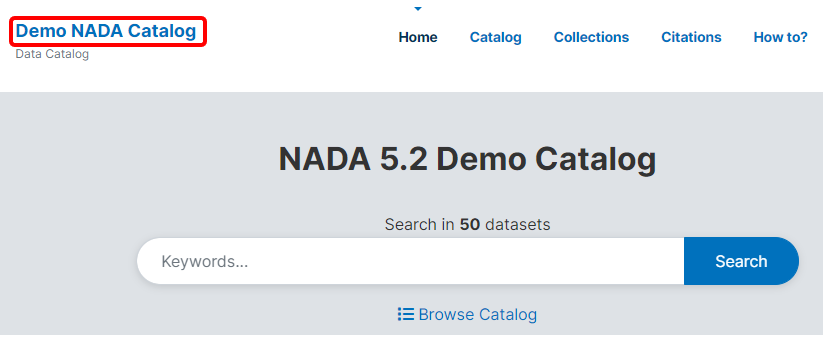
The Website title will become the frontpage title of the NADA catalog. In the user interface:
Website footer: The footer text can be changed in this field. This displays at the bottom of your site page.

Default home page: The initial page that loads when a user visits the NADA site can be set here. In this case the catalog page is set to open by default.
Webmaster name: The name of the webmaster can be set here. This is the name that will be used in system emails sent to users.
Webmaster email: Enter the webmaster email address here. This should be the address that will be used in communication with users. Typically, this is a general enquiries email set up by the organization and not a personal email address for a particular person. Note: to avoid mail systems rejecting mail as spam make sure to enter an address here that is on the same domain as the server used in the email settings at setup.
Cache expiration time: A cache folder stores pre- generated pages of the site to allow for faster browsing by the user. Set the time that the Cache takes to expire. By default, it is set to 2 hours (in milliseconds).
Disable caching: If it is desired to turn off caching then select "no" here. Sometimes it is useful to turn off caching when developing or updating a site to ensure that content changes become immediately visible on the front-end without having to wait for the cache to expire and the new changes to show. Turn this back on to speed up page loading for users.
Click Update to save all settings.
# Language
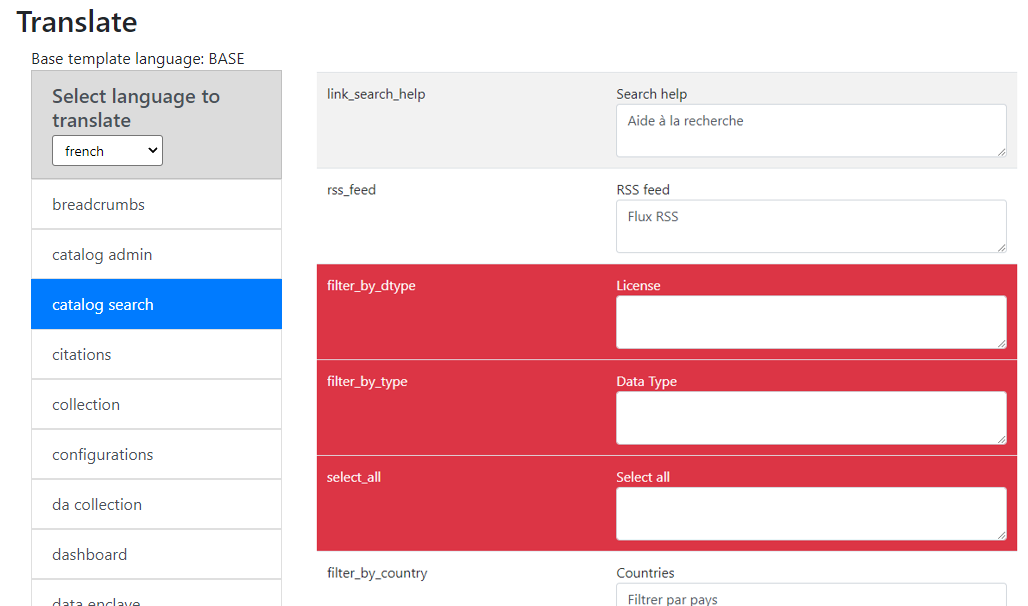
To change the language of the application, expand the language section and choose the desired language. Click Update to save and apply the setting.

The change of language will apply to both the user and the administrator interfaces.
If you see content that is not in the selected language, it means that some translations are missing. If a translation is missing, or if you think that the translation is not accurate, you can add/edit the translation yourself. See the section "Translating NADA".


# Use of HTML Editor
A basic HTML editor is provided in the menu and page creating section of the application. This setting allows this to be turned on or off.

# Survey catalog settings
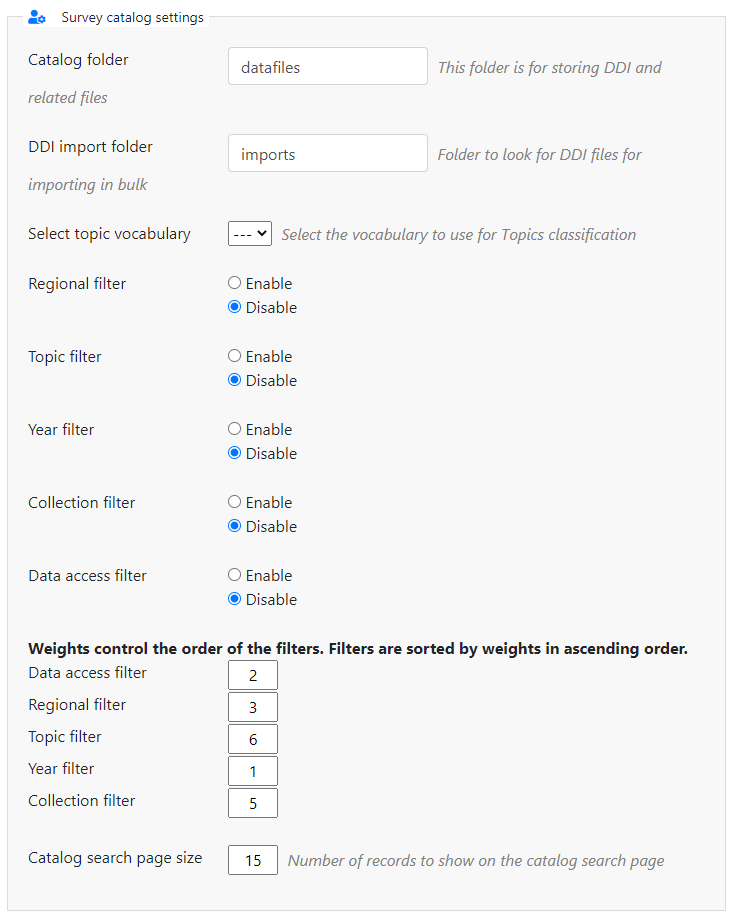
Catalog folder: This is the folder where the files for the study are stored on the server. This includes the DDI, eternal resources and data files. This folder can be moved to a location outside the web root as described in the installation instructions in Chapter 1. Enter either relative or absolute paths to the folder location.
DDI import folder: This is the folder where DDI's can be placed in order to use the bulk study import function in the NADA. In NADA3 files had to be physically copied to this folder on the server, but this is no longer necessary in NADA 4. Files can now be directly uploaded to this folder from the Site Administration > Manage Studies page.
Select the vocabulary to use for the topic filter. By default, this is set to the CESSDA classification as recommended in the IHSN templates supplied at IHSN.org (opens new window) for the Nesstar Metadata Publisher.
Enable or disable the Country filter on the user interface search page here. If the catalog only contains studies for one country, then turning this filter off is recommended.
Enable or disable the Topic filter on the user interface search page here. If no topics have been defined in the DDI's being uploaded, then it is recommended to turn this filter off (disable).
Enable or disable the Year filter on the user interface search page here.
Enable or disable the Collection filter on the user interface search page here. If no collections have been defined, then it is recommended to disable this filter.
Enable or disable the Data access filter on the user interface search page here. This filter is not needed if there are very few studies in the catalog or if all studies are set to the same access type.
This section controls the order in which the filters appear on the search page. Enter numbers here that rank the order of the filters in the order they should be displayed.
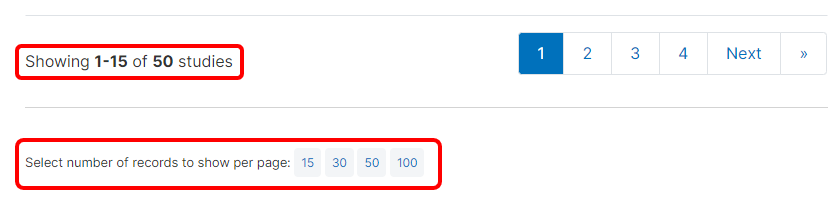
Catalog search page size: This setting determines how many studies displayed by default to the user on the search page -- catalog view.
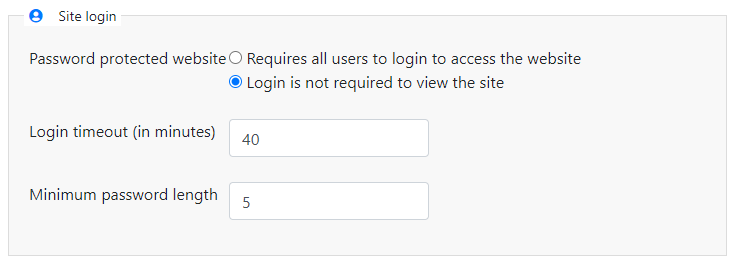
# Site login
Password protected website: By default, a NADA catalog created on a server will be accessible to all users with access to the URL (intranet or internet). Users will only need to register and login when they want to request access, or access, non-public data. In some cases, however, a catalog administrator may want to restrict the access to the catalog to authorized persons only. This can be done by requiring that all users login to access the website, by selecting the option "Requires all users to login to access the website". [how do they get a password?]
Login timeout: determines how long a user will stay logged in. After the time indicated here (a positive value in minutes), the user will be automatically logged out.
Minimum password length: Sets the minimum length for passwords created by the users at registration, or for manual user creation by administrators. The use of strong passwords is recommended.
# SMTP settings
NADA may need to be able to send emails to users. This will be the case when access to some datasets (public use files, or licensed access datasets) require that users be registered. Email communications will be used by NADA to (i) confirm and activate the user registration, and (ii) to inform users of the status of their requests for access to licensed datasets. To allow this, an email account dedicated to NADA must be created (possibly on a commercial email application like G-mail), and the SMTP must be configured to enable this account.
The SMTP settings are set by editing the config/email.php file (which cannot be done using the administrator interface). Once done, it is essential to test the email settings. This can be done using the Test email configurations button.

Another way to test if the email settings are working is to use the forgot password option from the user login page. If no mail is received when doing this test, the mail settings must be corrected. If necessary, check with the ISP or server administrator for the correct settings.
# Using the API
The site settings cannot be changed using the API.
# Countries
 Most entries in a data catalog will relate to one or multiple countries. All metadata standards and schemas used by NADA include an element to capture this information:
- 'nation' in the DDI Codebook;
- 'geographic_units' in the time series schema;
- 'ref_country' in the Dublin Core/document schema and in the tables schema;
- 'locationsShown/countryName' in the IPTC schema for images;
- 'country' in the video schema.
This information, especially in multi-country catalogs, is particularly relevant to filter data. By default, NADA provides a facet to filter entries by country.
But countries can be named in different manners in datasets/metadata. For example, the Democratic Republic of Congo could also be referred to as "DR Congo", "Congo, DR", "DRC". Multiple variants of a country name should all be mapped to a unique label, for two reasons:
- It would be inconvenient to users of a catalog to have to select more than one item in a list to identify entries related to one single country.
- It can be politically important (and a requirement) for some organizations to comply with specific names for countries and territories.
To address this issue, catalog administrators can provide their instance of NADA with a reference list of countries and capture the alternative names that may be found in the metadata. Note that "countries" can be "territories", "economies", "regions", or groups of countries. A default list of country names is provided in the NADA application, which can be edited.
# Using the web interface
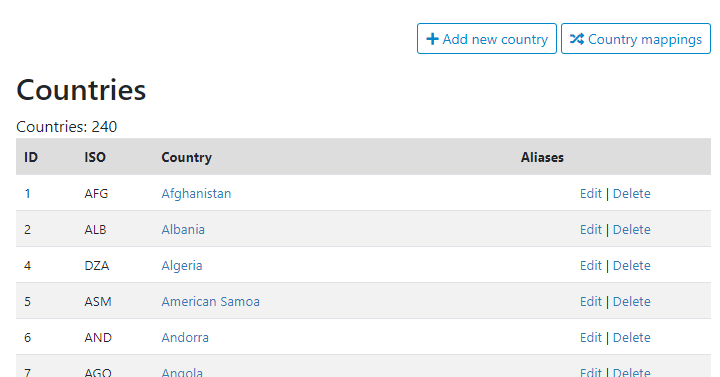
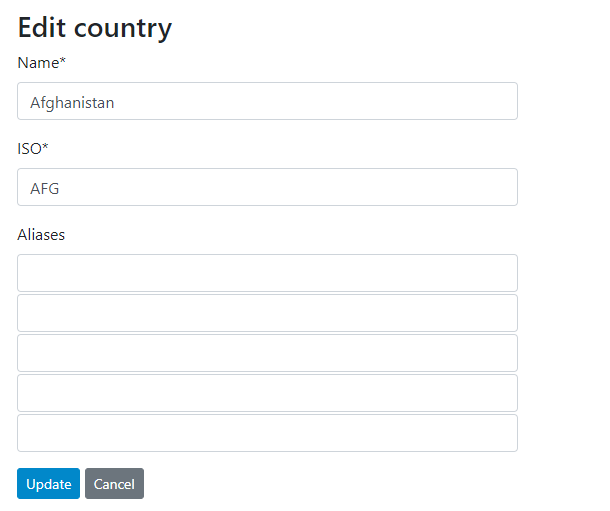
To add a new country, click Add new country. To edit a country, click on Edit. In both cases, you will be taken to a form where the country name to be used as the reference, its code (ISO, or possibly other), and the variants of the country name (aliases), can be entered or edited.
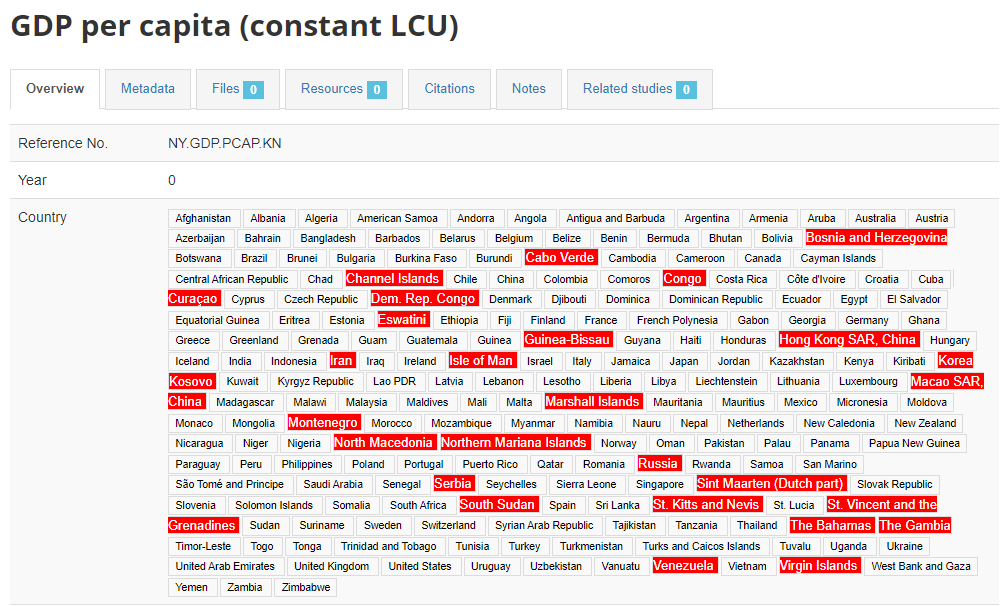
The list of countries entered in this list will serve as a control list for metadata entered in NADA. When metadata are imported and contain non-compliant names, these non-compliant names will be flagged in the entry page (displayed with red background). In the example below, "Cabo Verde" for example is flagged because the reference list of countries only recognizes the name "Cape Verde". Ideally, these issues should be fixed.
The names do NOT have to be fixed by changing the metadata themselves. In some cases, it would make sense to do so, but in others it could create inconsistencies between the source data and the metadata. The solution to address the issue when the data/metadata cannot be changed is to map non-compliant names to names found in the reference list. The fixes (i.e. the aliases for country names) will be stored, so the chances of finding non-compliant names in metadata is likely to rapidly reduce over time.
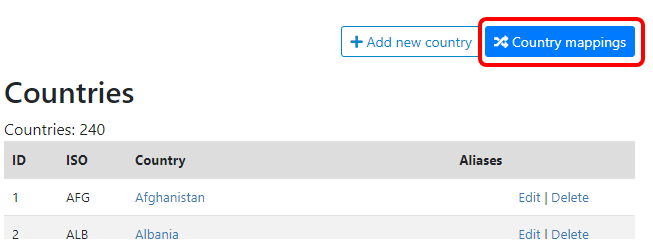
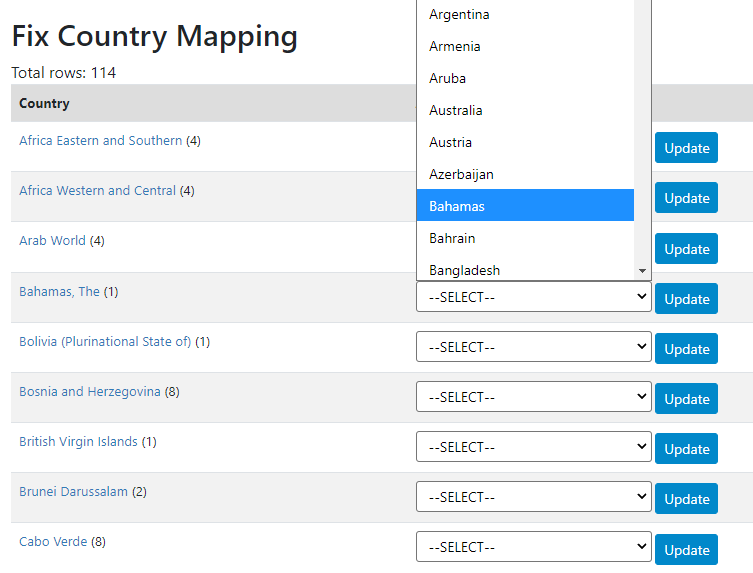
Clicking on any flagged name, or on the main menu item Settings > Countries, will open the page where the mappings can be done. In that page, click on Country mappings.
This will open a table showing the list of non-compliant country names. For each one of them, you can select a country from the list of compliant countries, then click Update. The non-compliant name will now be stored as an alias which will be applied automatically to other datasets that may have used the same non-compliant name. This line of the table will disappear when refreshing the page.
If you do not find an equivalent in the reference list, you may consider adding it. This is however not a requirement. Metadata with non-compliant country names can be stored in the application. The main impact is that they will not be identified in the filter by country (facet), which only shows the countries found in the reference list as options.
Warning: if you delete a country ...
# Using the API
There is currently no possibility to upload or maintain a list of countries using the API. This option may be added in future versions of NADA.
# Regions

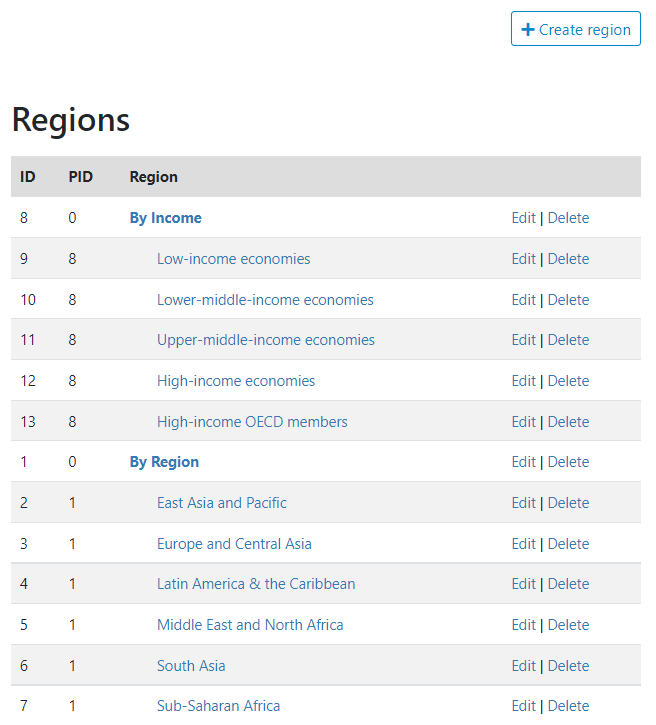
By region, we mean "country groups". The regions can be of different types, determined based on a geographic criterion (e.g., by continent), an administrative criteria (e.g., "OECD countries"), an economic criteria (e.g., high/middle/low-income countries), or other type of criteria (e.g., "landlocked"). In the example below, two types of groups are created: one by administrative region of the World Bank, and one by income level. Within a type, the groups do not have to be mutually exclusive. A country can belong to multiple groups.
# Using the web interface
A region or type of region is created by clicking on the "Create region" button, then entering the relevant information. If you create a region without specifying a "parent", you are creating a region parent. If you create a region and specify a "parent", you are creating a group within this parent group.
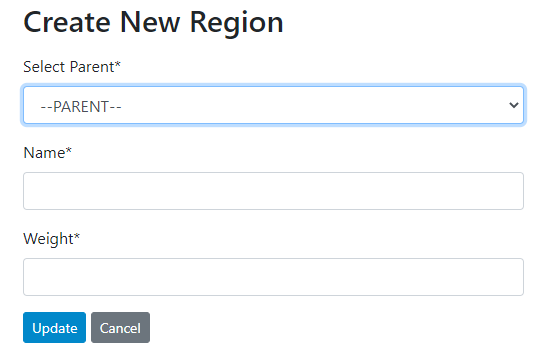
Once a region has been created, the countries that belong to it can be selected (from the reference list of countries). The "weight" argument is a numeric value that will determine the order in which regions are to be displayed.

Groups can be edited or deleted; this does not impact the metadata in the catalog in any way.
# Using the API
Country groupings cannot be entered or maintained using the API; this may be implemented in future versions of NADA.
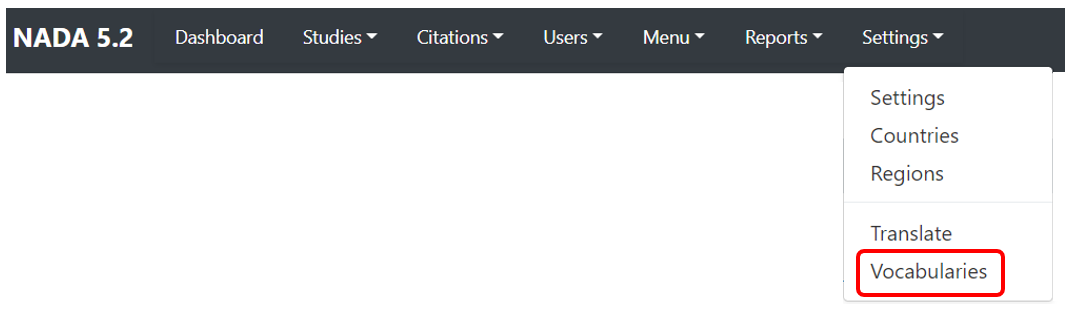
# Vocabularies
# Using the web interface

# Using the API
Vocabularies cannot be entered or maintained using the API; this may be implemented in future versions of NADA.
# Menu
# Adding a new page
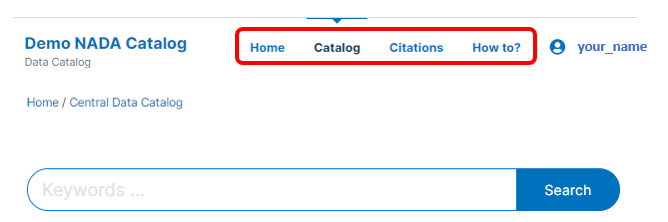
New HTML pages can be added to your NADA catalog, accessible from the main (top) menu. By default, NADA will have the Home, Catalog, Citations, and Login menu items. In the example below, the "How to? item was added as a custom menu item and catalog page.
# Using the web interface
Login as administrator, then click Meny > All pages.
 A list of currently existing pages will be displayed. From this table, pages can be deleted, or opened to be edited. The type "Link" indicates that the page corresponds to NADA-generated content (default pages), not to user-designed HTML pages.
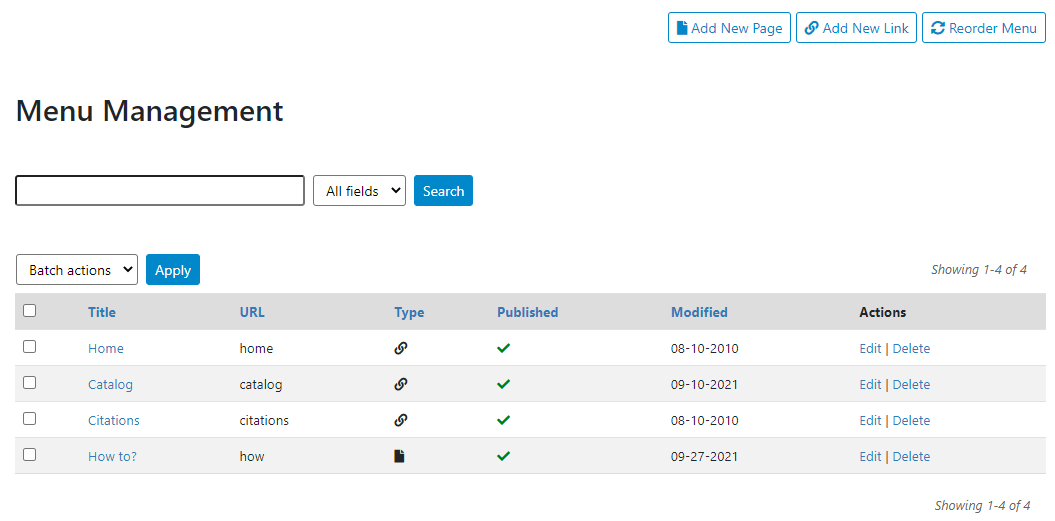
To add a new HTML page and create a menu item to access it, click Add new page

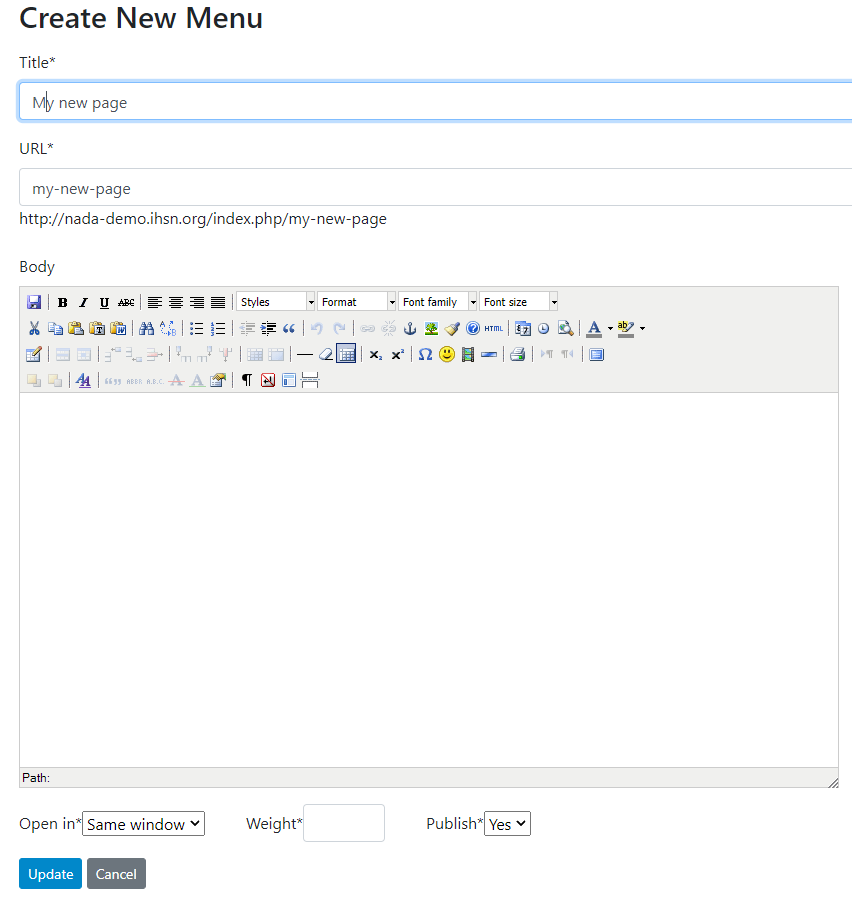
Give a title to the new page, and a URL (the URL you provide here will be automatically preceded with your catalog URL). Enter the content in the HTML editor (assuming the option to edit HTML pages was activated in the catalog Settings). Indicate whether clicking on the page's menu item should open the page in the same or in a new window, and whether you want the page to be published or not (in which case it will be considered as a draft). The Weight argument is used to order the page in the menu item (which can also be done using the Reorder menu tool; see below). When done, click on Update.
The NADA administrator interface and the embedded HTML editor provide limited options to customize the design of the page. To produce pages with more complex content and/or design, you can use your own tools to customize this page. [where to find it? What happens when you upgrade to a new NADA?]
# Using the API
# Adding a new link
What are links?
# Using the web interface
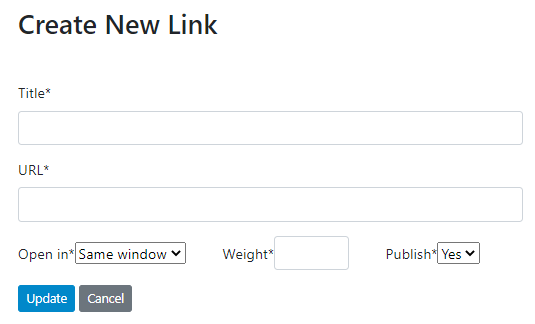
To add a link, proceed as for adding a new page, but click on Add new link.

# Using the API
This is currently not doable via API.
# Reordering the top menu
# Using the web interface
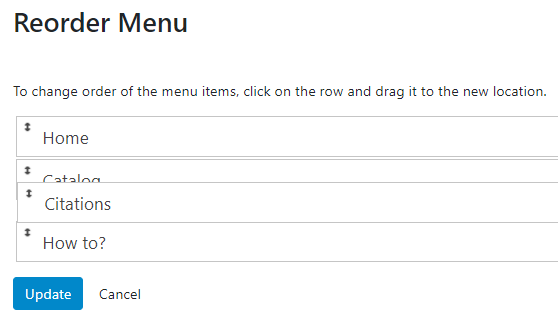
To change the order in which the menu items appear in the user interface, proceed as for adding new menu, then click on Reorder menu.

Drag and drop to position the menu items in the desired order, then click Update.
# Using the API
The main menu cannot be controlled by API.
# Managing studies
This is page that contains the tools to add, edit, and delete entries in the catalog.
# Data types and external resources
NADA is a cataloguing tool for multiple data types. All data types come with a specific metadata standard and schema that will contain the metadata. A catalog entry is specific to one data type. All catalog entries can be published with external resources.
# Data types
Microdata
Geographic
Time series
Tables
Documents
Images
Videos
Scripts
# External resources
Resources of any type, available in an electronic file or URL, that you may want to attach to an entry metadata.
# Adding external resources
Specific simple metadata schema.
Produce some metadata, then indicate file or URL. Then publish attached to an entry.
At any time, can add or delete a resource to a catalog.
RDF in Nesstar; otherwise can generate with API or in NADA.
# Adding an entry: approaches
To add an entry to your catalog, three approaches are possible (although not all apply to all data types): loading pre-existing metadata files, creating an entry from scratch in NADA, and using the NADA API. The first two approaches rely on the NADA administrator interface, the third one on the API and the use of NADAR (R package) or PyNADA (Python library).
# Loading metadata files
When metadata files compliant with a metadata standard or schema recognized by NADA are available (typically generated using a specialized metadata editor), these files can be uploaded in NADA using the administrator interface. The interface will still be used to upload the related resource files, to add a logo/thumbnail, to specify the access policy. This approach currently applies to microdata and to geographic datasets. It will be added to other data types in future releases of NADA.
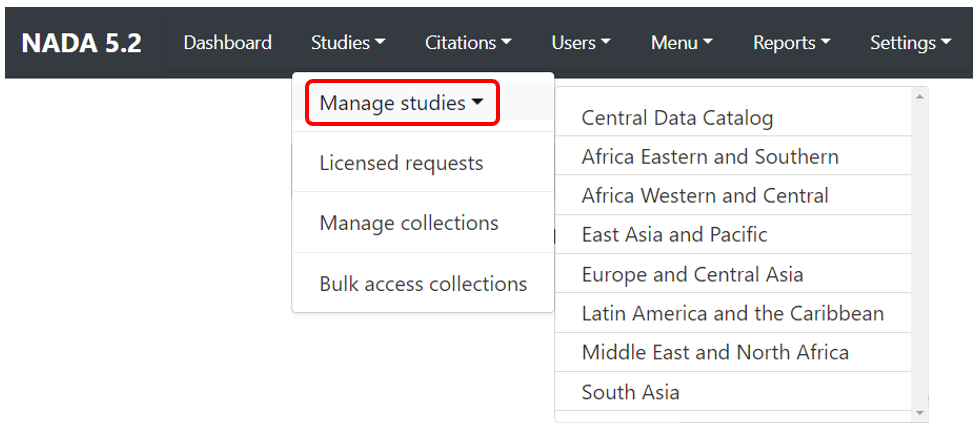
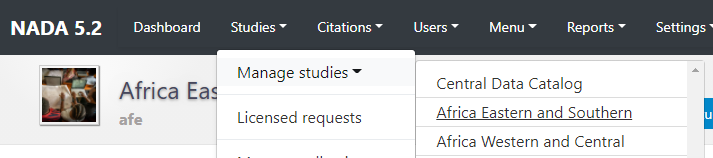
To use this approach, you will need to access the page in the administrator interface where you can add, edit, and delete entries. Click on Studies > Manage studies and select the collection in which you want to add an entry (if you have not created collections, the only option will be the Central Data Catalog).
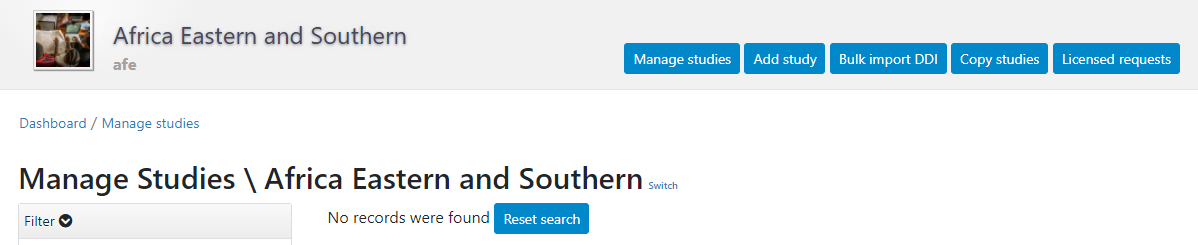
A list of entries previously entered in the catalog/collection will be displayed, with options to search and filter them.
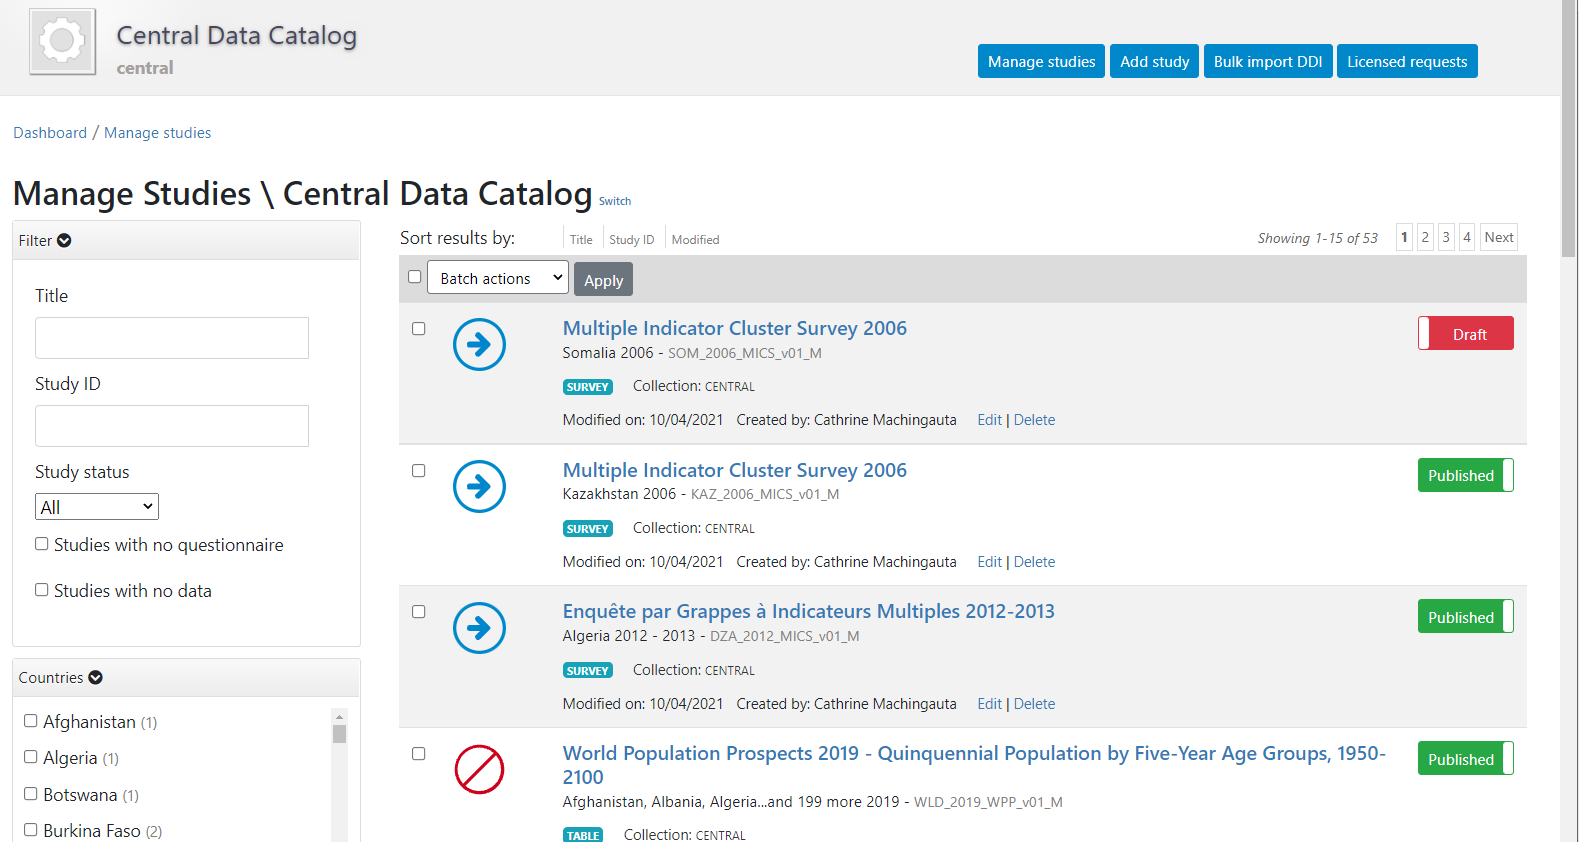
In this page, the Add study button will allow you to access the pages where entries can be added.

# Creating an entry from scratch
The metadata can be created directly in NADA, using the embedded metadata editor. This approach will also require access to the "Add entry" page of the NADA administrator interface (see above). The option is available for all data types but is recommended only for data that require limited metadata (such as images, or documents). For other types of data, manually generating comprehensive metadata can be a very tedious process (e.g., for microdata where metadata related to hundreds if not thousands of variables would have to be manually entered).
# Using the API
Metadata can also be generated programmatically, for example using R or Python, and uploaded to NADA using the API and the NADAR package of PyNADA library. This option allows automation of many tasks and offers the additional advantage of transparency and replicability. For administrators with knowledge of R and/or Python, this is a recommended approach except for microdata (for which the best approach is to use a specialized metadata editor). The metadata generated programmatically must comply with one of the metadata standards and schemas used by NADA, documented in the NADA API and in the Guide on the Use of Metadata Schemas.
If you use this approach, you will need an API key with administrator privileges. API keys must be kept strictly confidential. Avoid entering them in clear in your scripts, as you may accidentally reveal your API key when sharing your scripts (if that happens, immediately cancel your key, and issue a new one).
Once you have obtained a key (issued by a NADA administrator), you will have to enter it (and the URL of the catalog you are administering) before you implement any of the catalog administration functions available in NADAR or PyNADA. This will be the first commands in your R or Python scripts. It is done as follows:
Using R:
library(nadar)

my_key <- read.csv("*...*/my_keys.csv", header=F, stringsAsFactors=F)
set_api_key(my_key\[5,1\]) # Assuming the key is in cell A5
set_api_url("http://*your_catalog_url*/index.php/api/")
set_api_verbose(FALSE)
Using Python:
import pynada as nada
my_key = pd.read_csv(".../my_keys.csv", header=None)
nada.set_api_key(my_keys.iat\[4, 0\])
nada.set_api_url(\'https:// *your_catalog_url* /index.php/api/\')
# Adding an entry: microdata
Creating a Microdata entry can be done in two different ways using the administrator interface and the API:
By uploading pre-existing metadata, generated by a specialized metadata editor
By generating and uploading new metadata
For microdata, the use of a specialized DDI metadata editor to generate metadata is highly recommended (like the Nesstar Publisher or the World Bank's Metadata Editor). Indeed, the DDI should contain a description of the variables included in the data files, preferably with summary statistics. Generating variable-level metadata can be a very tedious process as some datasets may include hundreds, even thousands of variables. Metadata editors have the capacity to extract the list of variables and some metadata (variable names, labels, value labels, and summary statistics) directly from the data files. The alternatives to generating the metadata using a specialized editor are to enter the metadata in NADA, or to enter them in R or Python scripts.
# Loading metadata files
If you have used a specialized metadata editor like the Nesstar Publisher software application, you have obtained as an output an XML file that contains the study metadata (compliant with the DDI Codebook metadata standard), and a RDF file containing a description of the elated resources (questionnaires, reports, technical documents, data files, etc.) These two files can be uploaded in NADA.
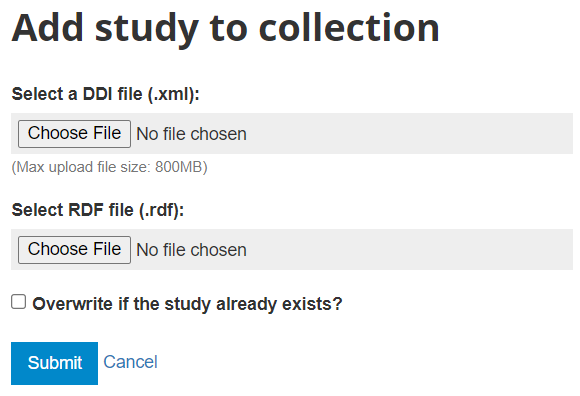
In the administrator interface, select Studies > Manage studies and the collection in which you want to add the dataset (if you have not created any collection, the only option will be to upload the dataset in the Central catalog; this can be transferred to another collection later if necessary). Then click on Add study.

In the Select a DDI file and Select RDF file, select the relevant files. Select the "Overwrite if the study already exists" option if you want to replace metadata that may have been previously entered for that same study. A study will be considered the same if the unique identification number provided in the DDI metadata field "study_desc > title statement > idno" is the same (in the user and administrator interface, IDNO will be labeled "Reference No"). Then click Submit.
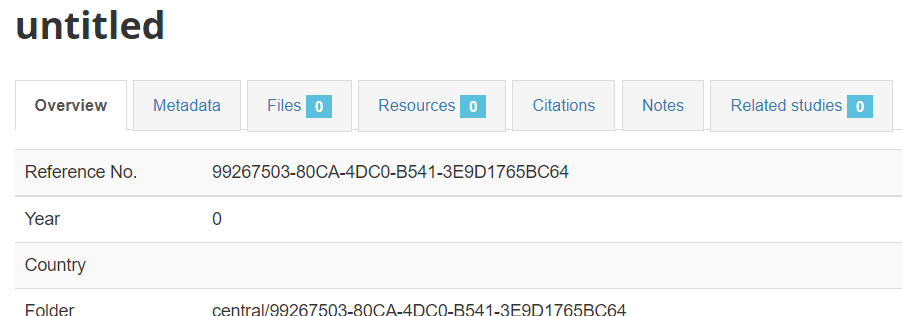
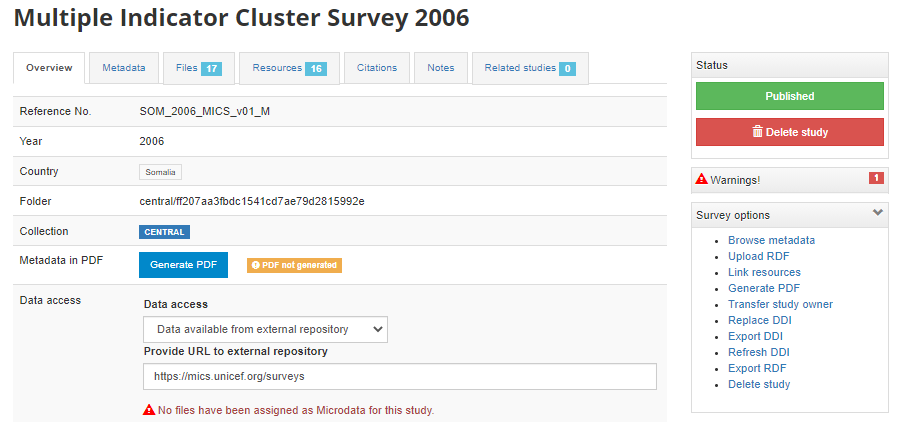
The metadata will be uploaded, and an Overview tab will be displayed, providing you with the possibility to take various actions.
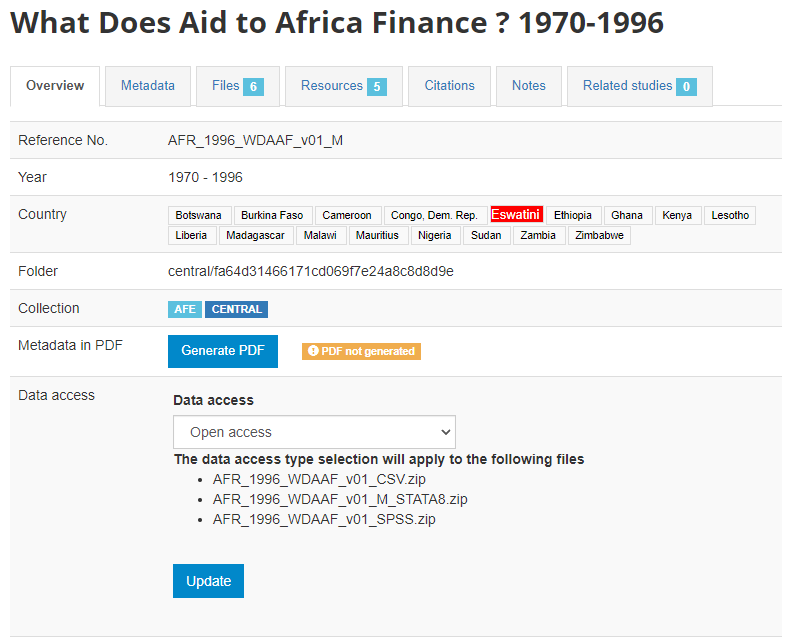
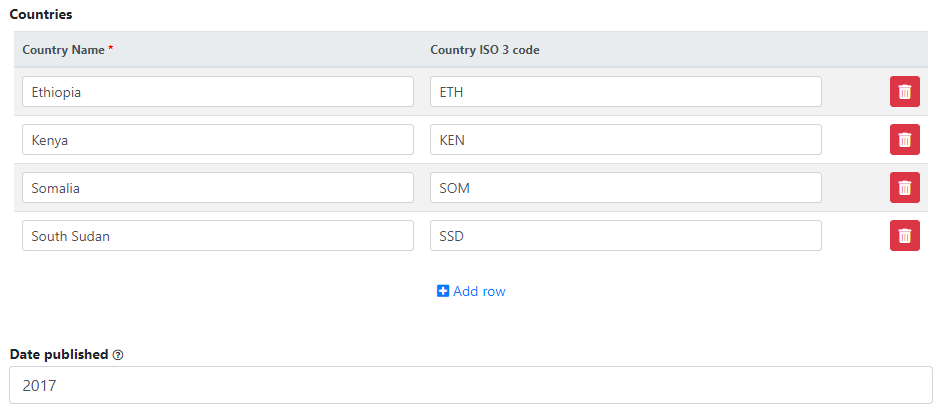
In Country, the names that are not compliant with the reference list of countries will be highlighted in red. By clicking on any of these country names, you will open the page where the mapping of these non-compliant names to a compliant name can be done. This is optional, but highly recommended to ensure that the filter by country (facet) shown in the user interface will operate in the best possible manner. See section "Catalog administration > Countries".
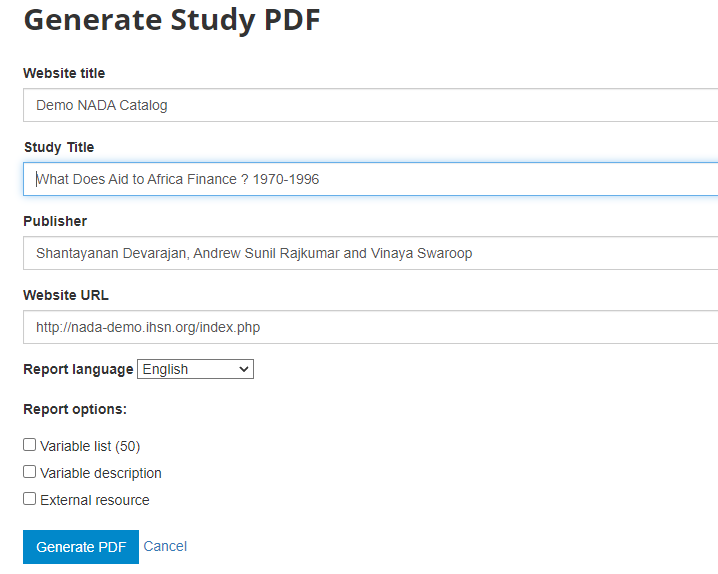
Metadata in PDF: Allows you to generate a PDF version of the metadata (applies to microdata only).

Data access: This is where you will indicate the access policy for microdata. The restrictions associated with some of these access policies will apply to all files declared as "Data files" in NADA (see description of tabs "Files" and "Resources" below. NADA must be informed of what files are "Data files"; it is very important when you document and upload external resources to make sure that data files are properly identified. If a data file is uploaded as a "document" for example, it will be accessible to users no matter the access policy you apply to the dataset.
The options for Data access are:
Open data: visitors to your catalog will be able to download and use the data almost without any restriction
Direct access: visitors will be able to download the data without restriction, but the use of the data is subject to some (minor) conditions
***Public Use Files (PUF)***: all registered visitors will be able to download the files after login; they will be asked but not forced to provide a description of the intended use.
Licensed data: registered visitors will be able to submit a request for access to the data by filling out an on-line form, which will be reviewed by the catalog administrator who can approve, deny, or request more information (see section "Managing data requests").
Data accessible in external repository: this is the option you will select when you want to publish metadata in your catalog but provide a link to an external repository where users will be able to download or request access to the data.
Data enclave: in this option, information is provided to users on how to access the data in a data enclave.
Data not accessible: in some cases, you will want to publish metadata and some related resources (report, questionnaire, technical documents, and others) but not the data.
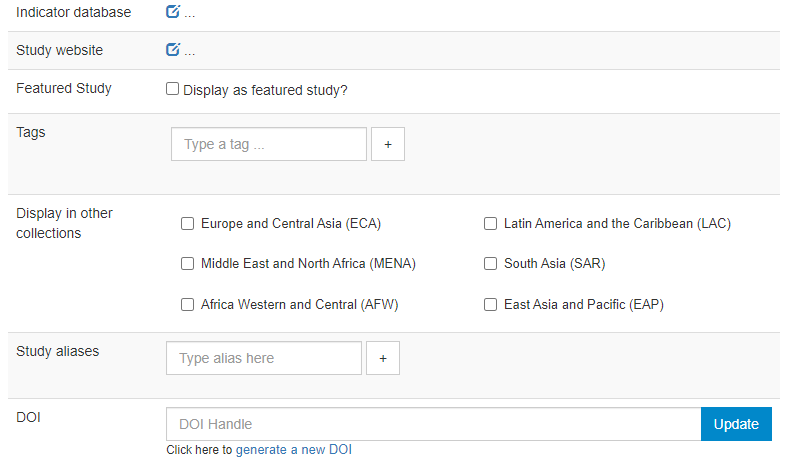
Indicator database: this applies to microdata only. The field allows administrators to provide the URL of a website were indicators generated out of the microdata are published.
Study website: a link to an external website dedicated to the survey.
Featured study: This allows administrators to mark entries as "featured". [how it will show in NADA]
Tags: need tag groups
Display in other collections:
Study aliases:
DOI: can we generate one?
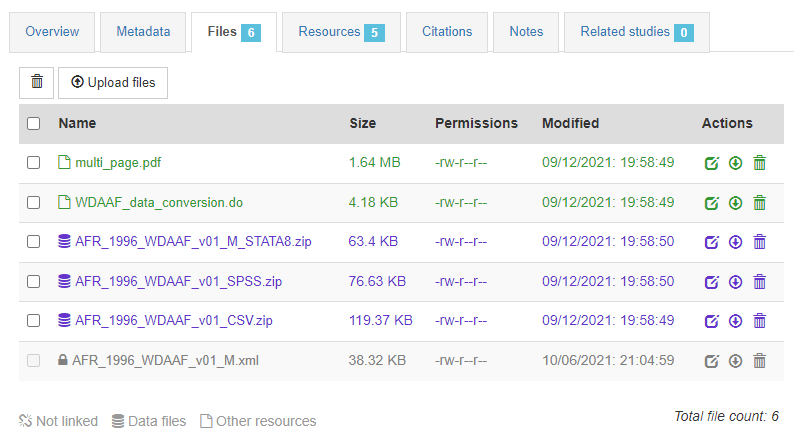
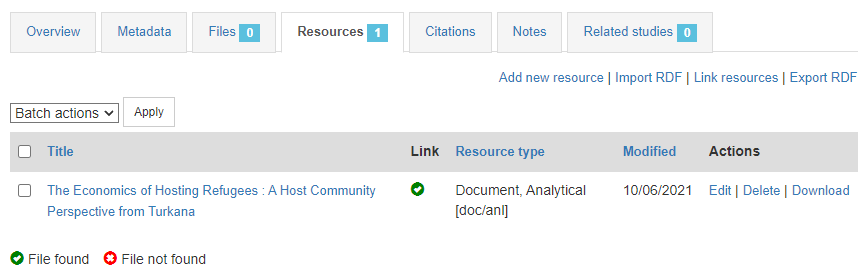
In the Resources tab, you will see a list of external resources, which should correspond to the files you uploaded. A green icon should appear next to the "Link", indicating that a file has indeed been identified that corresponds to the resource. If you see a red icon, click on "Link resources" to try and fix the issue. If the problem persists, the filename identified in the RDF metadata probably does not match the name of the uploaded file.


Thumbnail?
That's it.
# Creating from scratch

Then files ...
# Using the API
# When a DDI and RDF files are available
This will be the case when the microdata have been documented using a tool like the Nesstar Publisher. An example of such case was provided in section "Getting started -- Publishing microdata", which corresponds to the Use Case 009 available in R and in Python in the NADA GitHub repository.
# When the dataset is documented in a script
A micro-dataset can also be documented directly in a r or Python script. As the DDI schema is relatively complex, the use of a specialized DDI metadata editor like the Nesstar Publisher is often recommended. This tool provides the possibility to easily extract metadata from the data files (list of variables, labels, summary statistics). The same can be done using R or Python, but this requires relatively advanced experience in R or Python programming. Typically, microdata will be documented programmatically when (i) the dataset is small, and/or (ii) when there is no intent to generate detailed, variable-level metadata. We provide here an example of the documentation of a simple dataset.
Using R
Using Python
# Adding an entry: geographic
# Loading metadata files
Option not yet available in NADA.
# Creating from scratch
# Using the API
# Adding an entry: document

# Loading metadata files
Option not yet available in NADA.
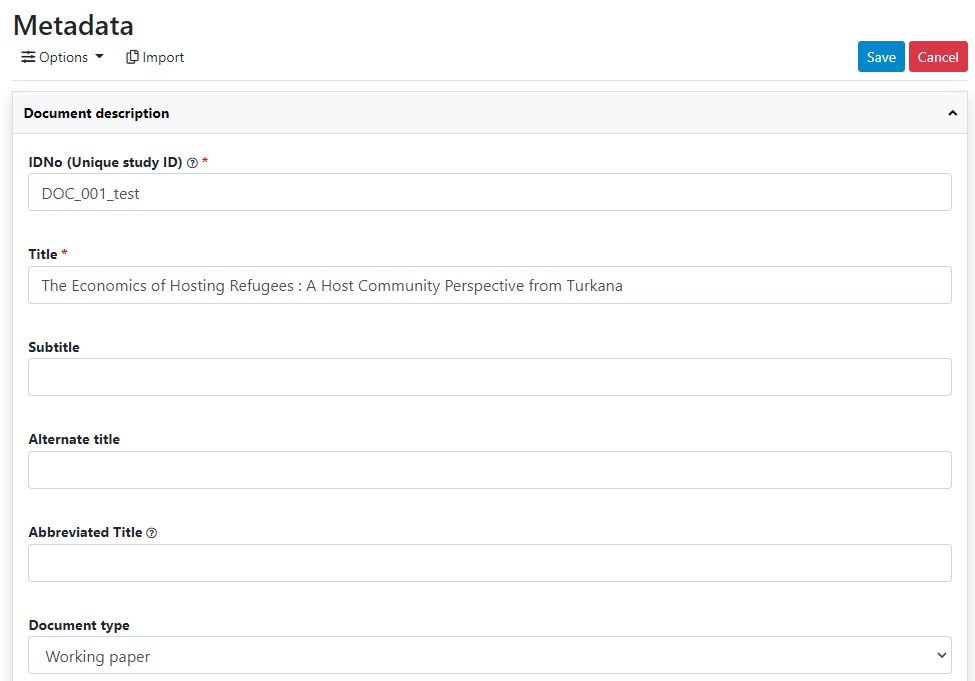
# Creating from scratch
Login as administrator, then in the login sub-menu, select Site administration.

In the Studies menu, select Manage studies / Central Data Catalog.

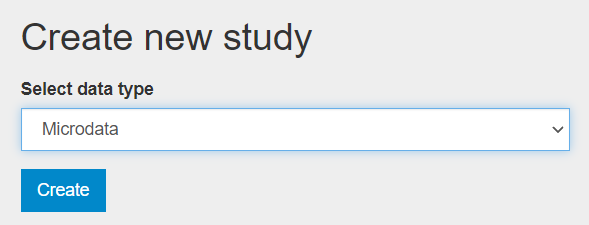
Click on Add study

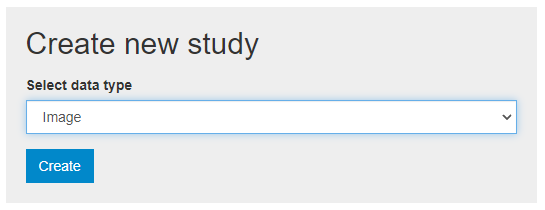
In Create new study, select Document.

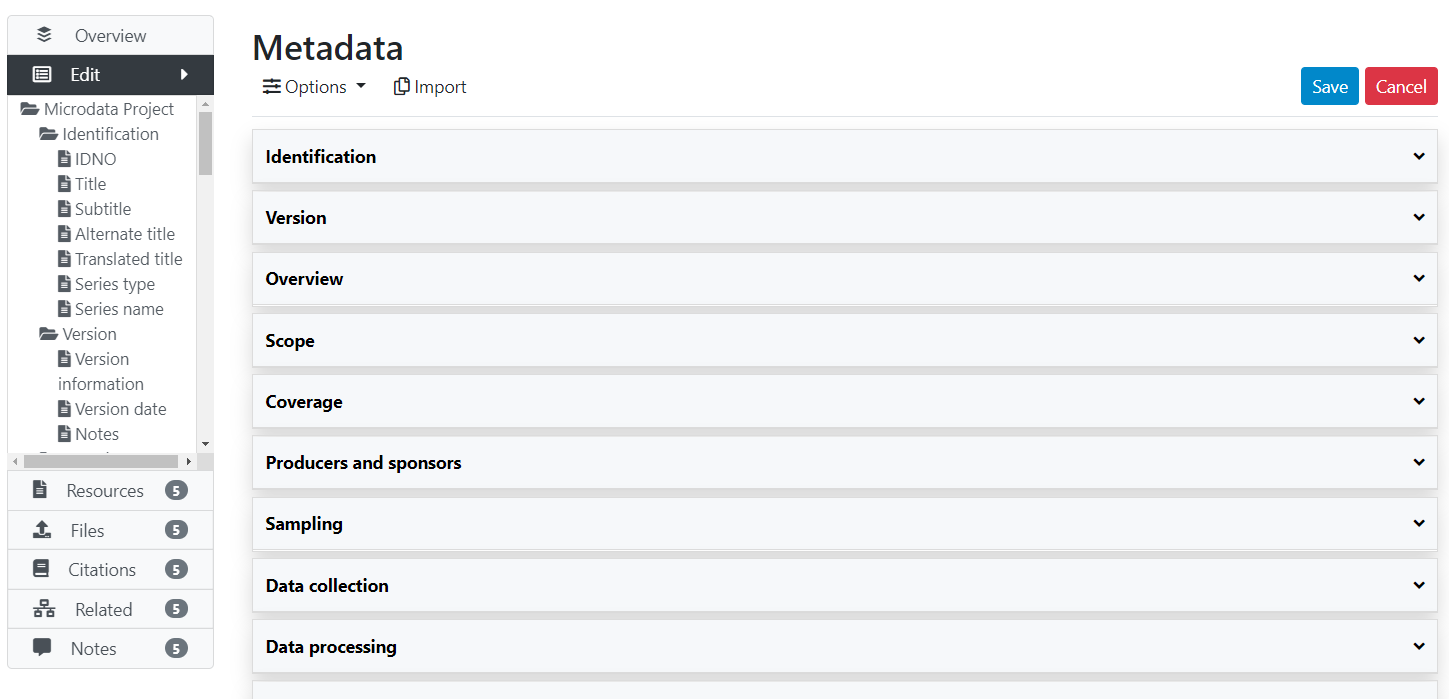
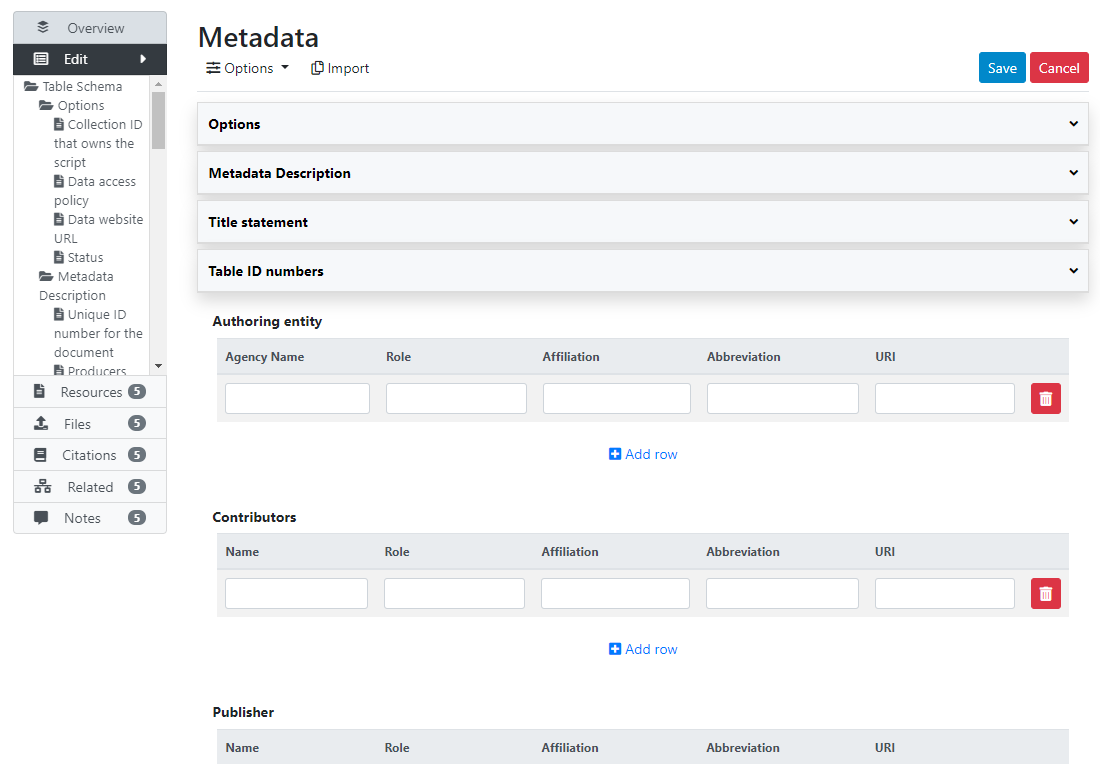
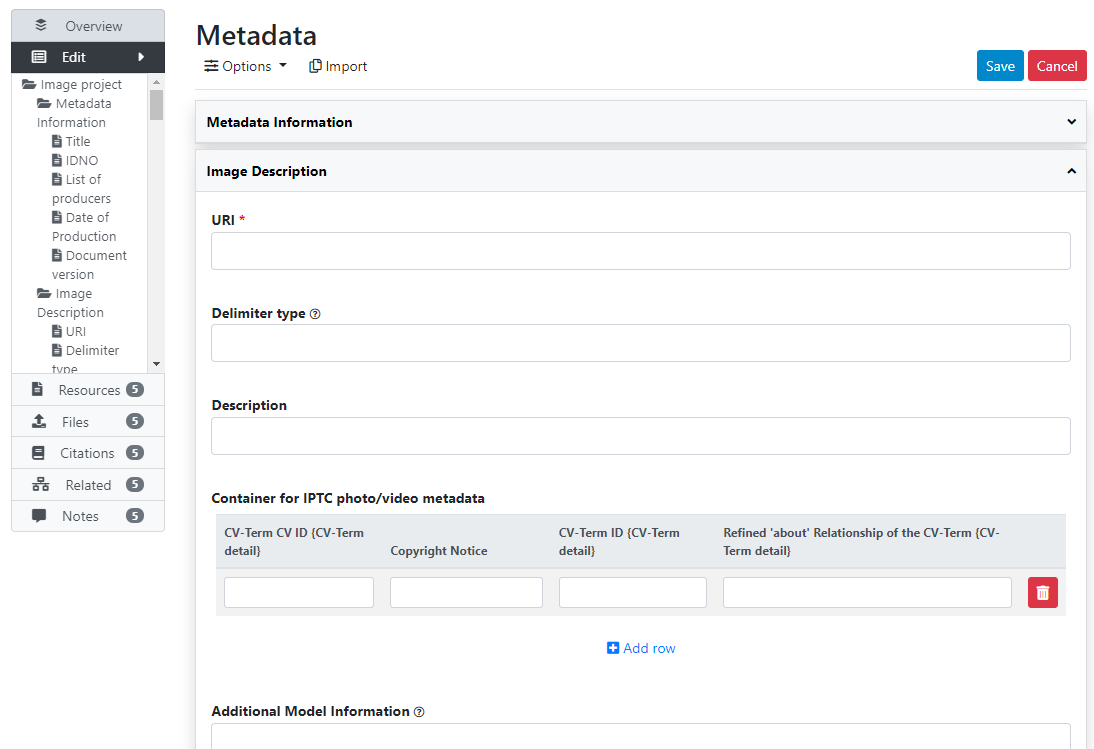
Click on Metadata.

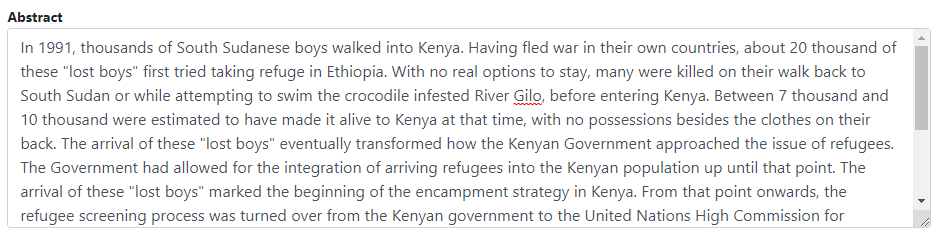
Enter some information in the form, then click on the Save button.
Go back to the entry page (press the "back" button of your browser).
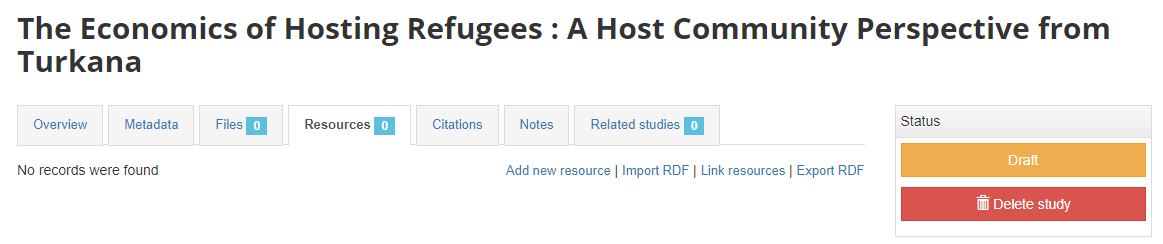
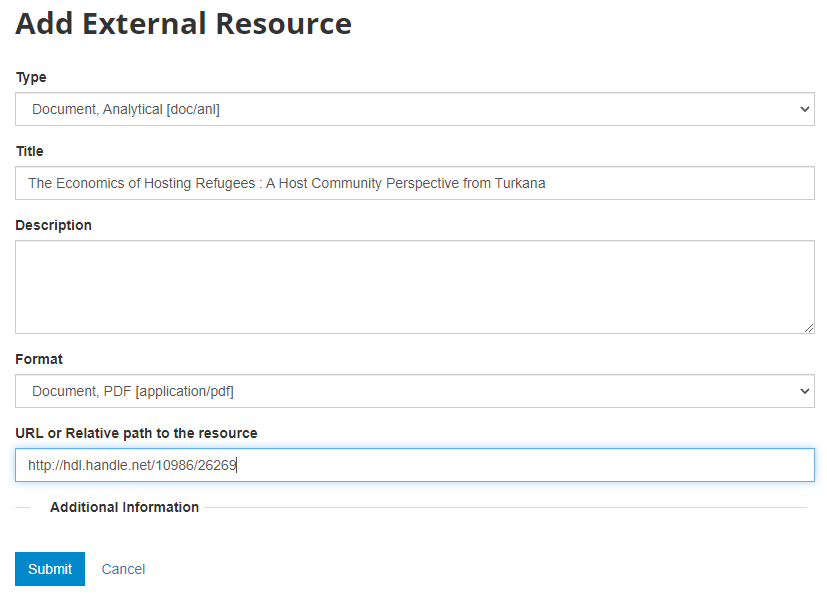
What has been done so far is generating and publishing the document description on the catalog. We have not provided any link to the document. One option would be to upload the PDF to your web server and make the document available from your website. In this case however, we want to provide a link to an external server. Click Add new resource and provide information on the type of resource you are providing a link to (in this case an analytical document), the resource title (in this case it will be the title of the document, but in some cases, you may want to attach multiple files to a document, e.g., an annex containing the tables in Excel format, etc.) Provide a URL to the site you want to link to (the alternative would be to provide the path and filename of the PDF file, for upload to your server). Click Submit.
Now the document metadata and the link to the resource are both provided. But the entry is still in draft mode (i.e. only visible to administrators).
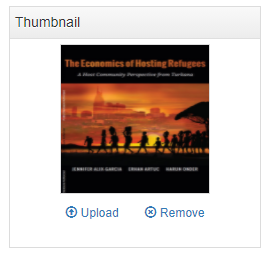
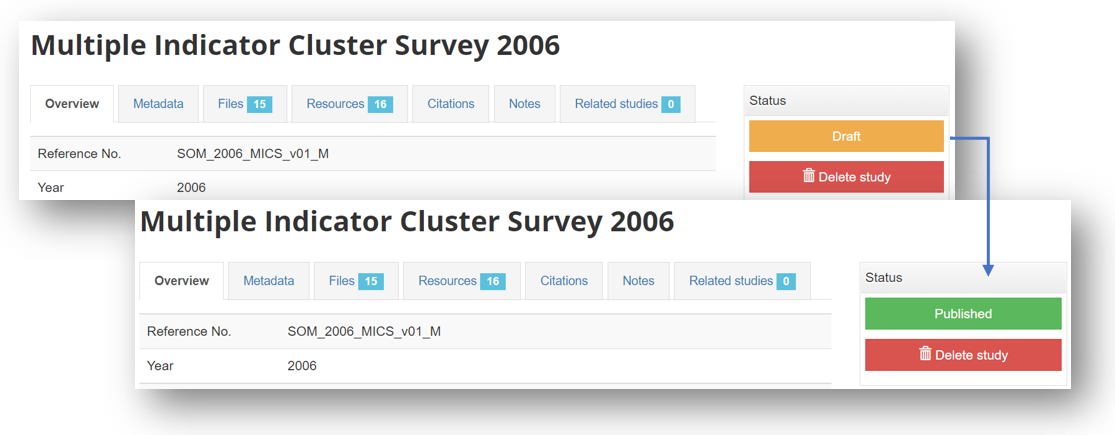
The last step will be to upload a thumbnail (optional), and to make this entry visible in your catalog by changing its Status from "Draft" to "Published". For a document, a screenshot of the cover page is the recommended thumbnail.


The entry is now visible to visitors of your catalog and in the Dashboard of the Site administration interface (where you can unpublish or delete it).
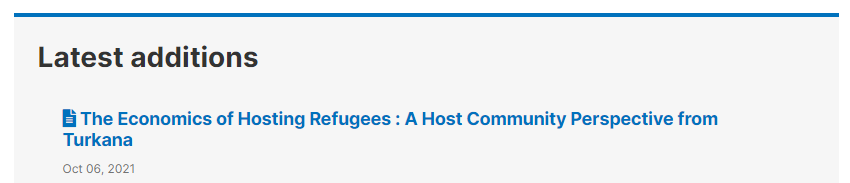
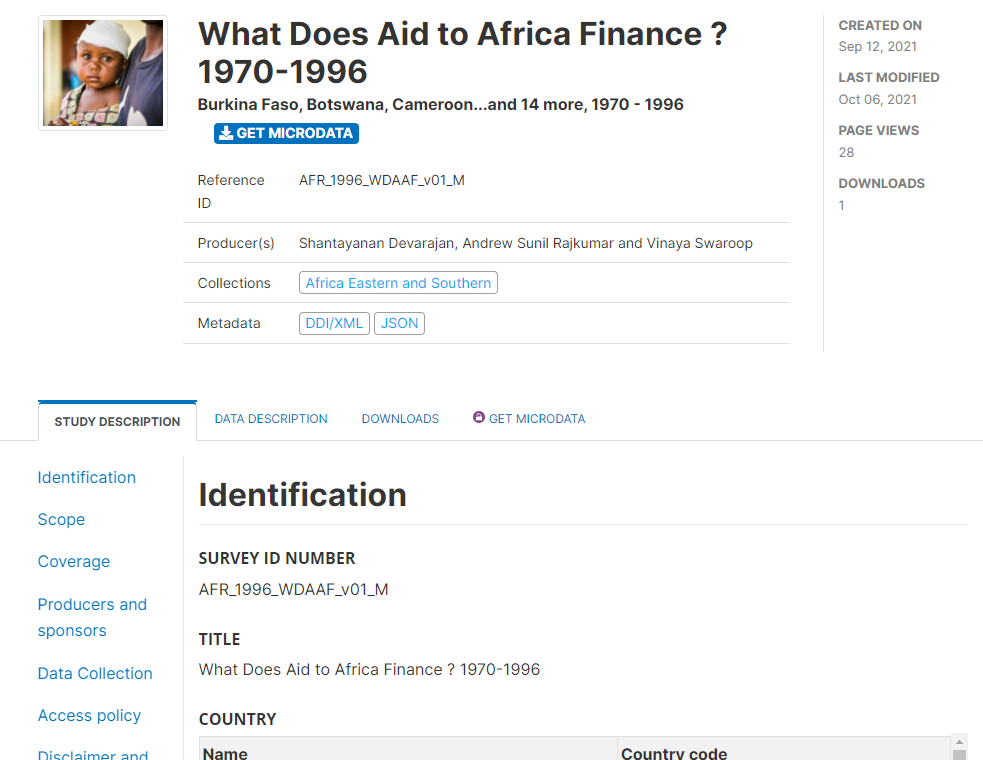
The study listing page in the user interface, with no thumbnail:
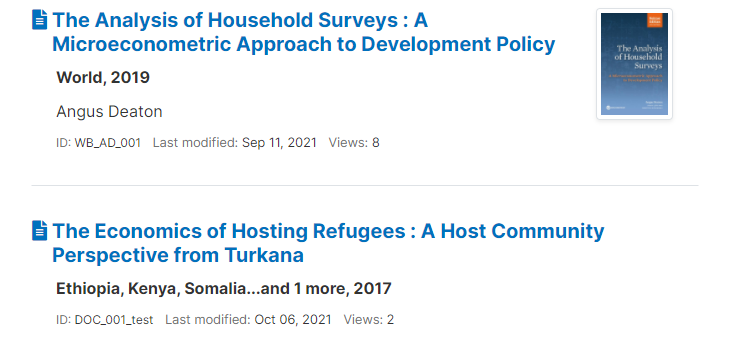
The study listing page in the user interface, with thumbnail:

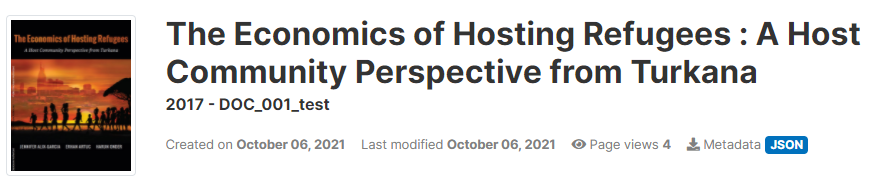
The header of the entry page, with no thumbnail:

The header of the entry page, with a thumbnail:
# Using the API
An example was provided in section "Getting Started - Publishing a document". That example is available in the NADA GitHub repository as Use Case 001.
We provide here another example, where a list of documents with core metadata is available as a CSV file. A script (written in R or in Python) reads the file, maps the columns of the file to the schema elements, and publishes the documents in NADA. This example corresponds to Use Case 007 in the NADA GitHub repository.
# Using R
# ==============================================================================
# NADA Demo Catalog - Use of API examples                      Use case ID: 002
#
# Use case description: generate metadata and publish in NADA a collection of
# documents for which metadata are available in a CSV file.
# The CSV file contains the following columns:
#   - document_url
#   - pdf_url	(URL to the PDF version of the document)
#   - txt_url	(URL to the TXT version of the document, if available)
#   - author (list of authors, as one string)
#   - identifier (unique identifier of the document; could be a DOI or other)
#   - abstract
#   - series
#   - language (we assume here that only English or French are valid values)
#   - publisher
#   - title
#   - type
#   - date_published (in ISO format; could be YYY, or YYYY-MM, or YYYY-MM-DD)
#   - countries (country names, separated by a ";")
#
# The published metadata will be structured using a schema described in:
#    https://ihsn.github.io/nada-api-redoc/catalog-admin/#tag/Documents
#
# Script tested with NADA version: 5.0
# Date: 2021-09-10
# See output in http://nada-demo.ihsn.org/index.php/catalog
#
#   ** This script requires a valid API key with administrator privileges.**
#
# ==============================================================================

library(nadar)
library(readxl)
library(rlist)
library(stringr)

# Set API key (stored in a CSV file; not to be entered in clear) and catalog URL

my_keys <- read.csv("C:/CONFIDENTIAL/my_keys.csv", header=F, stringsAsFactors=F)
set_api_key(my_keys[5,1])  # Assuming the key is in cell A5
set_api_url("http://nada-demo.ihsn.org/index.php/api/")
set_api_verbose(FALSE)

# Set the default folder, and load the CSV file

setwd("E:/demo_nada_files/UC002")
doc_list <- read.csv("NADA_demo_list_docs.csv", stringsAsFactors=FALSE)

# Generate the schema-compliant metadata, and publish in NADA catalog
# We need to map the columns in the CSV file to elements of the schema.

for(i in 1:nrow(doc_list)) {

  # Download the PDF file if not already done

  pdf_url  <- doc_list$pdf_url[i]
  pdf_filename <- paste0(doc_list$identifier[i], ".pdf")
  if(!file.exists(pdf_filename)) {
    download.file(pdf_url, pdf_filename, mode="wb")
  }

  # Take a screenshot of the cover page to be used as thumbnail

  thumb_file <- gsub(".pdf", ".jpg", pdf_filename)
  capture_pdf_cover(pdf_filename)

  # Map the CSV columns to metadata elements from the schema

  id        <- doc_list$identifier[i]
  title     <- doc_list$title[i]
  date      <- as.character(doc_list$date_published[i])
  abstract  <- doc_list$abstract[i]
  publisher <- doc_list$publisher[i]
  series    <- doc_list$series[i]
  type      <- doc_list$type[i]

  author_list = list()
  authors <- unlist(strsplit(doc_list$author[i], ";"))
  for(a in authors) {
    author = unlist(strsplit(a, ","))  # Format in CSV is "lastname, firstname"
    ln = str_trim(author[1])
    fn = str_trim(author[2])
    this_author = list(last_name = ln, first_name = fn)
    author_list = list.append(author_list, this_author)
  }

  if(doc_list$language[i] == "English") {
    lang_name = "English"
    lang_code = "EN"
  } else if (doc_list$language[i] == "French") {
    lang_name = "French"
    lang_code = "FR"
  }
  language  <- list(list(name=lang_name, code=lang_code))

  ctry_list = list()
  countries <- unlist(strsplit(doc_list$countries[i], ";"))
  for(c in countries) {
    ctry = list(name = str_trim(c)) # Removes start/end whitespaces
    ctry_list = list.append(ctry_list, ctry)
  }

  # Document the file, and publish in the NADA catalog

  this_doc_metadata <- list(

    metadata_information = list(    # This block is optional but recommended
      producers = list(
        list(name = "NADA team")
      ),
      production_date = "2021-09-11",
      version = "v01"
    ),

    document_description = list(
      title_statement = list(idno = id, title = title),
      date_published = date,
      type = type,
      authors = author_list,
      series = series,
      publisher = publisher,
      abstract = abstract,
      ref_country = ctry_list,
      languages = language
    )

  )

  # Publish the document in the NADA central catalog

  add_document(idno = this_doc_metadata$document_description$title_statement$idno,
               metadata = this_doc_metadata,
               repositoryid = "central",
               published = 1,
               thumbnail = thumb_file,
               overwrite = "yes")

  # Note: to publish the document in a collection (e.g. "Handbooks"), we would
  # enter repositoryid = "Handbooks" instead of "repositoryid = "central".
  # The collection must have been previously created in the catalog.

  # ==============================================================================
  # Uploading the document metadata will not upload the document itself. To make
  # the document available in/from the catalog, we need to upload the file to the
  # server or provide a link to an external URL, as an "external resource".
  # More than one resource can be attached to a catalog entry, as long as their
  # title differ; here, some documents are available in PDF and TXT formats.
  # ==============================================================================

  # The "type" column in the CSV file does not comply with dctype in the
  # external resources schema; we map the types accordingly
  # Note: to get a list of types found in the CSV file: table(doc_list$type)

  if(doc_list$type[i] == "book")   dctype = "doc/ref"   # Reference document
  if(doc_list$type[i] == "manual") dctype = "doc/ref"

  # Provide a link to the PDF file and to the TXT file if it exists
  # If we have links to a PDF and a TXT file, we mention the format in the title.
  title_pdf = title
  if(doc_list$txt_url[i] != "") {
    title_pdf = paste0(title, " - PDF version")
    title_txt = paste0(title, " - TXT version")
  }

  # Create link to PDF file
  external_resources_add(
    title = title_pdf,
    idno = this_doc_metadata$document_description$title_statement$idno,
    dctype = dctype,
    file_path = doc_list$pdf_url[i],
    overwrite = "yes"
  )

  # Create link to TXT file, if it exists
  if(doc_list$txt_url[i] != "") {
    external_resources_add(
      title = title_txt,
      idno = this_doc_metadata$document_description$title_statement$idno,
      dctype = dctype,
      file_path = doc_list$txt_url[i],
      overwrite = "yes"
    )
  }

}

# Alternative: If we wanted to upload the PDF file instead of providing a link :

  # external_resources_add(
  #   title = title,
  #   idno = this_doc_metadata$document_description$title_statement$idno,
  #   dctype = dctype,
  #   file_path = pdf_filename,
  #   overwrite = "yes"
  # )
Using Python
# ==============================================================================
# NADA Demo Catalog - Use of API examples                      Use case ID: 002
#
# Use case description: generate metadata and publish in NADA a collection of
# documents for which metadata are available in a CSV file.
# The CSV file contains the following columns:
#   - document_url
#   - pdf_url	(URL to the PDF version of the document)
#   - txt_url	(URL to the TXT version of the document, if available)
#   - author (list of authors, as one string)
#   - identifier (unique identifier of the document; could be a DOI or other)
#   - abstract
#   - series
#   - language (we assume here that only English or French are valid values)
#   - publisher
#   - title
#   - type
#   - date_published (in ISO format; could be YYY, or YYYY-MM, or YYYY-MM-DD)
#   - countries (country names, separated by a ";")
#
# The published metadata will be structured using a schema described in:
#    https://ihsn.github.io/nada-api-redoc/catalog-admin/#tag/Documents
#
# Script tested with NADA version: 5.0
# Date: 2021-09-29
# See output in http://nada-demo.ihsn.org/index.php/catalog
#
#   ** This script requires a valid API key with administrator privileges.**
#
# ==============================================================================

import os
import pandas as pd
import pynada as nada

# Set API key (stored in a CSV file; not to be entered in clear) and catalog URL

my_keys = pd.read_csv("confidential/my_keys.csv", header=None)
nada.set_api_key(my_keys.iat[1, 0])
nada.set_api_url('https://nada-demo.ihsn.org/index.php/api/')

# Set the default folder, and load the CSV file

os.chdir("E:/demo_nada_files/UC002")
doc_list = pd.read_csv("NADA_demo_list_docs.csv", encoding='cp1252')

# Generate the schema-compliant metadata, and publish in NADA catalog
# We need to map the columns in the CSV file to elements of the schema.

for i in range(len(doc_list)):

    # Download the file if not already done

    pdf_url = doc_list['pdf_url'][i]
    pdf_filename = doc_list['identifier'][i] + ".pdf"
    if not os.path.exists(pdf_filename):
        nada.download_file(url=pdf_url, output_fname=pdf_filename, mode='wb')

    # Take a screenshot of the cover page to be used as thumbnail

    thumb_file = nada.pdf_to_thumbnail(pdf_filename, page_no=1)

    # Map the CSV columns to metadata elements from the schema

    idno = doc_list['identifier'][i]
    title = doc_list['title'][i]
    date = str(doc_list['date_published'][i])
    abstract = doc_list['abstract'][i]
    publisher = doc_list['publisher'][i]
    series = doc_list['series'][i] if pd.notna(doc_list['series'][i]) else ""
    dtype = doc_list['type'][i]
    author_list = []
    authors = doc_list['author'][i].split(';')
    # Format in CSV is "lastname, firstname"
    # NADA API - "authors":[{"first_name":"","initial":"", "last_name":""}]
    for a in authors:
        this_author = {'first_name': (a.split(',')[1]).strip(),
                       'last_name': (a.split(',')[0]).strip()
                       }
        author_list.append(this_author)

    language = []
    lang_list = doc_list['language'][i].split()
    for lang in lang_list:
        ln = {}
        if lang == "English":
            ln = {"name": 'English', "code": 'EN'}
        elif lang == "French":
            ln = {"name": 'French', "code": 'FR'}
        language.append(ln)

    ctry_list = []
    countries = doc_list['countries'][i].split(';')
    for c in countries:
        ctry = {'name': c.strip()}
        ctry_list.append(ctry)

    # Document the file, and publish in the NADA catalog

    this_doc_metadata = {
        'metadata_information': {
            # This block is optional but recommended
            'producers': [{'name': "NADA team"}],
            'production_date': "2021-09-11",
            'version': "v01",
        },
        'document_description': {
            'title_statement':
                {"idno": idno,
                 "title": title
                 },
            'type': dtype,
            'abstract': abstract,
            'ref_country': ctry_list,
            'date_published': date,
            'languages': language,
            'series': series,
            'authors': author_list,
            'publisher': publisher,
        }
    }

    # Publish the document in the NADA central catalog
    idno = this_doc_metadata['document_description']['title_statement']['idno']

    nada.create_document_dataset(
        dataset_id = idno,
        repository_id = "central",
        published = 1,
        overwrite = "yes",
        **this_doc_metadata,
        thumbnail_path = thumb_file
    )

    # Note: to publish the document in a collection (e.g. "Handbooks"), we would
    # enter repositoryid = "Handbooks" instead of "repositoryid = "central".
    # The collection must have been previously created in the catalog.

    # ==============================================================================
    # Uploading the document metadata will not upload the document itself. To make
    # the document available in/from the catalog, we need to upload the file to the
    # server or provide a link to an external URL, as an "external resource".
    # More than one resource can be attached to a catalog entry, as long as their
    # title differ; here, some documents are available in PDF and TXT formats.
    # ==============================================================================

    # The "type" column in the CSV file does not comply with dctype in the
    # external resources schema; we map the types accordingly
    # Note: to get a list of types found in the doc_list dataframe, use:
    # doc_list['type'].value_counts()
    reference_documents = ["book", "manual"]
    if doc_list['type'][i] in reference_documents:
        dctype = "doc/ref"

    # Provide a link to the PDF file and to the TXT file if it exists
    # If we have links to a PDF and a TXT file, we mention the format in the title.

    if pd.notna(doc_list['pdf_url'][i]):
        title_pdf = title + " - PDF version"

    if pd.notna(doc_list['txt_url'][i]):
        title_txt = title + " - TXT version"

    # Create link to PDF file
    if pd.notna(doc_list['pdf_url'][i]):
        nada.add_resource(
            dataset_id=idno,
            dctype=dctype,
            title=title_pdf,
            file_path=doc_list['pdf_url'][i],
            overwrite="yes"
        )

    # Create link to TXT file, if it exists
    if pd.notna(doc_list['txt_url'][i]):
        nada.add_resource(
            dataset_id=idno,
            dctype=dctype,
            title=title_txt,
            file_path=doc_list['txt_url'][i],
            overwrite="yes"
        )

    # Alternative: If we wanted to upload the PDF file instead of providing a link :

    # nada.add_resource(
    #     dataset_id=idno,
    #     dctype=dctype,
    #     title=title,
    #     file_path=pdf_filename,
    #     overwrite="yes"
    # )
# Adding an entry: table
Currently no option to upload a metadata file (will be implemented in future versions of NADA). Can enter from scratch, or generate the metadata and upload using the API.
# Loading metadata files
Option not yet available in NADA.
# Creating from scratch

# Using the API
Use Case 006
Use Case 013
Use Case 016
Deleting:
# Adding an entry: time series
Currently no option to upload a metadata file (will be implemented in future versions of NADA). Can enter from scratch, or generate the metadata and upload using the API.
Two components: series, and source database.
# Loading metadata files
Option not yet available in NADA.
# Creating from scratch

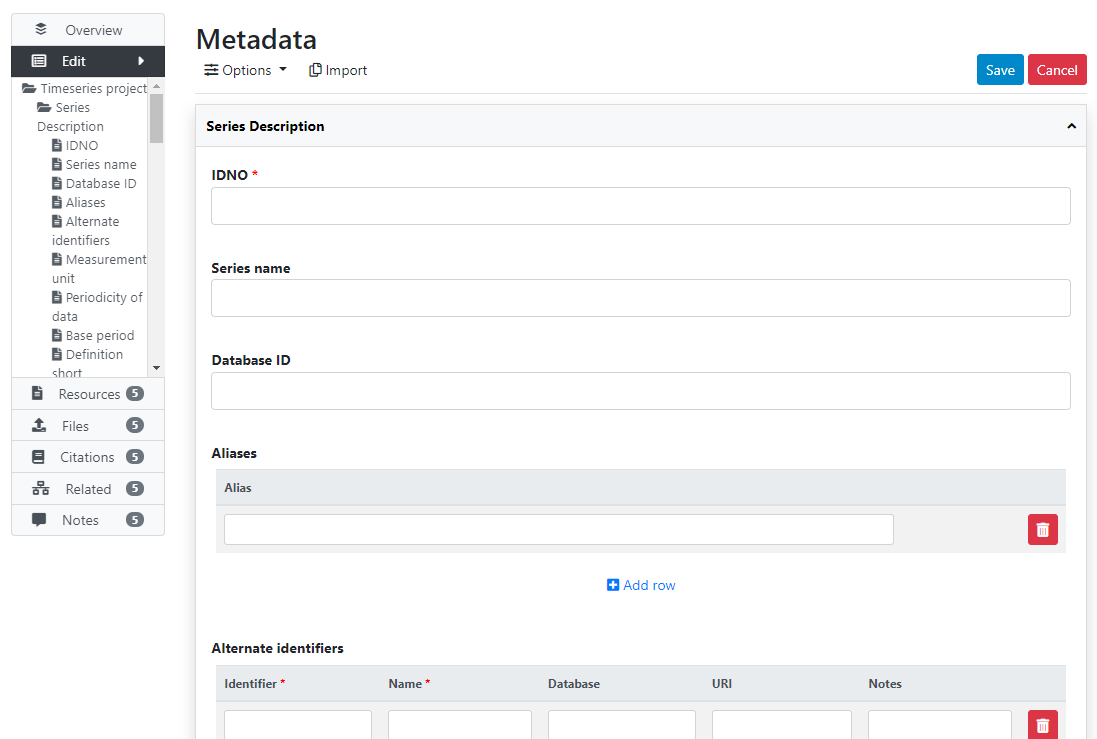
# Using the API
Use Case 007
# Adding an entry: image
Currently no option to upload a metadata file (will be implemented in future versions of NADA). Can enter from scratch, or generate the metadata and upload using the API.
# Loading metadata files
Option not yet available in NADA.
# Creating from scratch
# Using the API
The API advantage: face detection, labels, ...
Use Case 002
Use Case 003
Use Case 006
# Adding an entry: video
Currently no option to upload a metadata file (will be implemented in future versions of NADA). Can enter from scratch, or generate the metadata and upload using the API.
# Loading metadata files
Option not yet available in NADA.
# Creating from scratch
# Using the API
Use Case 005
# Adding an entry: scripts
Currently no option to upload a metadata file (will be implemented in future versions of NADA). Can enter from scratch, or generate the metadata and upload using the API.
# Loading metadata files
Option not yet available in NADA.
# Creating from scratch
# Using the API
# Deleting an entry
# Using the web interface
# Using the API
# Replacing an entry
# Using the web interface
# Using the API
# Editing an entry
Risk of discrepancy
# Using the web interface
# Using the API
Powerful automation options. Can programmatically change any specific piece of metadata, for one or multiple entries.
See the NADAR or PyNADA documentation.
# Publishing/unpublishing
# Using the web interface
In the Manage studies page:


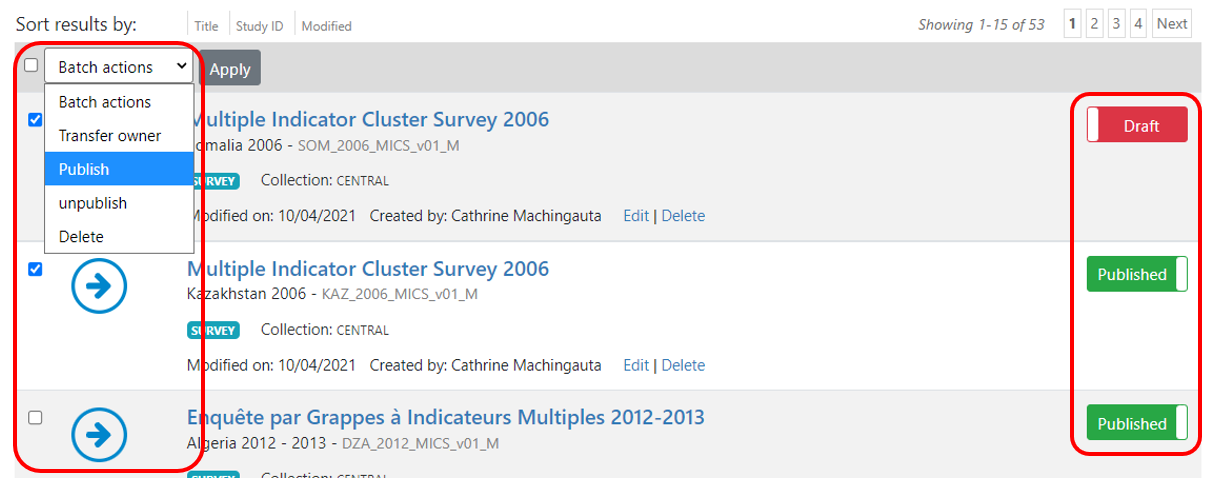
In the study page:
# Using the API
When an entry is added:
To change it:
# Enabling a document viewer
# Using the web interface
# Using the API
# Publishing data in MongoDB
Data can be published in MongoDB (assuming installed). Data will then be accessible via API. Applies to time series and tables, possibly microdata.
Condition: data in long format. Use R, Python or other tool to convert to appropriate format.
Preferably, numeric (factor) variables for efficiency.
Saved in CSV.
Uploaded with data dictionary. Then available.
Can only be done via API (not UI).
Access policy for data published in API: ...
# Organizing/formatting data
# Data dictionary
# Lookup file
# Uploading
# Informing users
# Adding visualizations using widgets
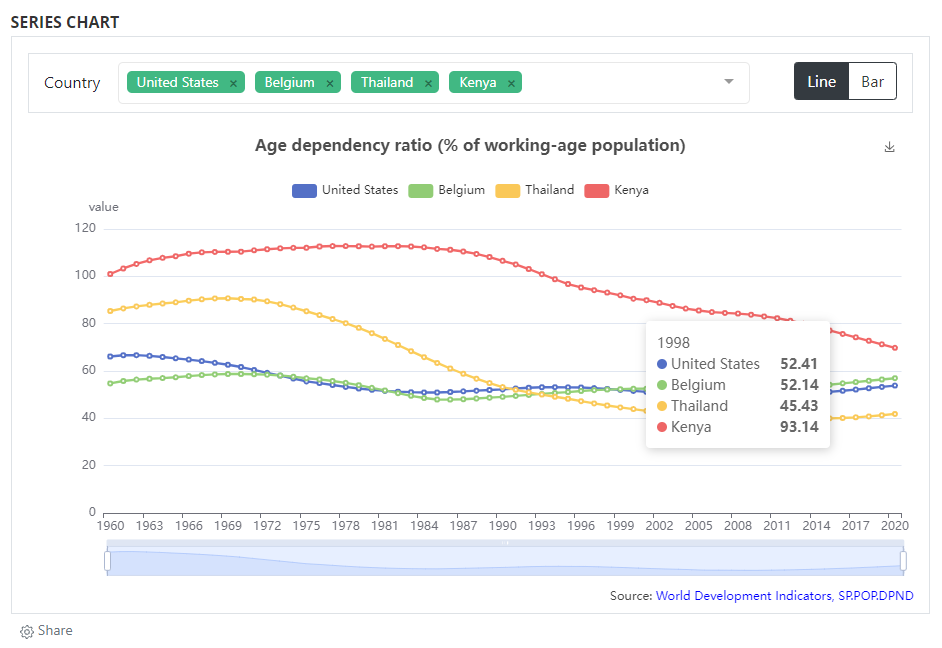
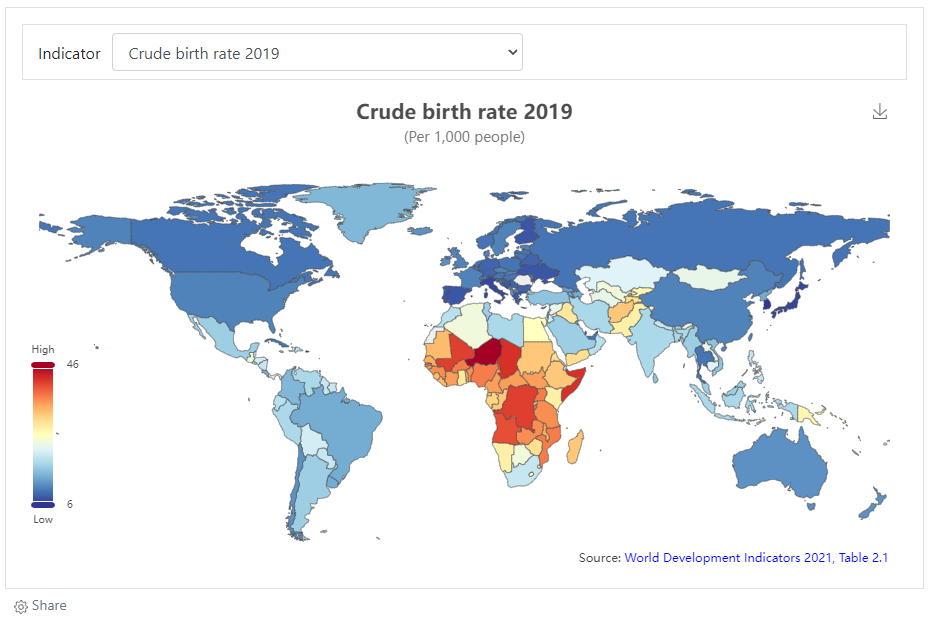
Dynamic visualizations such as charts and maps can be added to a catalog entry page using widgets. The use of widgets is only possible via the API (this cannot be done through the administrator interface). The visualizations are generated outside NADA, for example using a JavaScript library. NADA itself does not provide a tool for creating visualizations; it only provides a convenient solution to embed visualizations in catalog pages. The NADA demo catalog includes such visualizations. See for example:
https://nada-demo.ihsn.org/index.php/catalog/49 (opens new window) (line/bar chart, choropleth map, data preview)
https://nada-demo.ihsn.org/index.php/catalog/87 (opens new window) (choropleth map)
https://nada-demo.ihsn.org/index.php/catalog/97 (opens new window) (age pyramid)
Visualizations can however be applied to any data type, as long as the underlying data are available via an API (the NADA data API, or an external API).
The widgets (zip files) used in the NADA demo catalog are available in the NADA GitHub repository (Use Cases).
# Requirements
A visualization widget can be added to a catalog page in two steps. First, upload a zipped widget source file to a catalog. Second, attach the widget to entry page(s). A zipped widget file contains one [index.html]{.underline} file, and supporting files such as a CSS and a thumbnail image.
In R:
library(nadar)
widgets_create
uuid = widget_uuid,

options = list(
    title = "title of widget",
    thumbnail = "thumbnail.jpg",
    description = "description of widget"
),

zip_file = zip_file

)

widgets_attach(
    idno = dataset_id,
    uuid = widget_uuid
)
In Python:
import pynada as nada

nada.upload_widget(
    widget_id = widget_uuid,
    title = " title of widget ",
    file_path = zip_file,
    thumbnail = "thumbnail.JPG",
    description = " description of widget "
)

nada.attach_widget(
dataset_id = dataset_id,
widget_id = widget_uuid,
)
With the widget APIs, you can manage widgets and attachments separately. Oftentimes, many entry pages have a common data API and a same type of visualization, in which case a single widget can be used to display different datasets by reading the dataset ID that the widget is attached to as follows:
datasetID = parent.document.getElementsByClassName('study-idno')[0]
Thus, it is advisable to codify key contents of entry pages, such as country names and indicator series, and include the codes in dataset IDs so that a widget can load different data with the codified parameters from data API.
Since a widget is a self-sufficient web application, it is possible to import any JavaScript libraries to visualize data. It is also desirable to utilize a front-end framework (ex. Vue JS) and a CSS framework (ex. Bootstrap JS) to implement a JavaScript widget in a more structured way. The following examples are implemented using open-source Java libraries including jQuery, Vue, Bootstrap, eCharts (chart), Leaflet (map), and Tabulator (grid). Other libraries/frameworks could be used.
# Example 1: eCharts bar/line chart

# Example 2: eCharts map

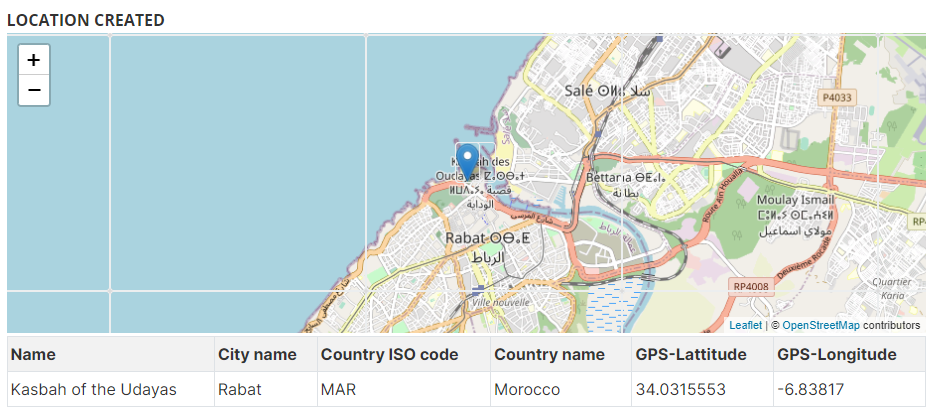
# Example 3: location of image in a OSM map

# Other examples:
Demo catalog ; links to GitHub
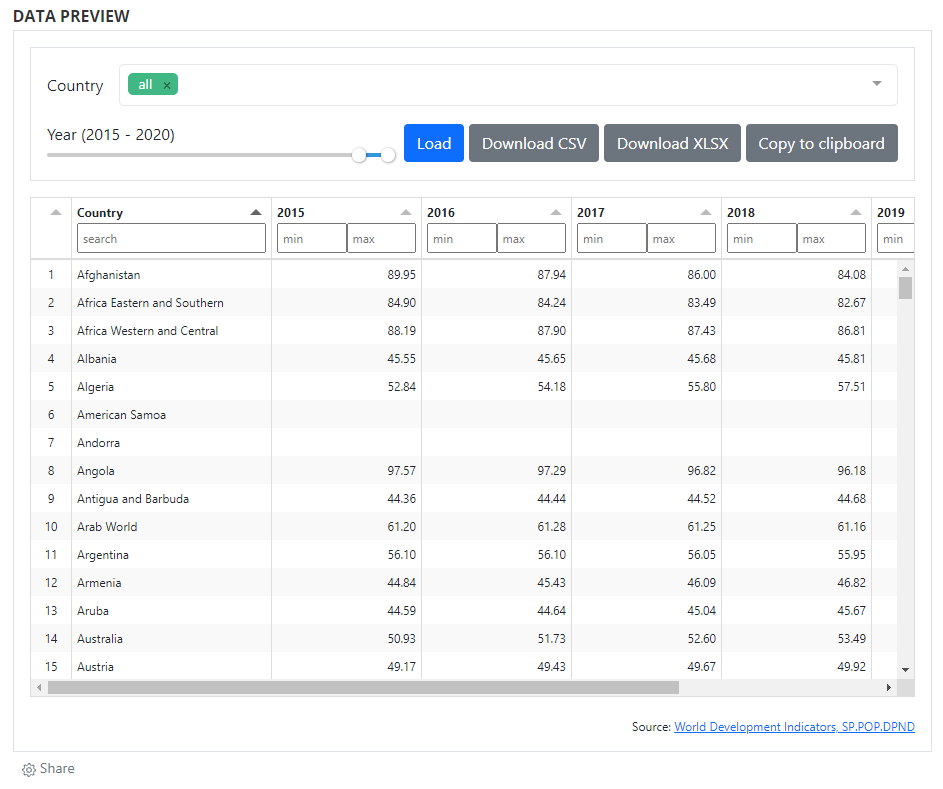
# Adding a data preview grid
The grids are generated outside NADA. In the example below, the grid produced using the open-source W2UI application. Other applications could be used, such as Grid JS, Tabulator, or other (including commercial applications). NADA itself does not provide a tool for generating data grids; it only provides a convenient solution to embed grids in catalog pages.
# Reviewing studies
Create a role.
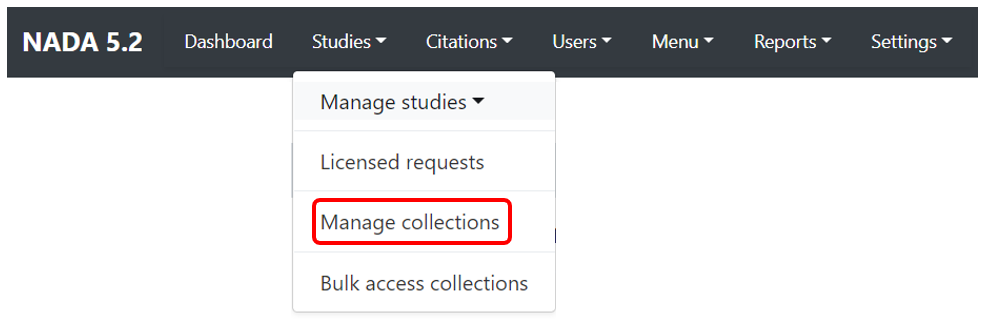
# Managing collections
# Why do we have collections?
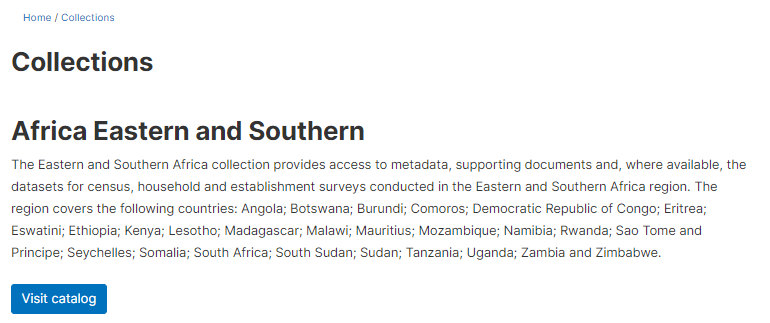
Collections are sub-categories of the Central Data Catalog. They allow administrators of a NADA instance to group studies into what can be thought of as sub-catalogs of the Central Data Catalog. Collections provide a number of benefits both from the user and the administrator perspective. From the users' perspective, being able to filter and view groups (collections) of studies that logically belong together makes finding what they are looking for easier. From the administrators' perspective, the ability to create collections of studies that may logically belong together facilitates the ability to decentralize the management of each collection of studies to specific administrators (for example collections can be managed by different departments in an institution).
The creation of collections will in general only be useful and necessary for large catalogs or for catalogs that desire more decentralized management of groups of studies by different departments.
# Creating a collection
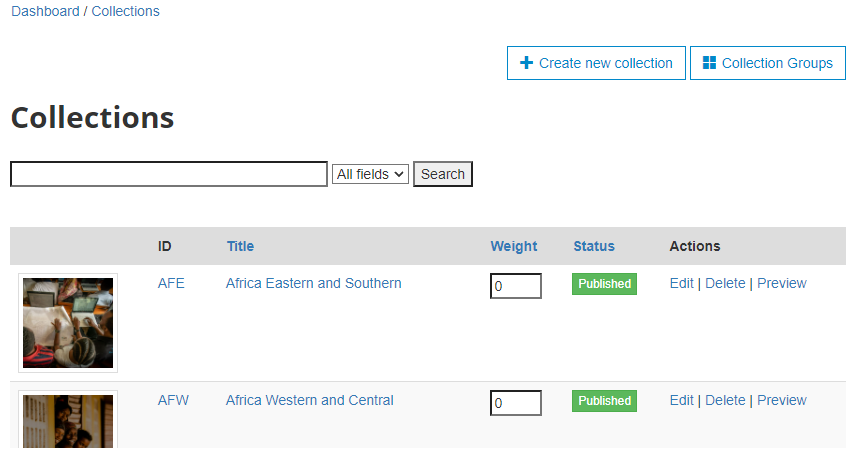
There are no collections defined in the default NADA 4 installation. Collection page will be empty. After you create collections, they will be listed in the page.
# Using the web interface
To create a new collection, click on the Create new collection button.

This will open:
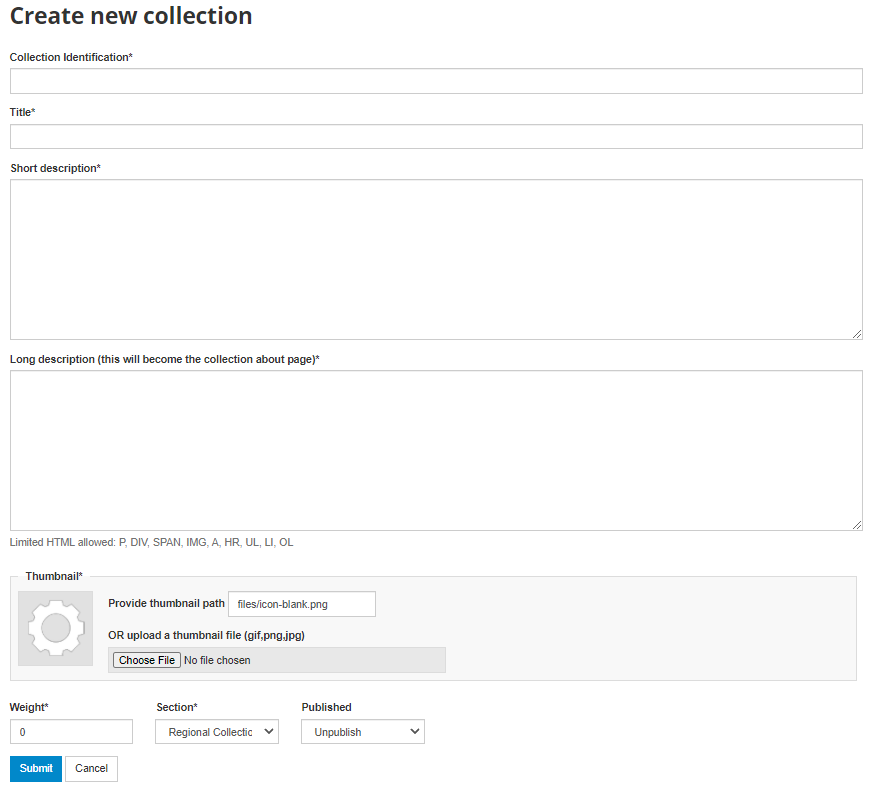
Under Collection Identification, provide a short name for the collection. This will become the URL for the collection so pick carefully. For Title, fill in the fill title for the collection. This will be the name displayed at the top of the collection page.
Fill in a three- or four-line short description of the collection. This text will display on the front end in the collections list.
Fill in a more detailed description of the collection. This will display on the About page for that collection.
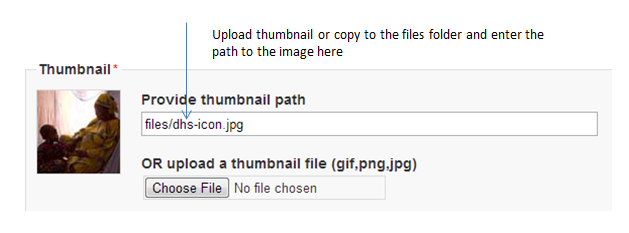
To format the page and include images it is possible to enter HTML code into this box: below is an example piece of code that includes an image.
Upload a file to display next to the collection as it is listed on the collection page. NOTE: This image should be 82 X 82 pixels. If the upload does not work automatically then copy the thumbnail image to the "files" folder as shown above.
E. The Weight field determines in what order collections are shown in the collection list. 0,1,2,3 etc. The Select collection type drop-down is a system value to distinguish between collections that should be viewed as internal to the organization or external. For example, some collections may be made up entirely of studies from an organization outside the host catalog. These collections can be designated as external. The Section dropdown allows for the categorization as either a collection based on a specialized collection (like health) or based on a regional breakdown. Selecting Publish -- publishes the collection. Click on Submit to save the changes.
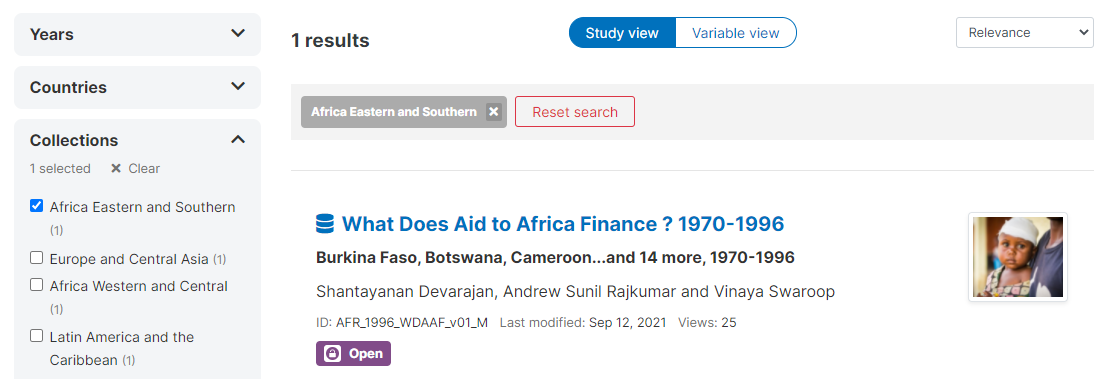
To view the results click on the Preview link on the far right:
The new collection now also shows in the collection list on the Central Catalog About page (this is where the thumbnail and short description fields are displayed).
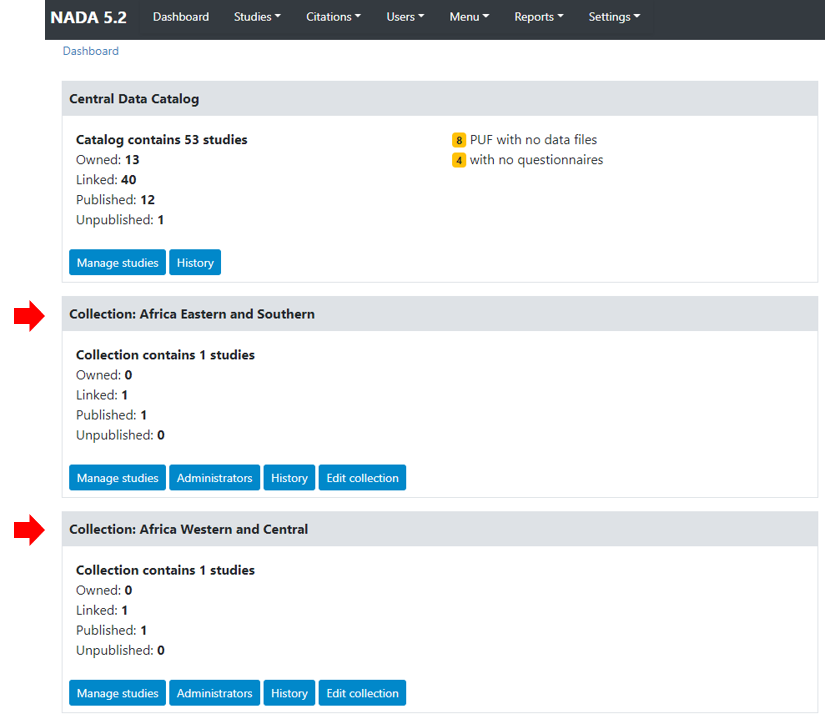
Visiting the Dashboard will now also show the new collection listed below the Central Data Catalog. With a number of green buttons as shortcut links to manage the studies on the collection, assign administrators for the collection, a history of activity on the collection and a link to edit the collection as in the steps above.
# Using the API
# Changing the collection administrator
# Using the web interface
# Using the API
# Adding an entry
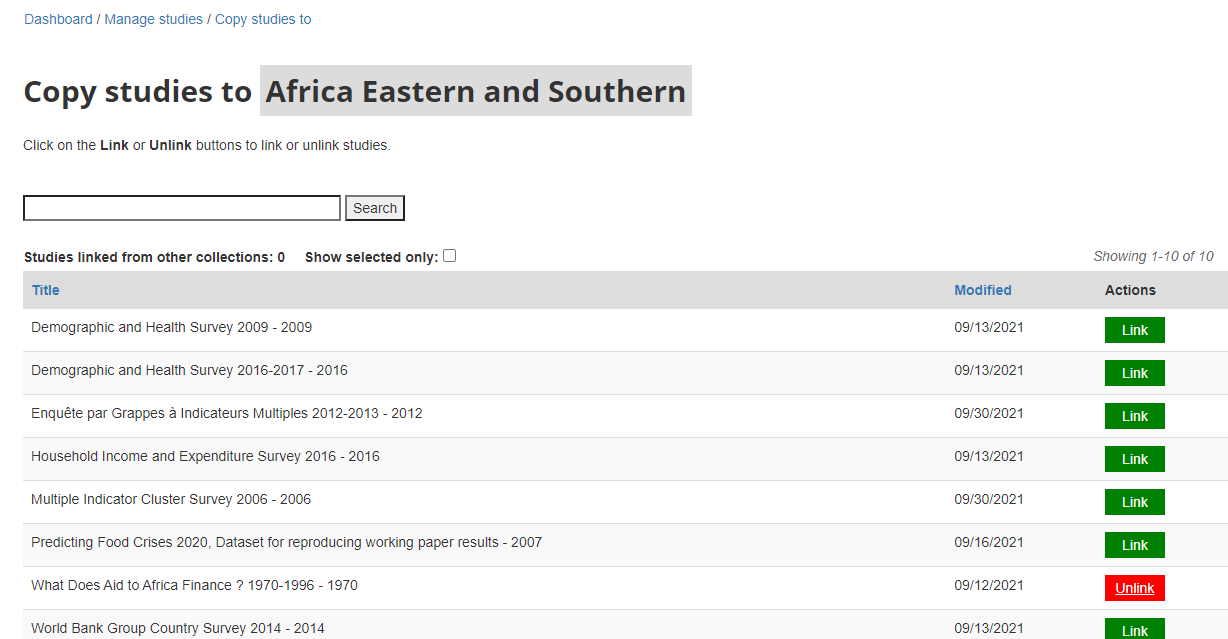
# Using the web interface
Add data: owned and borrowed
# Using the API
# Changing the ownership of an entry
# Using the web interface
# Using the API
# Adding the collection facet
# Using the web interface

# Using the API
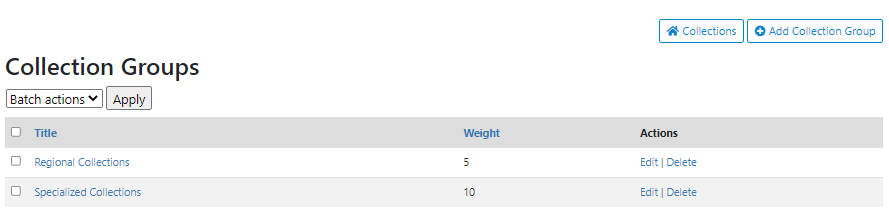
# Collection groups
# Using the web interface

Preview
Why no logo?
# Using the API
# Enabling bulk data access
# Using the web interface

# Using the API
# Transferring ownership of an entry
# Using the web interface


Also: can access to collection tools in Dashboard:
# Using the API
# Managing facets
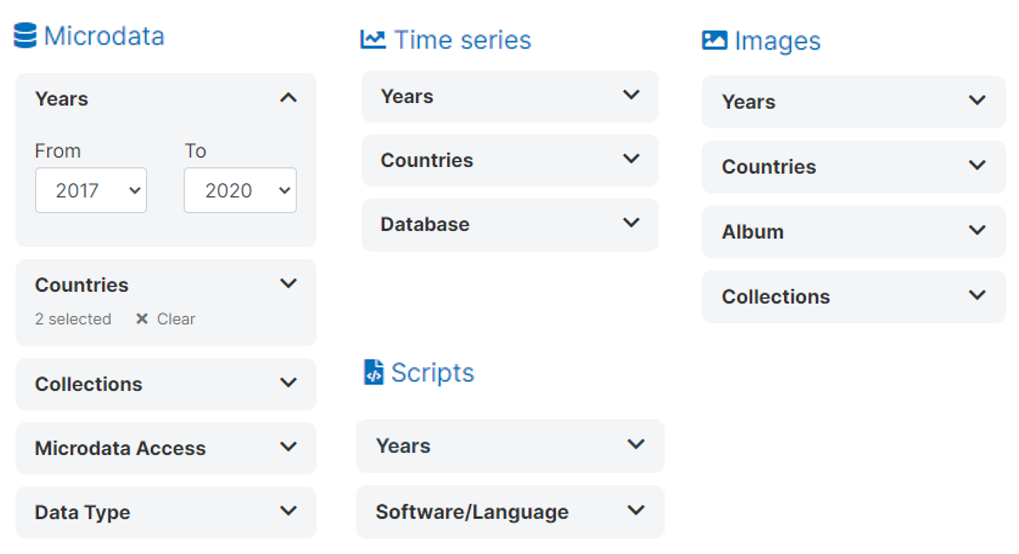
Facets (filters) play a critical role in making data more discoverable. The following facets are displayed by default in NADA:
Range of years
Country
Data type (shown only when a catalog includes entries of more than one type)
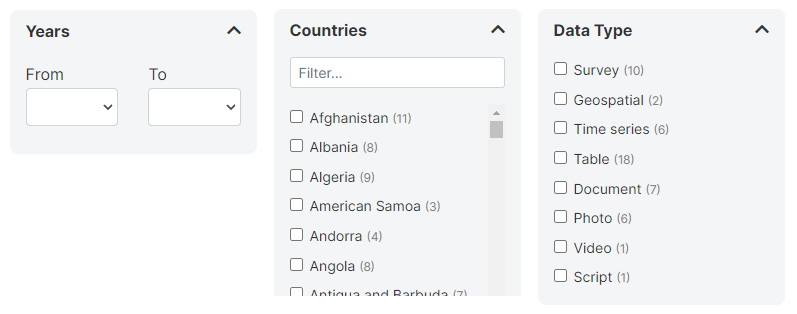
You can add your own facets and apply them to each data type independently. Facets must be created based on metadata elements in the standard standards and schemas. They only make sense when the metadata element is categorical and has a reasonably small number of categories. When metadata are documented using CVs, make it easier. All metadata schemas used in NADA have an element "tags" that provides much flexibility to create custom facets.
# Creating a new facet
# Using the web interface
To manage facets, click on Settings > Facets in the main menu.

Click on Create new facet. In each relevant schema, you will have to identify the element that corresponds to the facet being created. In some cases, a facet will apply to only one data type (for example, a facet "Document type" would only apply to entries of type "document"). In others, it can apply to multiple data types. A few facets other than the ones provided by default in NADA (year, type, country) may cover all data types (this could be the case of "topics", "keywords", or "tags").
In the Create Facet form, you will provide a short name for the facet, a title (header to be displayed in the user interface), and a status (Enabled/Disabled).
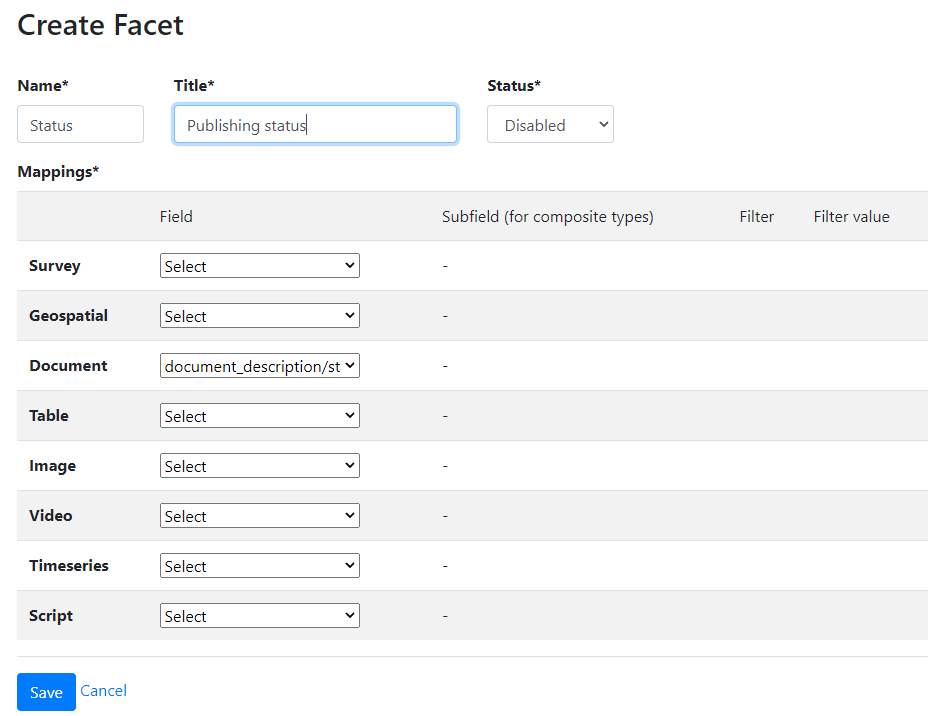
In the Field section, select the metadata field that correspond to your facet. For example, if you create a facet to allow users to filter documents by their publishing status (the document schema suggests the use of a controlled vocabulary for this field with possible values "first draft, draft, reviewed draft, final draft, final"), you will select the field "document_description/status".
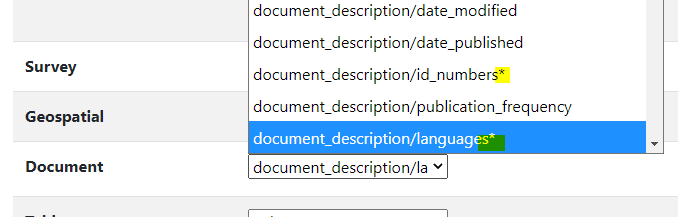
Subfields: Some metadata fields may have more than one component. For example, the field "language" has a component "name" and a component "code". If you want to use the name of the language in the filter, you will have to select the element "name". The fields that contain more than one component are identified with a * in the drop-down list.
Filter and Filter value: These options allow you to limit the filter to some specific values in the metadata. An example of the use of filter and filter value is provided below in the section "Use of tags for custom facets".
After creating a new facet, you must click on the Indexer button to reindex the metadata in your catalog. Without doing this, the facet will not be displayed in your catalog.

# Using the API
Facets cannot be created using the API in NADA 5.2.0.
# Activating and ordering facets
# Using the web interface
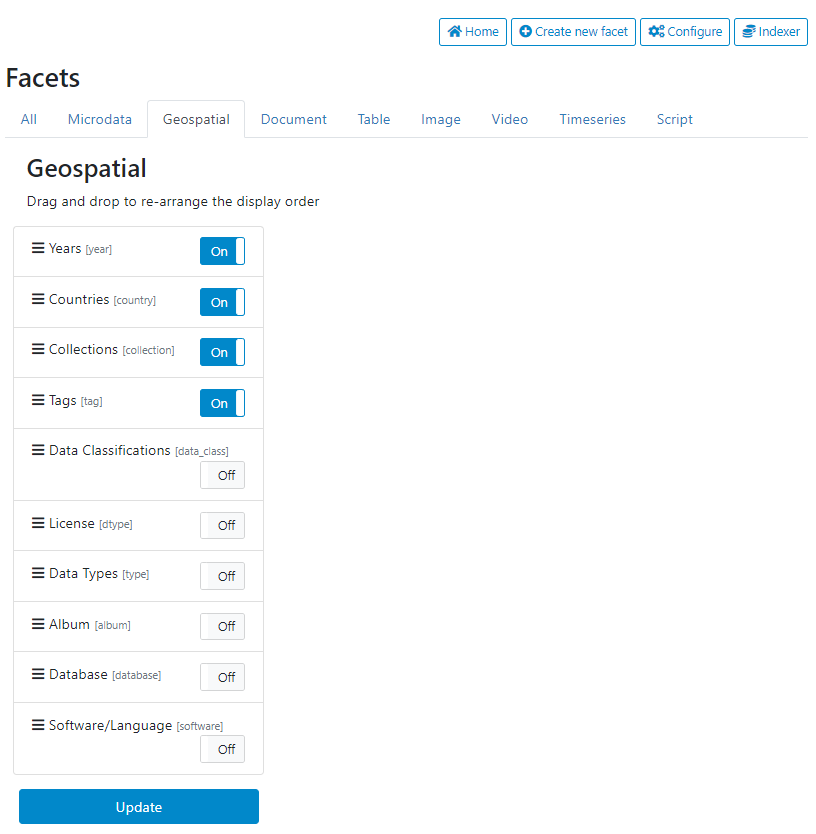
To activate the facets and change the order in which they appear in the user interface, click on Configure.

The different data types are displayed in tabs where all available facets are listed. In each tab, select the facet you want to display in the corresponding data type tabs in the user interface (setting them as On/Off). The order of the facets can be modified by drag and drop. When a change is made in the selection and/or order, click on Update to save it.
# Using the API
Facets cannot be managed using the API in NADA 5.2.0.
# Use of tags for custom facets
Tags provide a very convenient and flexible solution to generate customized tags based on information that may not be found in the specific elements found in the metadata schemas. The "tags" field available in all metadata schemas contains two elements: tag, and tag_group.

Let's assume you want to create a facet that would apply to ALL data types and filter entries by pricing policy, with two possible options: "For free" or "For a fee". No metadata schema using in NADA other than the Document schema provides an element related to the pricing policy. The NADA API makes it easy to add this information to the metadata for all catalog entries, in a tag. The "tag" would contain value "For free" or "For a fee", and in all cases the tag_group would be named "fee_or_free". A new facet can then be created with the following parameters:
Name: pricing
Title: Pricing policy
Mapping: tags (for all data types)
Filter: tag_group
Filter value: fee_or_free
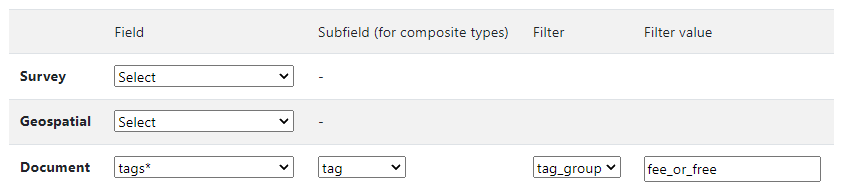
The selection of the "tags" field and the filter and filter value must be entered for ALL data types. After saving it and reindexing, a new facet will be available that will apply to the tags that belong to the group "fee_or_free" (ignoring all other tags that may have been entered in the metadata).
# Using the API
Facets cannot be managed using the API in NADA 5.2.0.
# Managing citations
Citations are the published and unpublished works that make use and cite datasets listed in your catalog. NADA provides the option to maintain a catalog of such citations.
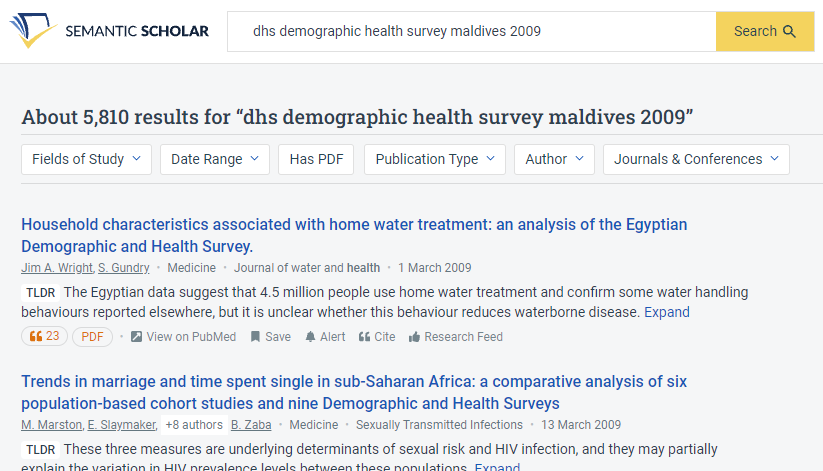
Citations can be found in Semantics Scholar or Google Scholar. Or authors may inform you. Has to use multiple queries. Many false positives. Filter by year (exclude years < dataset year). Requires some visual validation.
Can be a tedious process. We are developing a tool to assist.
Semantic scholar: https://www.semanticscholar.org/ (opens new window)
Advantage: open, has API
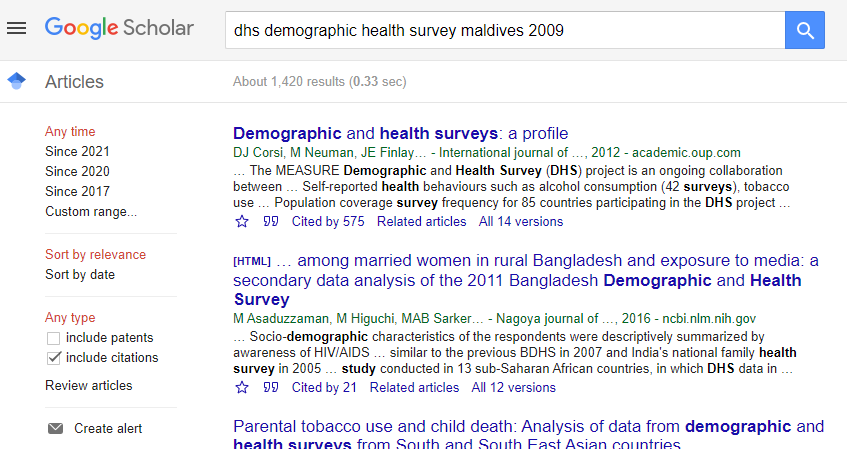
Google Scholar: https://scholar.google.com/ (opens new window)
No API, and does not allow programmatic extraction. But convenient automated notification (alert).
Cannot guarantee exhaustivity and perfect accuracy. Data are poorly cited (no information on the version; translated or incomplete title mentioned in publications. Still can have much value to show that well documented and easily accessible data are used.
# Adding a citation
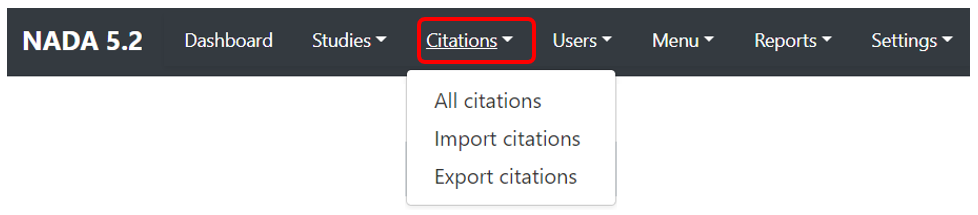
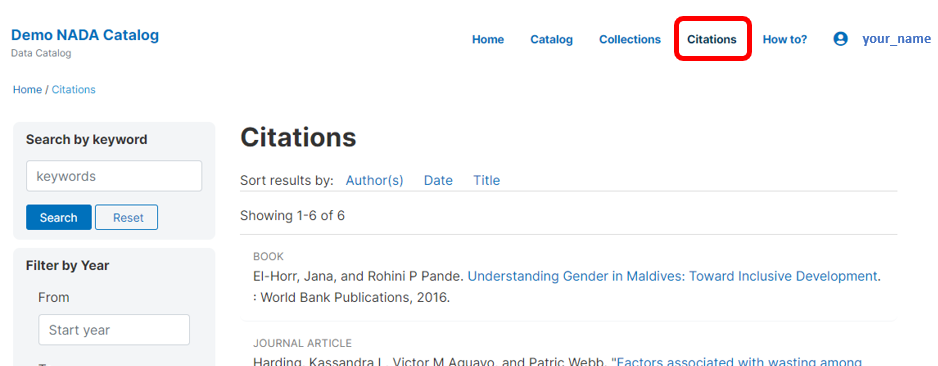
Citations are added from the Citations menu.
One citation can be related to more than one dataset. And of course, one dataset can have multiple citations. When you add a dataset to your catalog, and want to add citations to it, it may be the case that the citations was already entered but attached to another dataset. In such case, you will only have to add a dataset to the list of related datasets. You do not want to duplicate citations in your catalog.
# Using the web interface
To add a citation - click on All citations then click on the Add New Citation button at the top right.
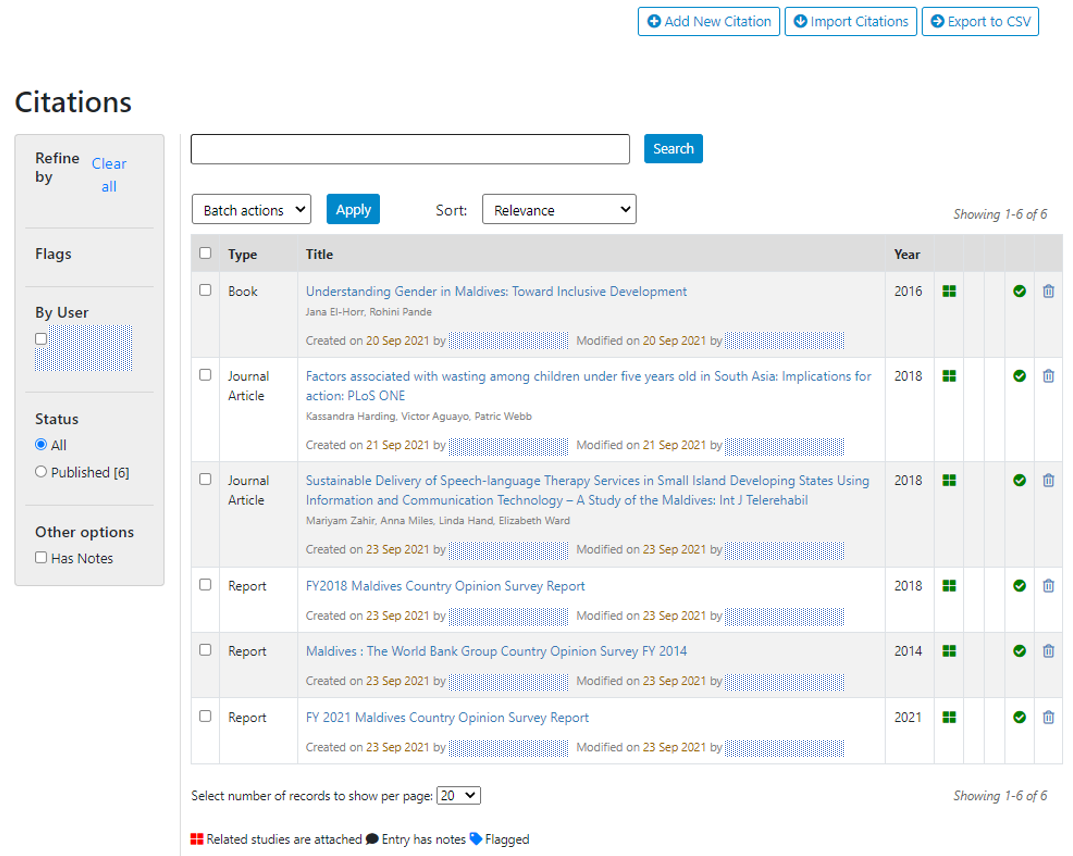
It is important to know whether the citation is already in your citation catalog. Enter the title, possibly author, and the page will display the closest matches.
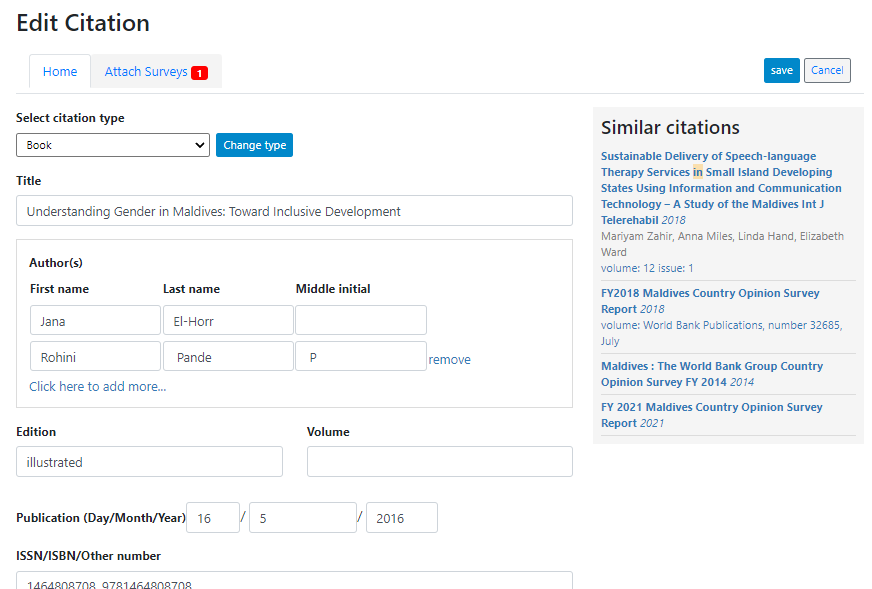
If no match, add the new citation by filling the citation form.

Citation type: Select the appropriate kind of publication. These were presented in the introduction of the manual. A drop-down list is provided.
Title: Title of the document
Authors: List of authors
Edition
Volume
Publication date: Enter at least the year
ISSN/ISBN/Other number: Unique identification number of the document (other than the DOI, for which a specific field is provided)
Publisher: Name of the publisher
City: City of the publisher address
Country/State: Cuntry/State of the publisher address
URL: Link to the document or to a page where the document is found
DOI: Digital Object Identifier of the document
Language: Language (if multiple, main language)
Abstract: The abstract is optional, but we want to include it whenever possible. When copy/pasted from a PDF document, edit the content if necessary, to ensure that the flow of the text is continuous.
- Instead of:

- we want:

Keywords: a list of keywords (entered in a single text field.
Notes: additional notes, if any
Attach file: Filename (with path) of the document (in most cases, this will not be provided; only the URL field will be filled)
Flag: the flag will be used internally for adminisrtaive/review purpose. Citations that need review or confirmation for example can be flagged. The citations can be filtered by flag in the "All citations" page, allowing administrators and reviewers to take action accordingly.

- Publish: Publish (or not) the citation in the citation catalog.
After entering all relevant information, click SAVE.
If the citation had already been entered (in which case it appears in Similar citations box), you only have to attach an additional dataset to it. Select the citations in the "Similar citations" box (to avoid creating a duplicate). The form will be automatically filled out. Go to the Attach surveys tab to attach the relevant dataset(s), and save the change.
The citation (if the status has been set to "Published") will now be visible in the user interface. The number of citations will be displayed in the catalog listings.
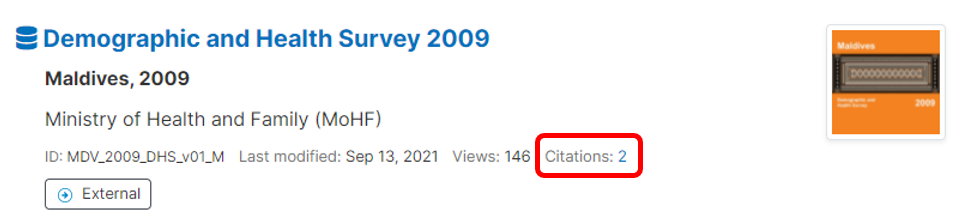
In a study page, the citations (if any) will be shown in a tab.
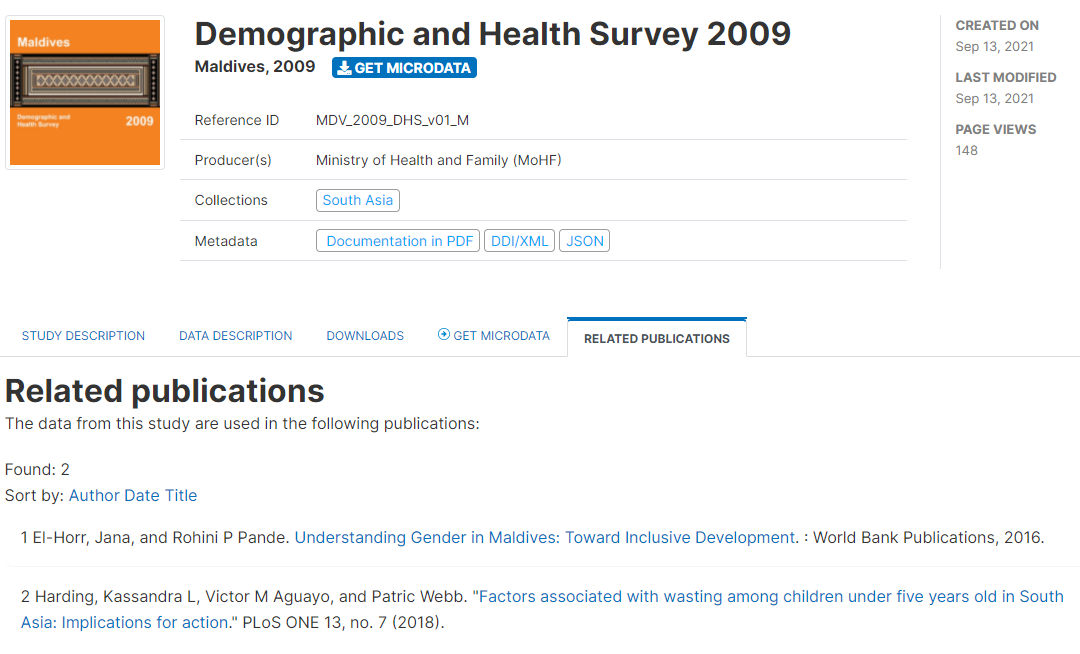
All citations will also be listed and searchable in the Citations catalog.
# Using the API
...
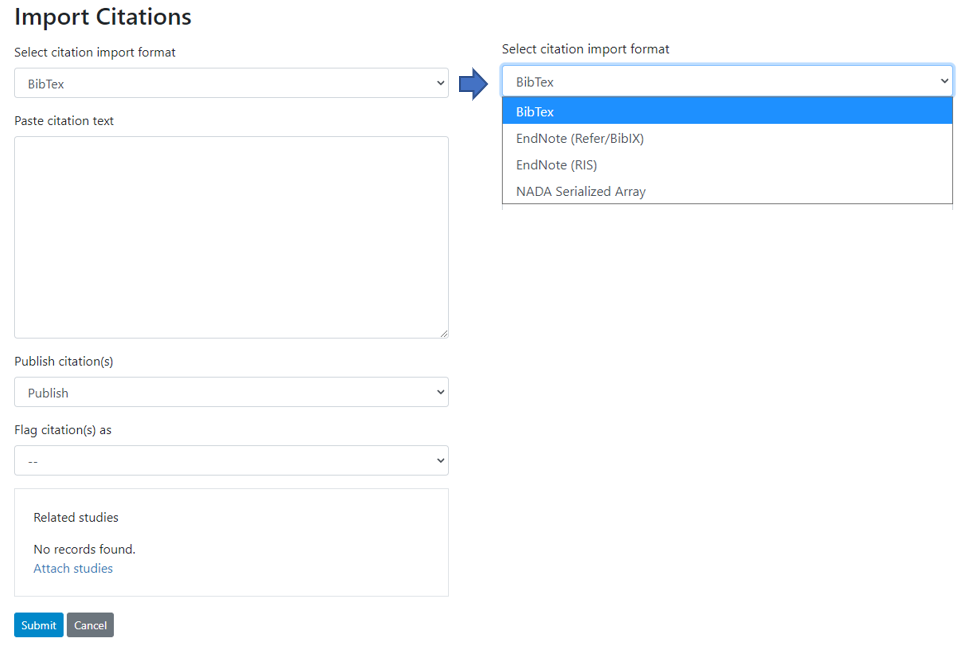
# Importing citations
It is also possible to import citations in common citation formats such as BibTex and EndNote (RIS).
# Using the web interface
To do this use the Import Citations link from the top menu. Paste the BibTex or RIS text into the form and then at the bottom of the screen click on Attach studies to link the citation to a particular study in the catalog.
# Using the API
...
# Exporting citations
# Using the web interface
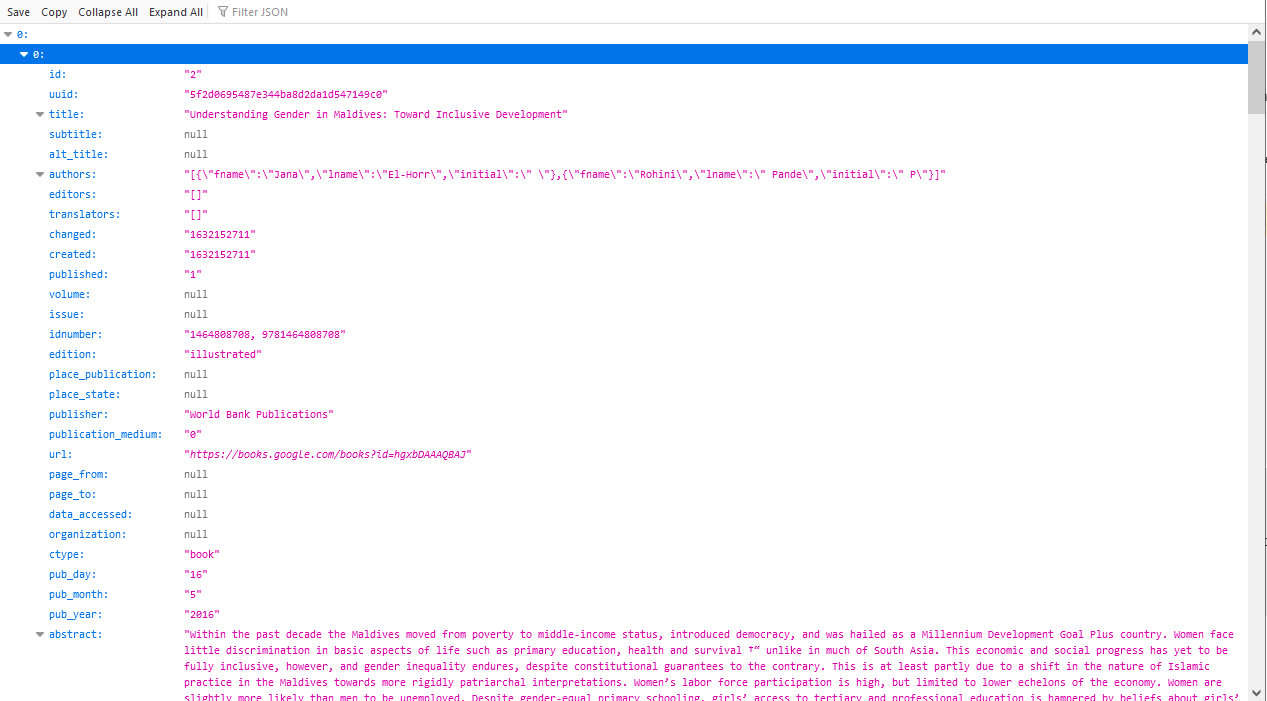
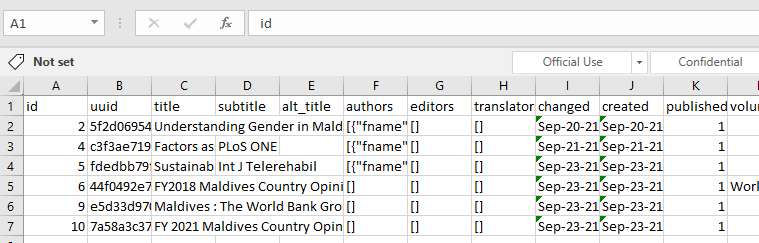
The list of citations in your catalog can be exported to JSON or CSV format.


Citations exported as JSON:
Citations exported as CSV:
# Using the API
...
# Deleting citations
# Using the web interface
# Using the API
# Managing data requests
Some datasets will be declared as being accessible only under license. This means that users need to be registered and submit a request for accessing data. Typically, this is done at the study level, and only apply to microdata and geographic datasets. Sometimes for a collection (see bulk data access).
# Using the web interface
Datasets that are assigned the Access Type Licensed require approval from a NADA administrator before the user can get access to the data files. From the site administration there are a number of ways to see if licensed requests have been received.
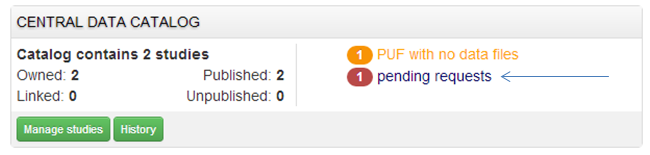
- In the dashboard: Pending requests show up as red in the catalog quick summary section. Clicking on this link goes to the Licensed Survey Requests management page.
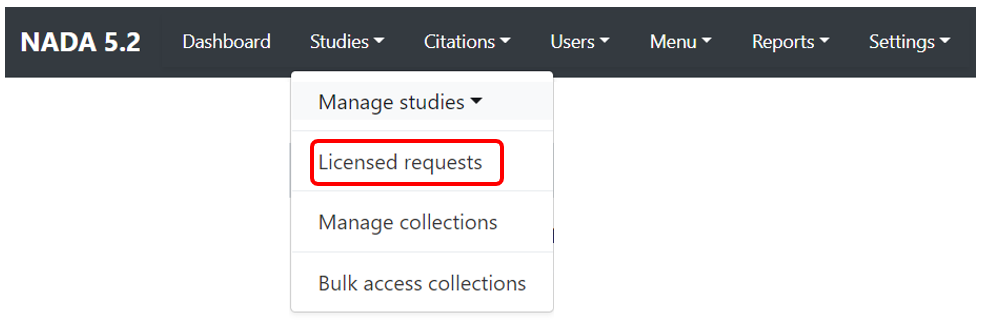
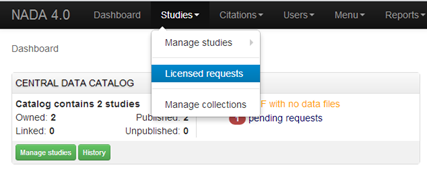
- From the Studies menu: select Licensed Requests from the submenu. The link shows a page with a list of Licensed Requests received. The status column indicates the Pending requests.

Click on the Edit link for to process a request.
The Request information tab shows a summary of the information provided by the applicant.
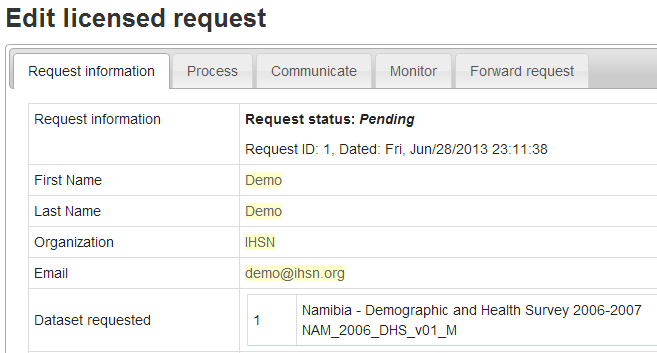
To Approve or Deny or request further information for the request. Click on the Process tab.
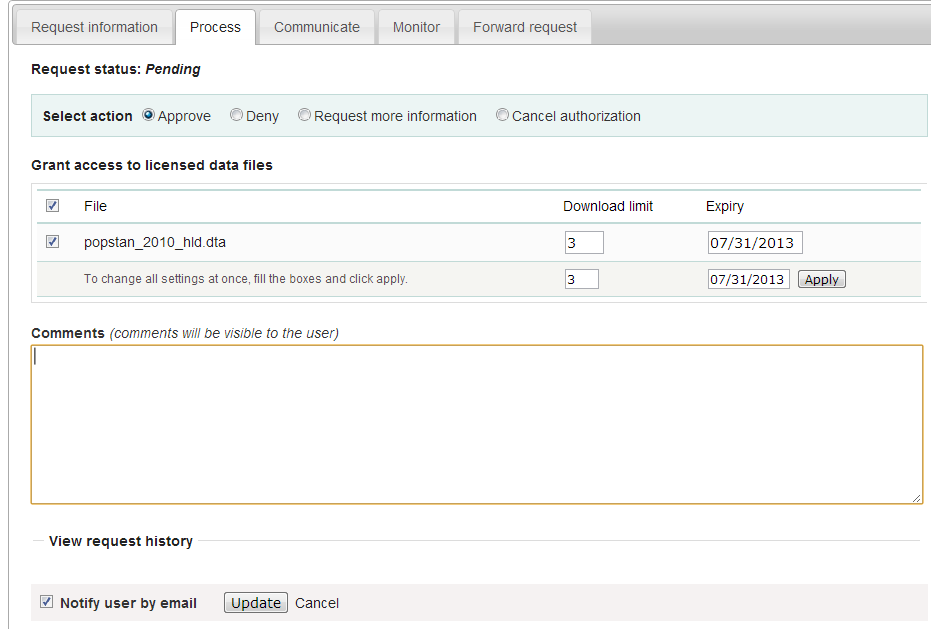
Select Approve to approve the request. (other options include Deny as well as Request more information from the applicant).
Select the files that the user will be authorized to download - it is also possible to enter a maximum number of downloads and expiry date for downloads.
Enter any comments to be sent to the applicant
Select Notify user by email to notify them that the application has been processed.
Select Update.
The remaining tabs:
Communicate - provides a means to ask for more information from the applicant
Monitor - allows the administrator to see when and how many times the applicant downloaded the data
Forward Request - provides a means to forward the request to another person for review.
# Using the API
# Managing users

# Viewing, creating, modifying, deleting user accounts
# Types of User Accounts
When the NADA software is first installed a Site Administrator account will be created as part of the installation process.
Three types of user accounts are possible in the NADA: (i) Site Administrators; and (ii) Regular users; (iii) Administrators with Specific Roles
Regular Users - this is a regular user who registers on a NADA site from the user interface. This user type has no access to the site administration. It is required to register as a user before being granted access to public use and licensed data types.
Site Administrators (unlimited) - this user has access to all functions and all collections within the Site Administration. System wide access.
Administrators with Specific Roles - these users have a limited set of administrator roles assigned to them. For example, to manage licensed requests or manage collections. Unlike Site Administrators these users are limited to administering only particular parts of the NADA catalog and the Administrator interface.
# User Roles
Often organizations will not want to assign full administrative rights to all members of staff managing the catalog. It is may be desirable to only assign roles to administrative users based on a limited set of responsibilities they may have in maintaining the catalog. The NADA allows granular roles to be assigned to administrator user accounts. For example, some administrators can be limited to managing licensed requests but would not be able to manage user accounts or create collections. Other administrators would be limited to metadata reviewer roles etc.
# Creating User Accounts
A. Regular User accounts can be created in two ways: (i) by registering an account through the account login page from the User Interface of the application or (ii) by an Administrator through the User management section of the Administrator Interface.
<!-- -->
(i) A Regular User account can be created by a site visitor directly from the register screen from the login link on the user interface of the application.

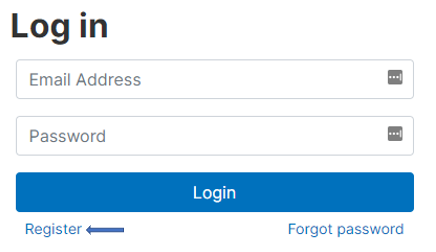
The Regular User created by this process has no access to the site administration. This account can only be used to apply and gain access to public and licensed datasets.
(ii) Regular User accounts can also be created by an existing Administrator from the Users menu in the Administrator Interface.
<!-- -->
B. Administrator accounts can only be created/ modified/deleted/ by an existing Administrator from the Users menu in the Administrator Interface.
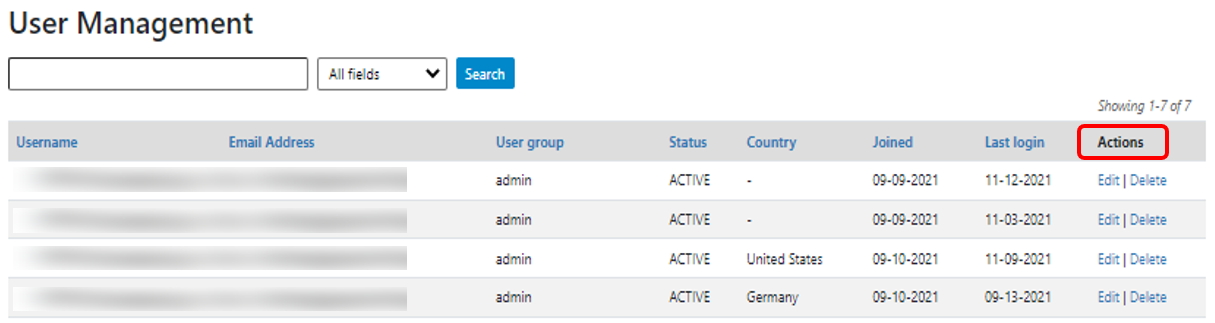
User accounts can be viewed, created, modified, and deleted from the Administrator interface through the All users menu item in the top menu bar once logged in as an Administrator.
The User Management interface displays all accounts listed in the catalog in a tabular format.
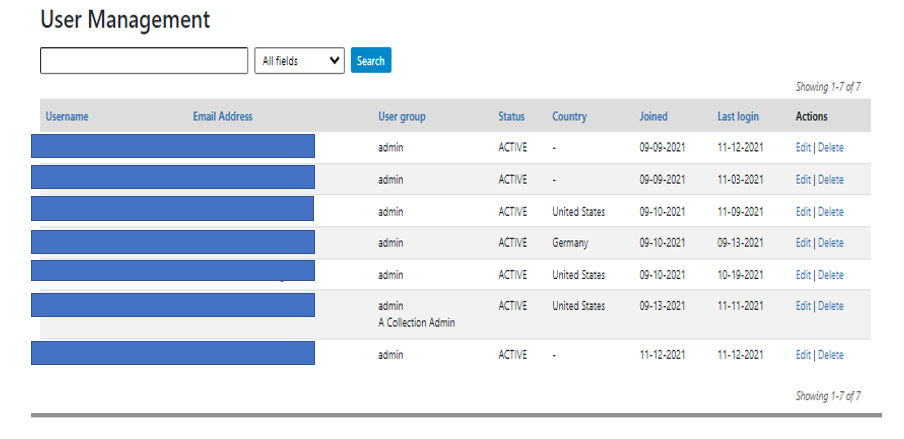
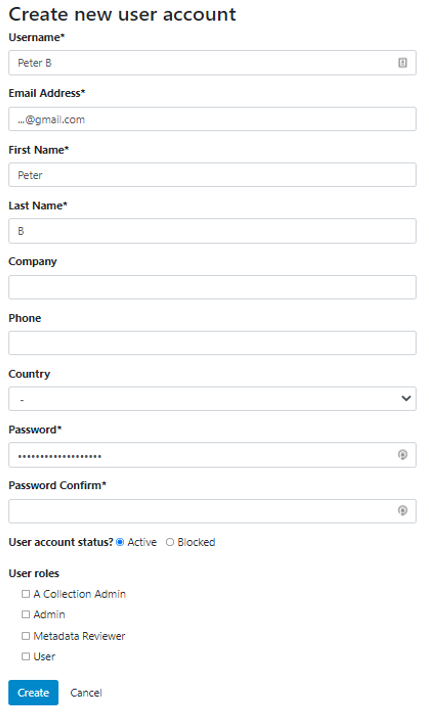
To create a new user from the Administrator view, either (i) select the Add user option in Users menu, or (ii) click on the Create new user account button in User Management interface. Both methods will take the Administrator to the account creation form.

Administrators can also Edit and Delete accounts. This is done from the Actions column in the User Management section.
# Defining roles
# Creating and assigning user roles
Often organizations will not want to assign full administrative rights to all members of staff managing the catalog. It is may be desirable to only assign roles to administrative users based on a limited set of responsibilities they may have in maintaining the catalog. The NADA allows granular roles to be assigned to administrator user accounts. For example, some administrators can be limited to managing licensed requests but would not be able to manage user accounts or create collections. Other administrators might be limited to metadata reviewer roles etc.
# Creating a User Role
A role needs to be defined before it can be assigned to a User.
A. To create a User Role, click on the User Roles button in the top right of the User Management screen.
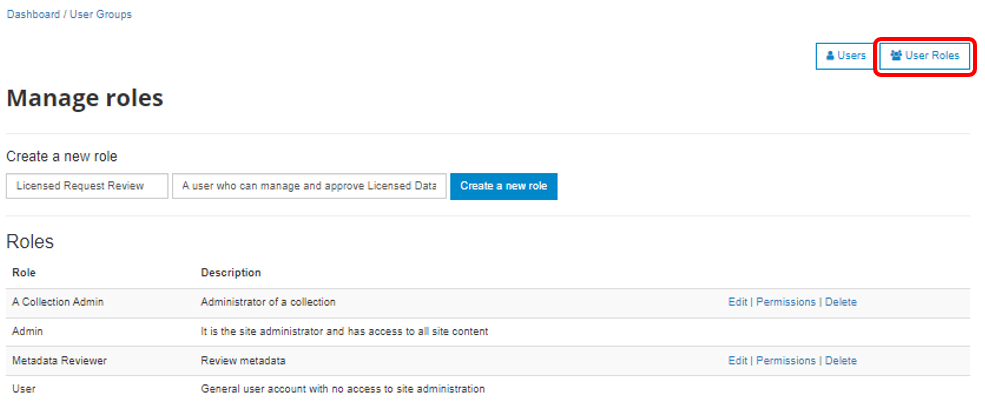
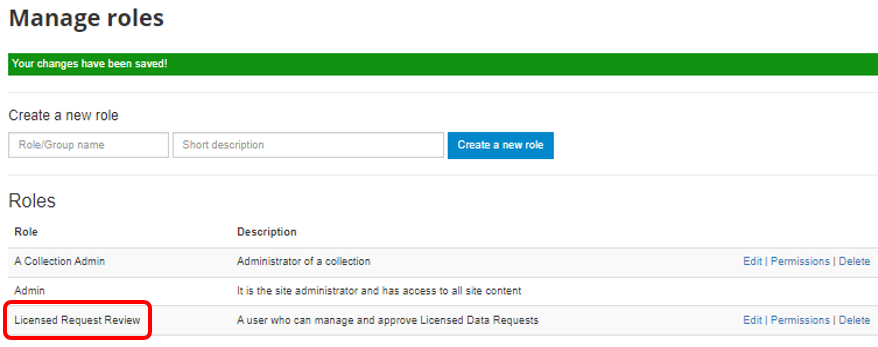
B. In the Create a new role box enter a role name and short description for the role. Then click the Create a new role button.
The new role will be created and listed in the Manage Roles table.
C. Next the permissions for the new role need to be defined. To set the permissions click on the Permissions link next to the role you wish to assign permissions to.

D. Select the set of permissions you wish to assign and then click the submit button at the bottom of the screen.
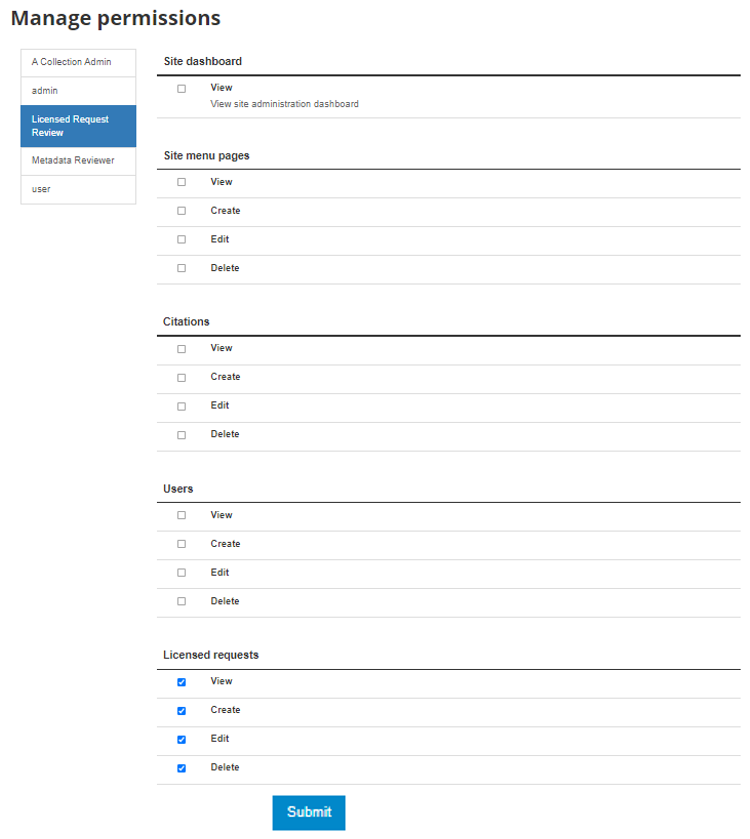
The following permission\roles can be assigned:
Site Administration -- View
Site menu pages -- View, Create, Edit, Delete
Citations -- View, Create, Edit, Delete
Users -- View, Create, Edit, Delete
Licensed Requests -- View, Create, Edit, Delete
Manage Collections -- View, Create, Edit, Delete, Publish
Manage Studies -- View, Create, Edit, Delete, Publish
Reports-- View
Site Configurations-- Edit
Site Configurations-- Edit
Vocabularies-- Edit
Country configurations-- Edit
Regions-- Edit
Site translations -- Edit
Permissions by collection-- View, Create, Edit, Delete, Publish
In the example above permissions were assigned that would allow the user to only administer Licensed requests. The user was assigned permissions to View, Create, Edit, Delete licensed requests.
E. To edit or delete a role click on the Edit, Delete links for that role in the Roles section
# Assigning a role to a User
In our example we created a role for a Licensed dataset reviewer that would allow the person assigned that role to manage all parts of the Licensed data management system.
To assign that role to the user Peter in the example below we need to edit the information for that user.
A. Click the edit button next to the user you want to assign the role to.

B. Select the Licensed Request Review Role at the bottom of the page as well as any other Roles you want user Peter to fulfill. Then click the Update button.
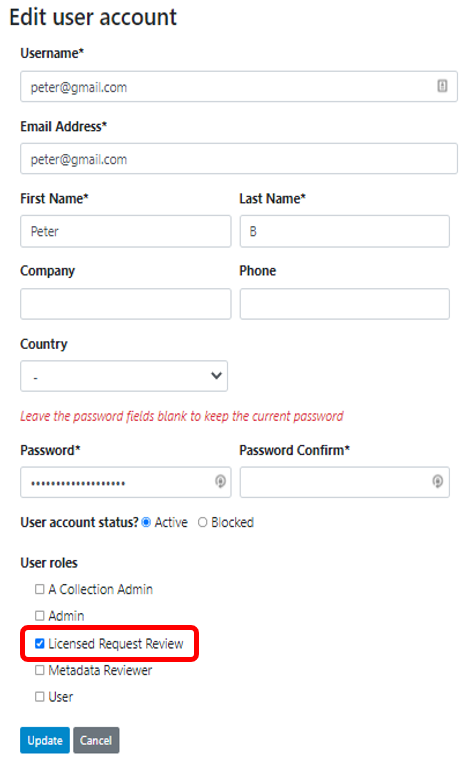

Note that if a role is deleted, it will not delete user accounts that are associated with the role. The users will just not have access to the deleted role anymore. For example, if a user has the "Licensed reviewer" role, and if we delete the "Licensed reviewer" role from the catalog. The user account won't be deleted, but it loses the Licensed reviewer role.
# Using the API
# Use of the API: use cases
The API allows many convenient automation. We present some use cases. Use cases are on GitHub with R and Python code.
# Edit targeted fields
# Adding widgets
# Image recognition and exclusion of faces
# Harvesting
# Publishing to CKAN
# Reports
NADA logs events and generates summary reports. It is not a full usage monitoring system, and it is highly recommended to implement one like Google Analytics.

# Pre-designed reports
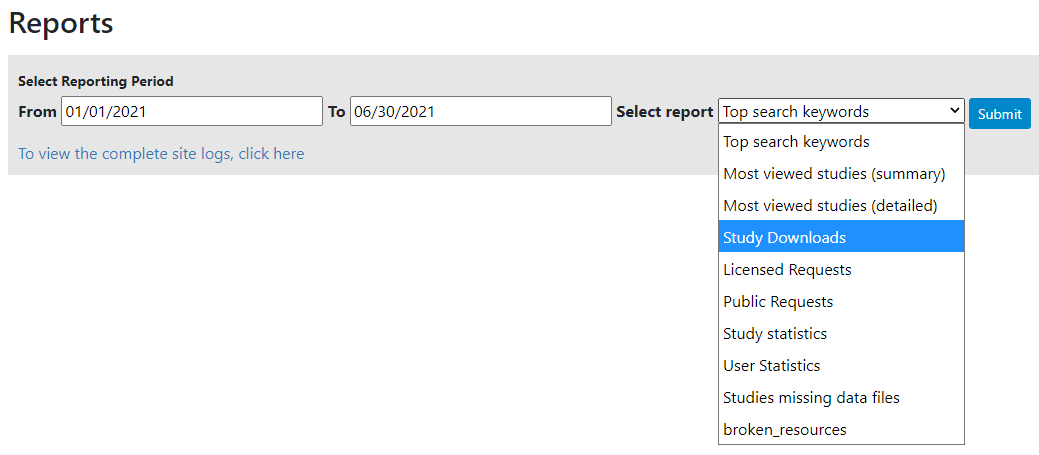
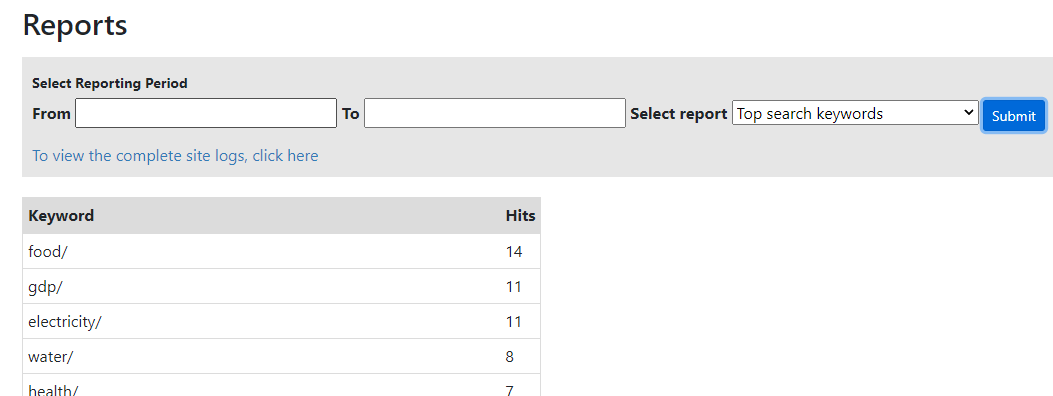
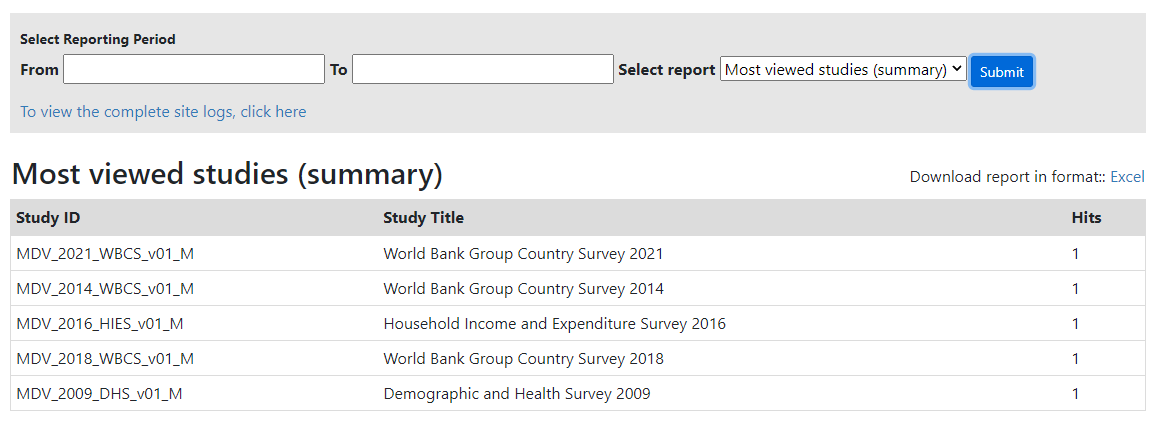
# Site logs
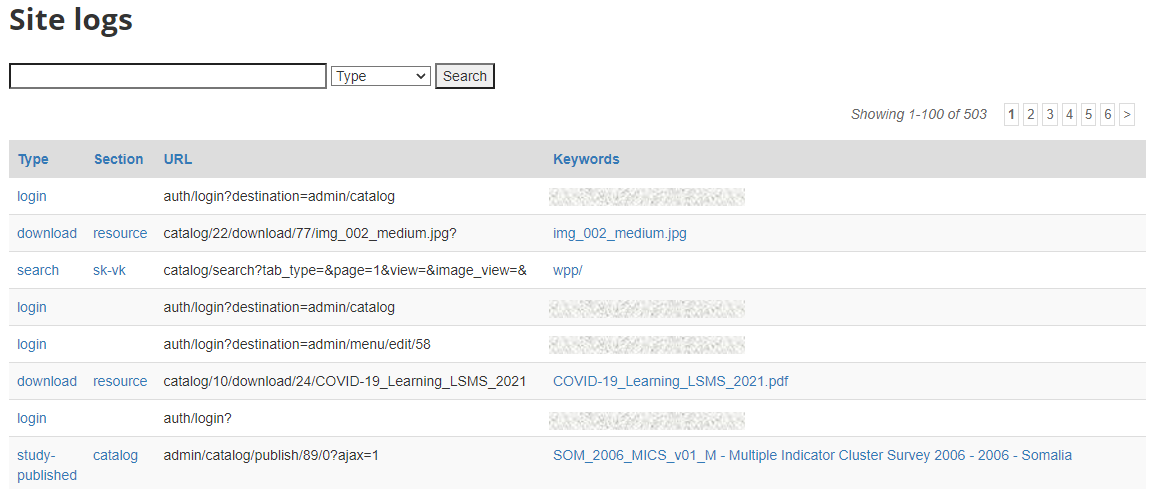
What is logged?
Where are the log files stored?
Size / storage / export
Keep or delete?
# Using the API
The API provides much more flexibility to generate reports. Instead of relying on the pre-defined reports, administrators should produce R or Python scripts that can be run any time and generate reports (possibly on crone jobs, with automatic sending by email).
Examples:
Use case X
Use case Y
Read site logs in R or Python
# Web usage analytics
Setting up web analytics: Google Analytics, other.
# Data deposit system
The NADA Data Deposit system is an optional component of the application, which needs to be installed and activated separately from the main application. It is intended to allow catalog administrators to collect datasets from authenticated/authorized contributors. The current version of the Data Deposit applies to microdata only. Future versions of NADA will accommodate additional data types. When the Data Deposit is installed, a new item can be added to the main menu linking to a landing page (to be developed by the catalog administrator). This landing page should provide some information to data depositors on what to deposit, and how, and a link to the Data Deposit application itself.

# Overview
The Data Deposit system allows contributors to a data catalog to submit datasets for publishing in the catalog. It does not automatically publish or add content to the catalog; it is used to collect data, metadata, and resources related to a dataset and transfer these materials to a catalog's curation team. Typically, a Data Deposit system will be implemented within an organization, on an intranet or controlled-access server. For security reasons, the Data deposit should not be used as a crowd-sourcing data gathering system.
The Data Deposit allows contributors to upload files, enter metadata using templates, and provide instructions to the data curators. It logs all activities, providing full traceability of the data acquisition process. It informs depositors of their actions, providing confirmation and evidence of data deposit when needed. It allows data curators to organize the data curation work. The use of metadata templates reduces the burden on data curators (when depositors enter detailed metadata); it is however a system that minimizes the burden on data depositors. All metadata is exportable to DDI 2.5
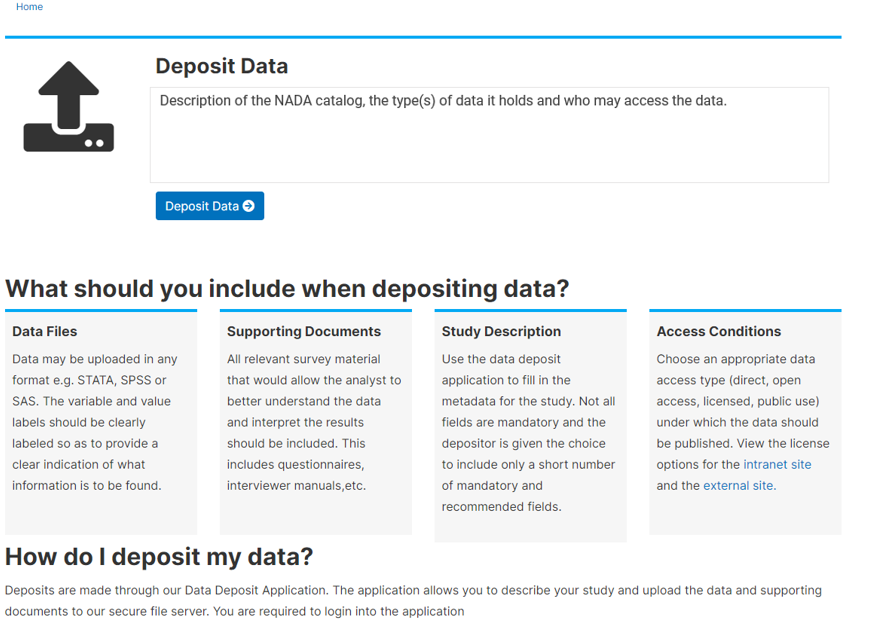
# Installation and activation
... (@todo)
# Use by data depositors
The deposit application landing page displays information about the catalog; deposit instructions and guidance for depositors to help them prepare their data and documentation before they initiate the deposit process, as well as what to expect once a deposit is submitted. Once a contributor is ready to deposit, the first step is to click the Deposit Data button. This prompts the contributor to log in to the application.
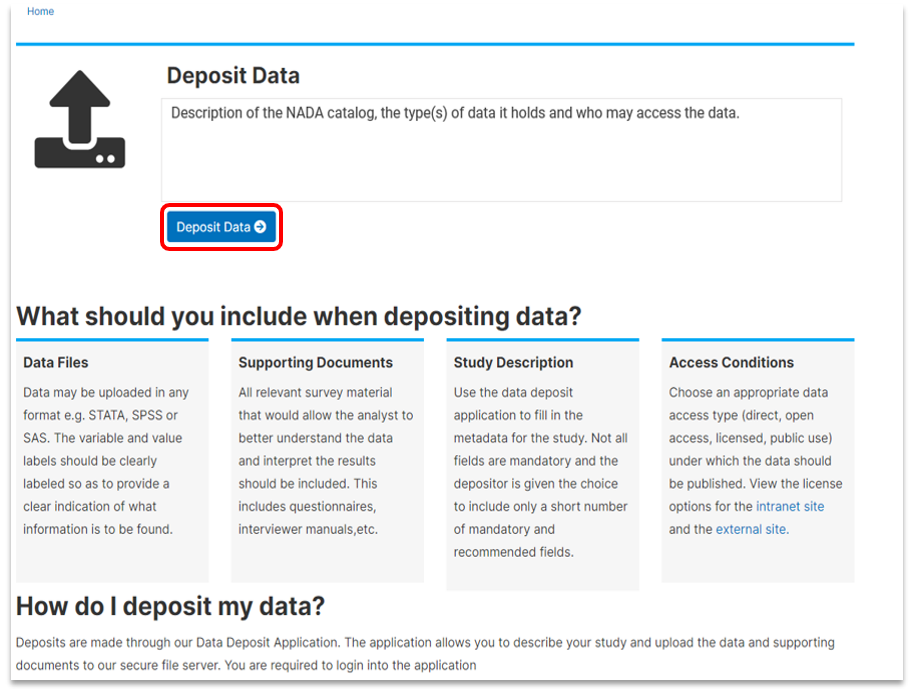
Once a depositor logs in to the deposit application, the first page they see is titled My projects. This page lists all deposit projects initiated and submitted by the individual who is logged in, as well as deposit projects where the individual is included as a collaborator. From this page, a depositor can create new deposit projects, review existing projects and monitor the status for each project in their list.
Deposit status can take any of the following values:
Draft: The depositor or named collaborators can edit, upload resources for any length of time until they are ready to submit, or they can delete the deposit project.
Submitted: This status is displayed when deposit project has been submitted. The depositor cannot edit or delete the project, but they can request the administrator to reopen the project if they need to add any resources or edit the deposit form.
Accepted: The deposit form has been reviewed by the administrator, the data and metadata have been transferred to the curators for processing. At this point, the depositor or any named collaborators cannot edit the request. If they need any changes made to the project, they will need to request the administrator to reopen the project (return it to draft status) on their behalf.
Processed: deposit is processed i.e., data and metadata are curated and if authorized for publication, the metadata and data are published in the catalog.
Closed
# Creating a new deposit project
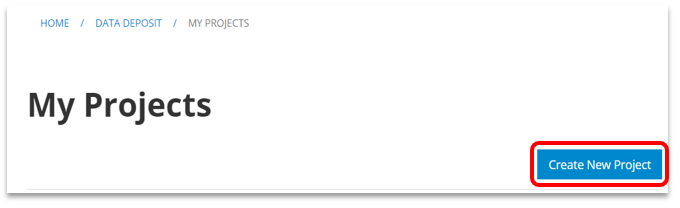
# Project information
The Create New Project button launches a form for the depositor to enter basic deposit project information i.e., title, abbreviation and description. The depositor can also specify email addresses of any collaborators on the project who would also have view and edit rights to the project. Collaboration and project description details are optional, but the title and project short name are mandatory.
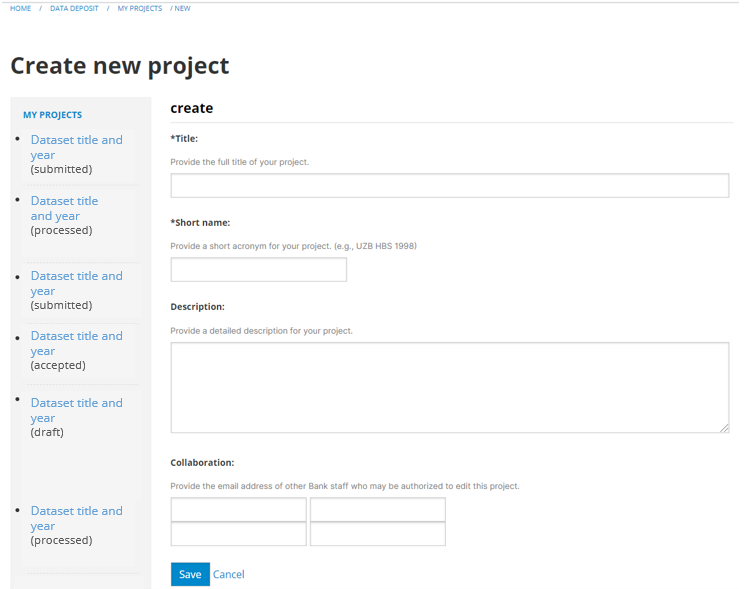
Once this section is saved, a draft deposit project is created in the system, assigned a unique project id, and listed under the specified project title. On My Projects page, the project is listed with Edit, (View) Summary, and Delete options available for the depositor.
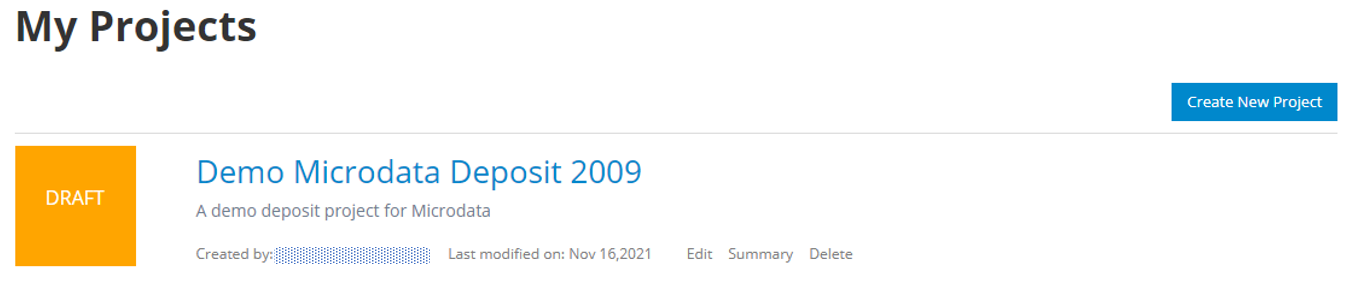
When editing the project, you will notice that there are additional tabs available, and the project information is now displayed on the first tab - the Project Information Tab.
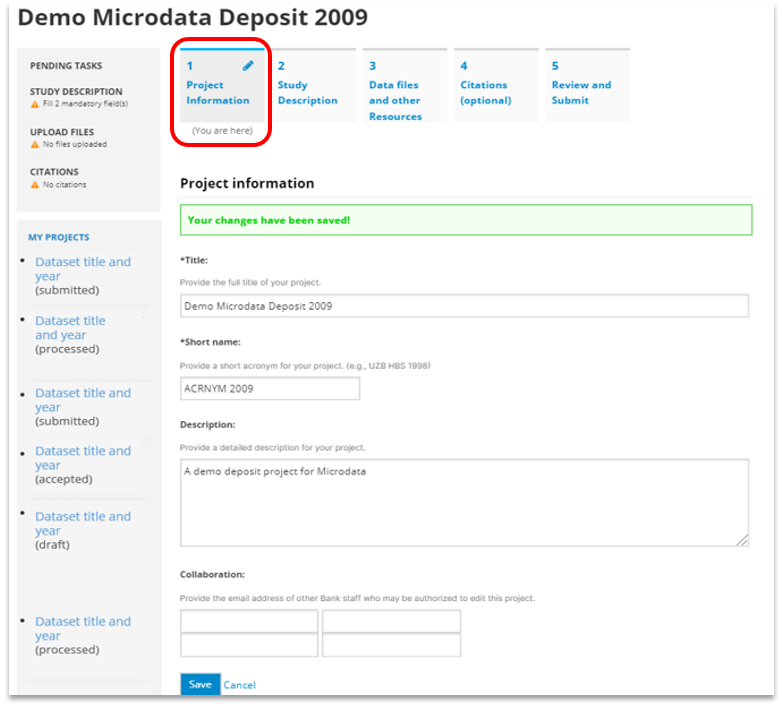
# Study Description
Click the Study Description tab to provide Study Description details. The current version of the data deposit application accepts microdata, so the deposit form fields correspond to DDI metadata fields, which is the international metadata standard for microdata.
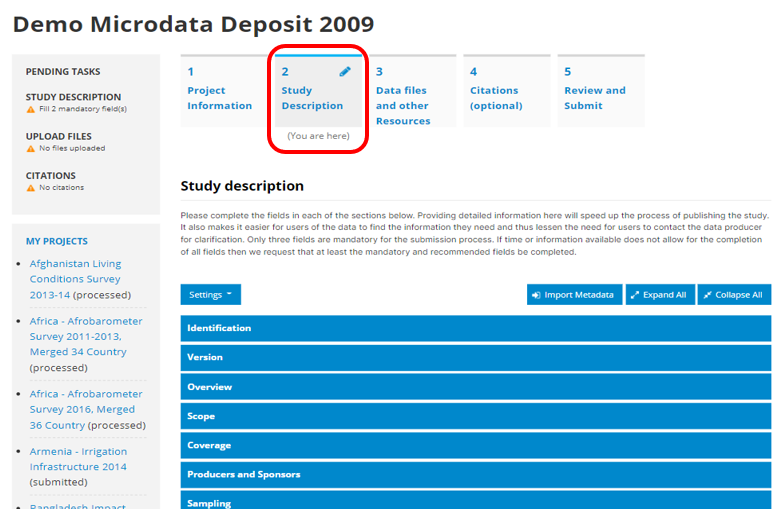
There are a few functions available to aid the deposit process. The depositor can adjust form settings, import metadata from another project, expand/collapse all form fields.
# Adjustable form settings
By default, the study description form displays all the form fields. However, the depositor can customize the form settings to hide/display help (descriptions for each field including examples) or show only recommended fields, or mandatory fields.
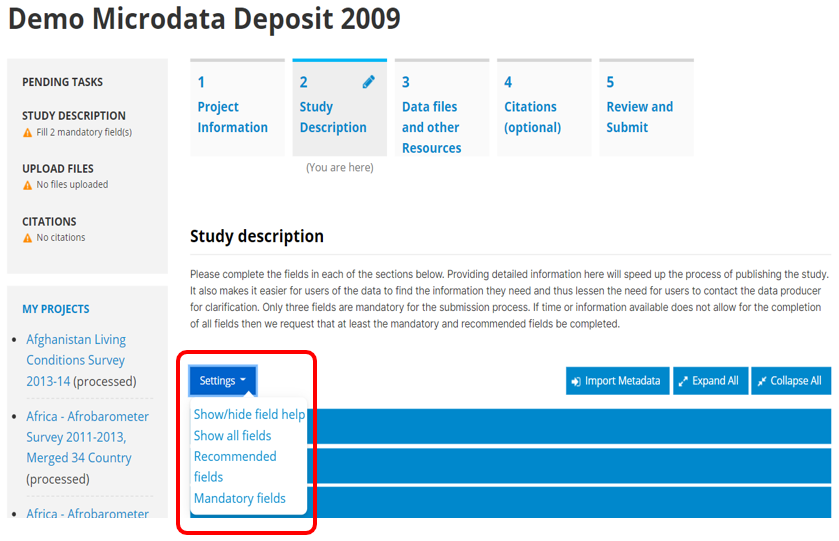
Show field help
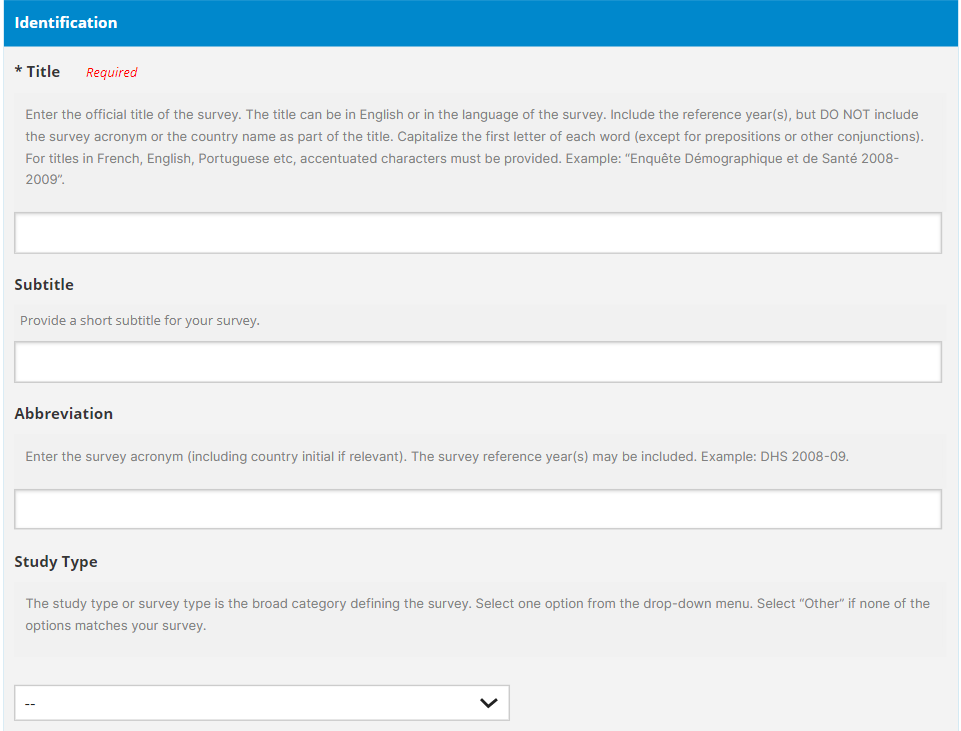
Show Recommended Fields
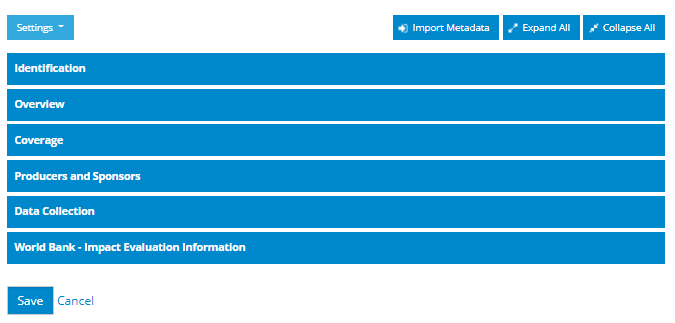
Show Mandatory Fields

# Metadata Import
If a new project has a study description similar to an existing project, the deposit application allows depositors to import metadata from a project in their projects list, to avoid manually filling all the form fields, and then edit as needed. To import, click the Import Metadata button then select the relevant project to import from.
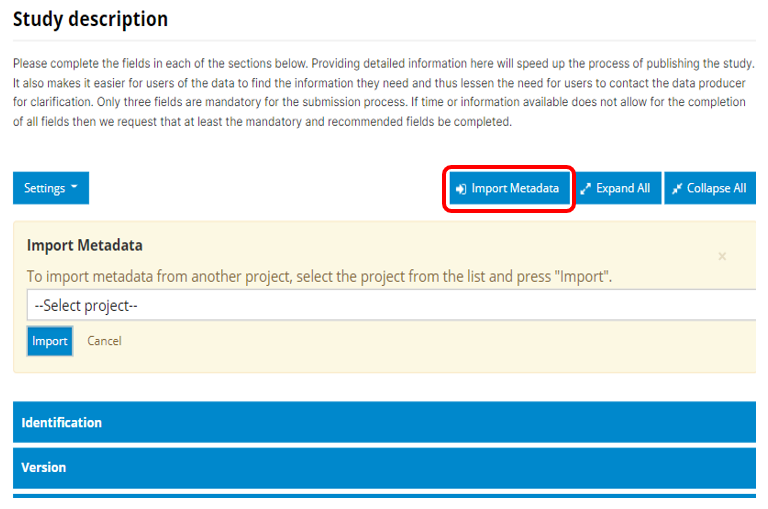
# Form display options: Expand All/Collapse All
By default, the form is set to collapse all fields. Depending on preference, the depositor can set the form to expand all fields or collapse all fields by clicking on the relevant button. 'Expand all' reveals all the form fields in each section. Collapse All hides the form fields, and shows only the section titles to give the user an overall view of the sections in the form.
The Save button is at the bottom of the Study Description form saves the Study Description update to the deposit project. The deposit remains in draft status and the project can be edited (or deleted) anytime until it is submitted. Any pending tasks e.g mandatory fields that need to be filled will be indicated in the Pending Tasks section to the left of the form. Completed tasks are indicated by a green check mark.
# File Upload
Data Files and resources are uploaded from the Data files and other Resources tab**.**
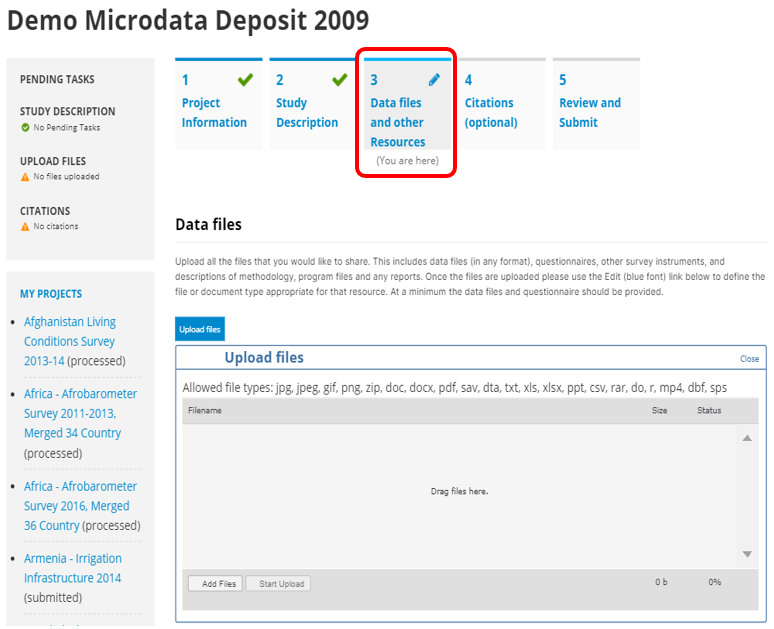
The depositor can either drag and drop multiple files of up to 2G B and click Start Upload, or click Add Files, navigate to the file location to select files then click Start Upload. Allowed file types are indicated in the above screenshot (jpg, jpeg, gif, png, zip, doc, docx, pdf, sav, dta, txt, xls, xlsx, ppt, csv, rar, do, r, mp4, dbf, sps). Uploaded files are listed in a table showing the file name, type and size. This helps the depositor review the uploads and make sure the correct files have been uploaded.
The depositor can update the files in the project by deleting or uploading new files. A depositor can either delete individual files from the Actions column, or through batch delete i.e., checking relevant file names and selecting Delete from the batch actions dropdown menu then clicking Apply. To upload new files, click the Upload button above the top right corner of the table.
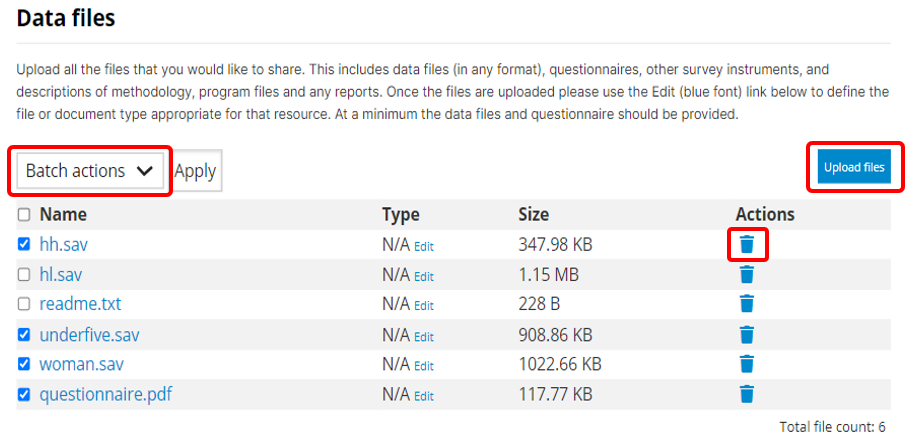
Depositors have the option to define the file or document type when uploading resources. This is done via the Edit link. This step is optional for the depositor as file type can also be defined during curation.
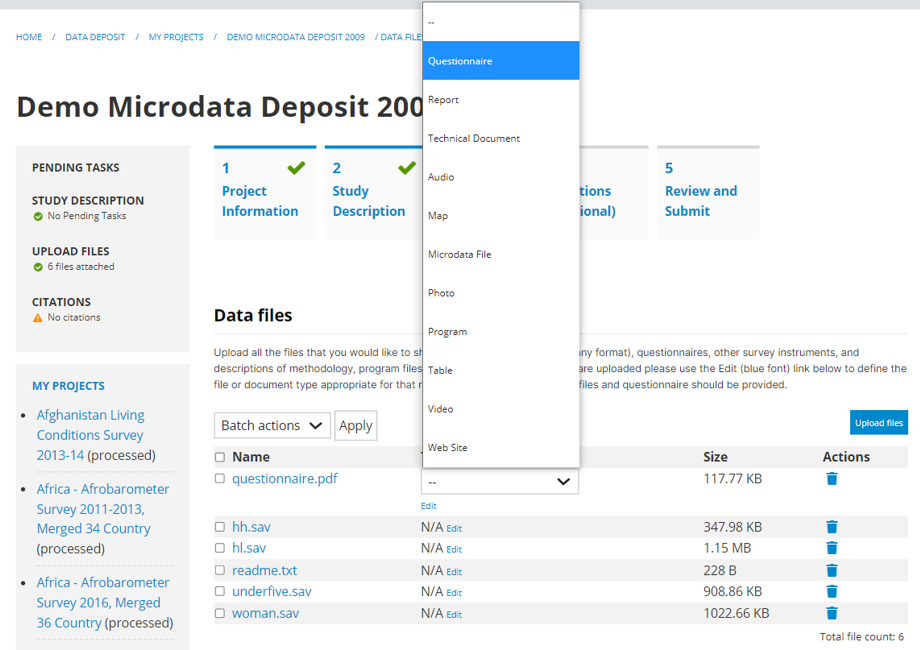
Now in place of N/A, the Type column will reflect the file type as defined by the depositor. The total file count is displayed under Pending Tasks and on the bottom right corner of the table.
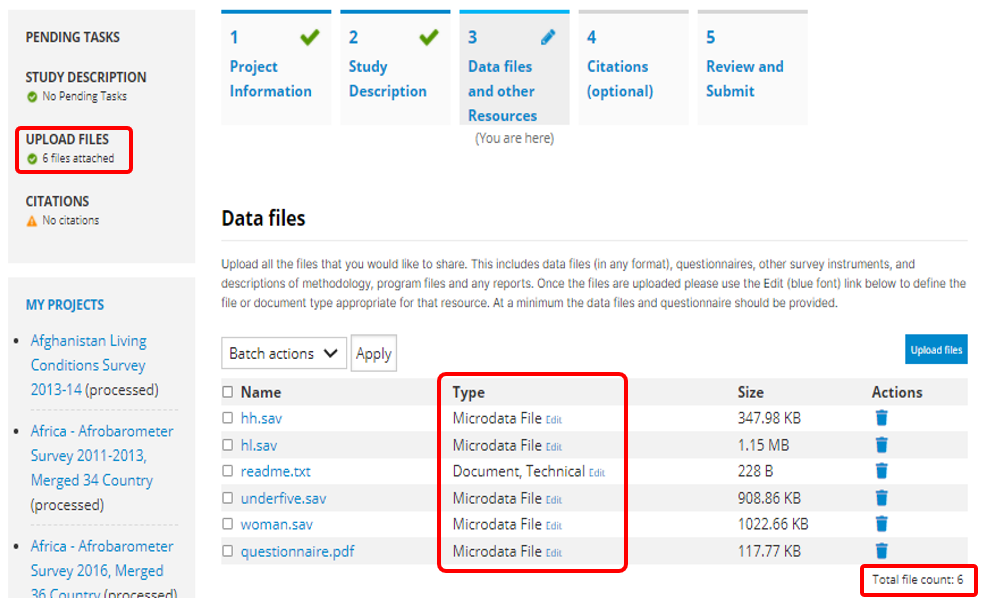
# Citations (optional)
The Citations tab is optional and is used to enter details of any publications that have used the data being deposited.
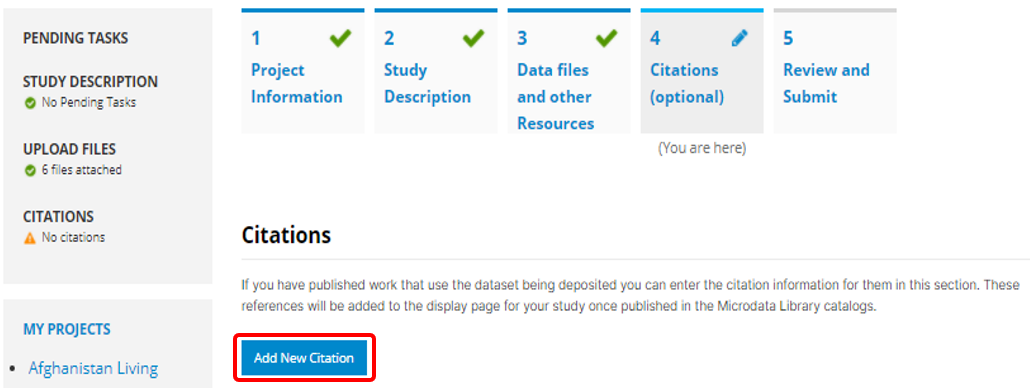
To add a citation, click the Add New Citation button to launch the citations form.
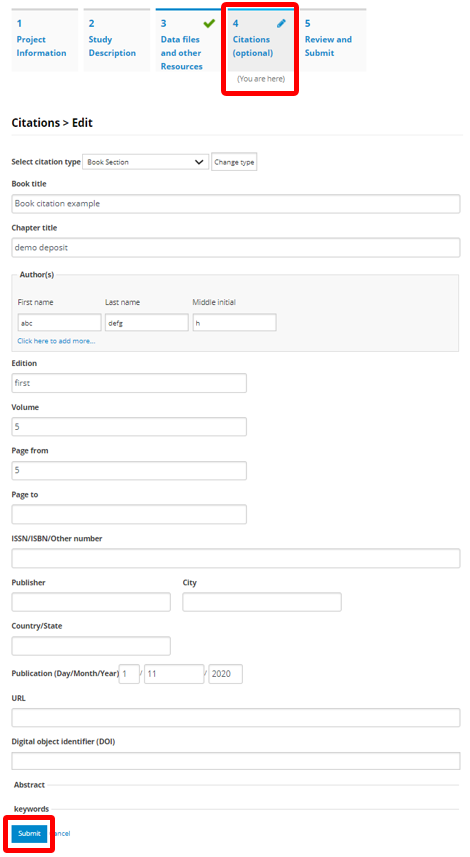
Once all the details are added and submitted, the new citation will be listed under the citations tab with options to edit or delete it and add another citation. The number of citations added to the project is also listed under Pending Tasks. To add another citation, click the Add New Citation button and follow the same process.
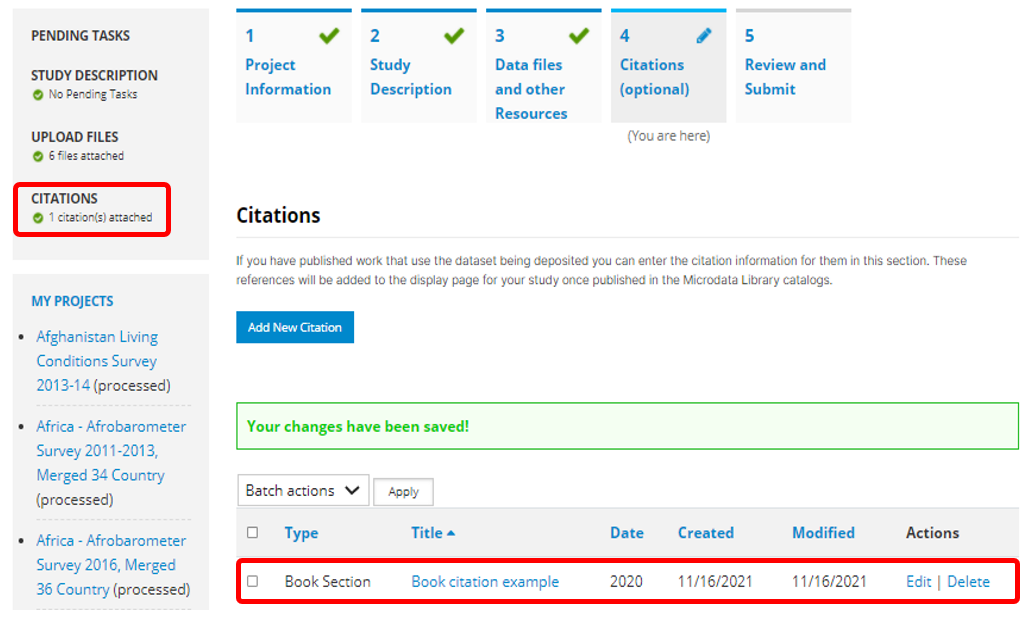
# Deposit Review and Submit
The Review and Submit tab has two sub-menus, a Review tab and a Submit tab. The default view is the Review tab which presents all the project details, study description, files and citations for review.
From this tab, the depositor can generate a DDI xml file and a resource description file (RDF) -- exporting the metadata to machine readable format that can be read by software including NADA; a print preview (summary of the deposit); or email the deposit information to others for review. These options are available on the top right above the project information box.
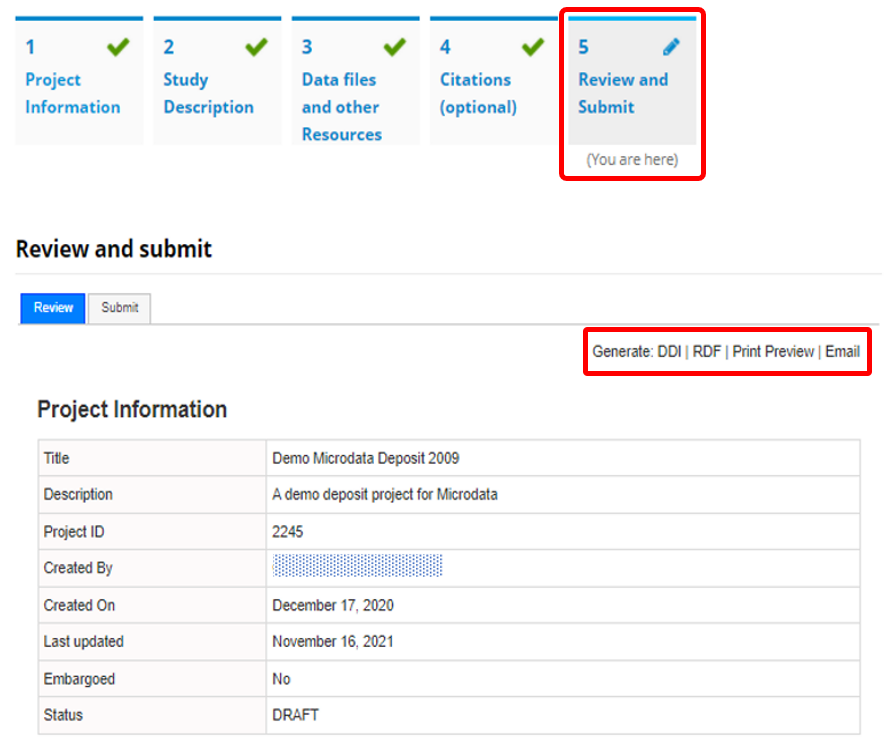
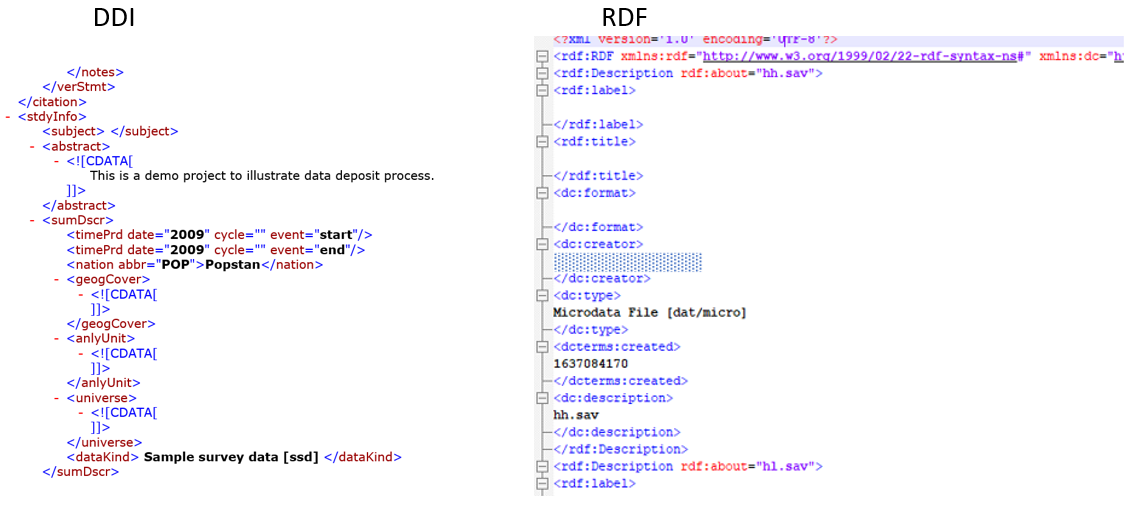

Once all the deposit information is reviewed and found to be satisfactory, it is ready for submission. Project submission is done from the Submit sub-menu.
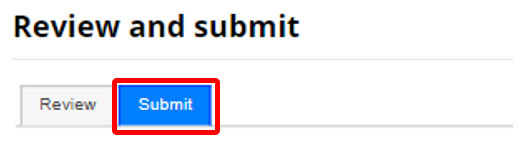
This presents a form where the depositor specifies
Access policy suitable for the data, in line with the data terms of use
Catalog to publish -- if there are multiple catalogs
Embargo information - If the dataset is embargoed, the depositor indicates the terms of the embargo e.g., time-period and any other special instructions.
Disclosure risk - Safeguarding the identity and privacy of respondents that have provided the data is important. The depositor can specify any identifying variables in the data (e.g., names, official ID numbers, precise GIS coordinates, etc, or any variables deemed otherwise sensitive in the study setting (e.g., ethnicity, tribe, religion, etc) so they can be treated before the data is distributed. Ideally these would be treated before the data is deposited.
Key variables
Notes to the library
cc -- email addresses of additional people who will also receive a summary of the deposit submission.
Once this information is submitted, the depositor is given opportunity to confirm submission with the understanding that they will not be able to edit the deposit once it is submitted. Clicking the Submit button will submit the deposit. The depositor receives a confirmation email of the deposit.
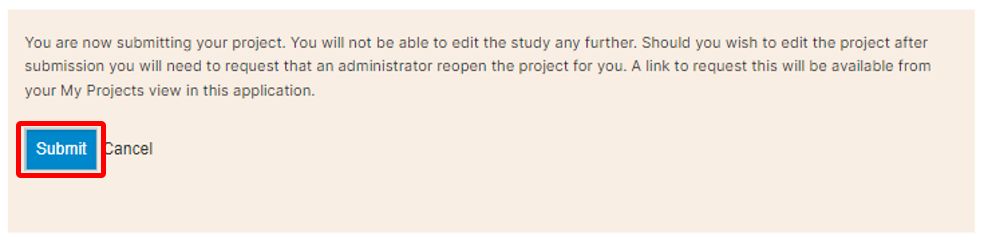
The updated status of the deposit is reflected on My Projects page, and a summary of the deposit can be viewed by clicking on the project title. At this point the project cannot be edited or deleted. If any updates need to be made to the project after submission, the depositor needs to contact the administrator to request the project to be re-opened.
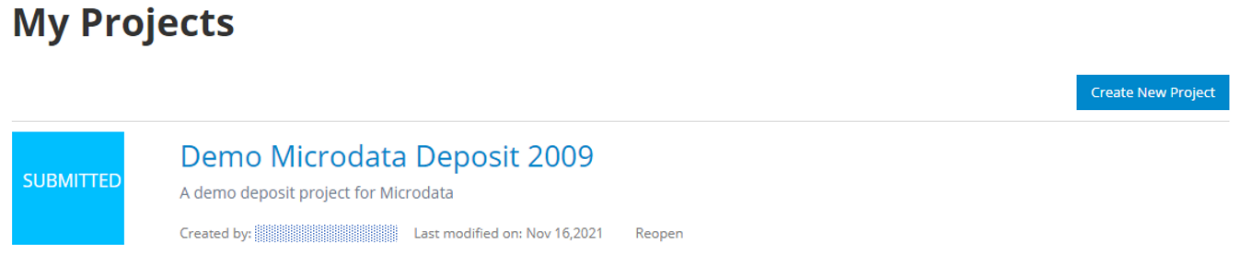
The status of the deposit will as change as the deposit goes through the curation workflow. It will be updated to reflect the current status of the deposit.
# Data deposit administration
# Access deposits
Administrators can access deposits from the Data Deposit menu. Deposits can be filtered by workflow status or found using the keyword search function. The administrator can view a list of deposits at each stage of the workflow, see what is in the pipeline (draft and submitted projects); review deposits that are still in draft status and feedback to depositors before they submit.
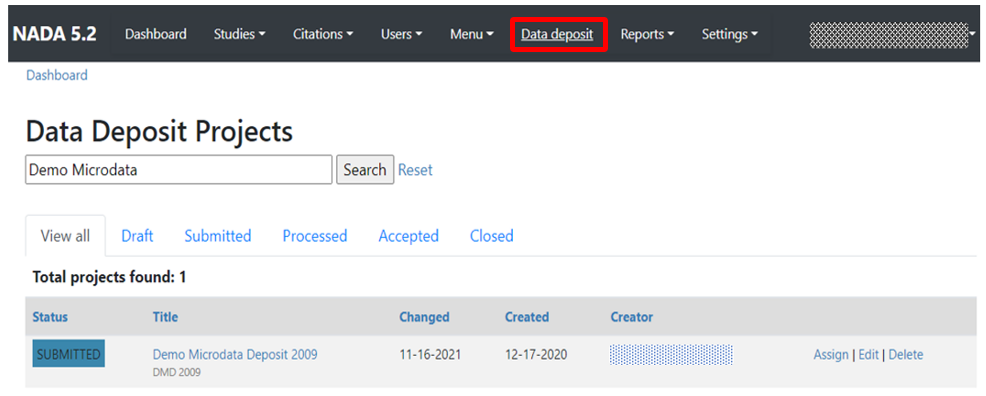
For each deposit, there are three primary actions that can be performed by an administrator: Assign, Edit and Delete.
# Assign tasks

An administrator can assign a deposit to a curator, who also has administrative rights to access the deposit admin site. The system sends a notification to the assigned curator, and tags to inform informs other curators on who is managing the deposit. To assign a deposit to a curator, click the assign link then select the assignee from the list of admins and click submit.
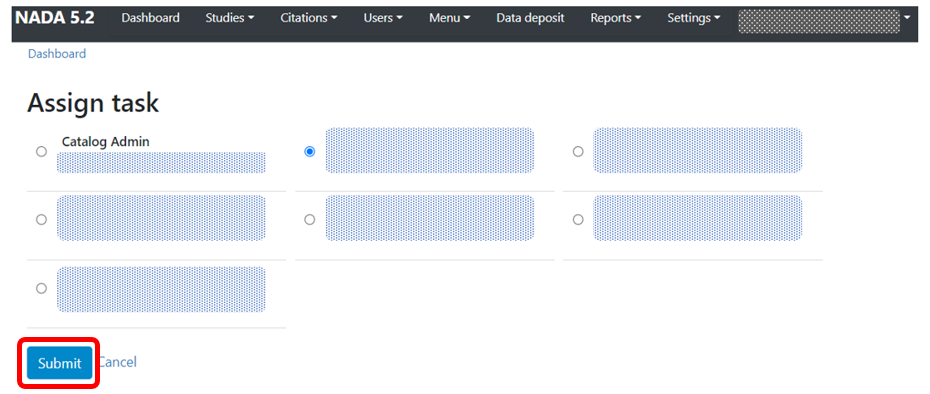
Once a deposit is assigned, a tag is displayed next to the deposit with the initials of the assigned curator. The tag is color coded to signal the status (work in progress/resolved). The default status for assigned projects is work in progress. This can be updated by the curator once it is resolved. This status is independent of the deposit workflow status and is updated separately.

# Features to keep track of assigned tasks
An administrator can view all active tasks by using this url:
Catalog url+ /admin/datadeposit/tasks
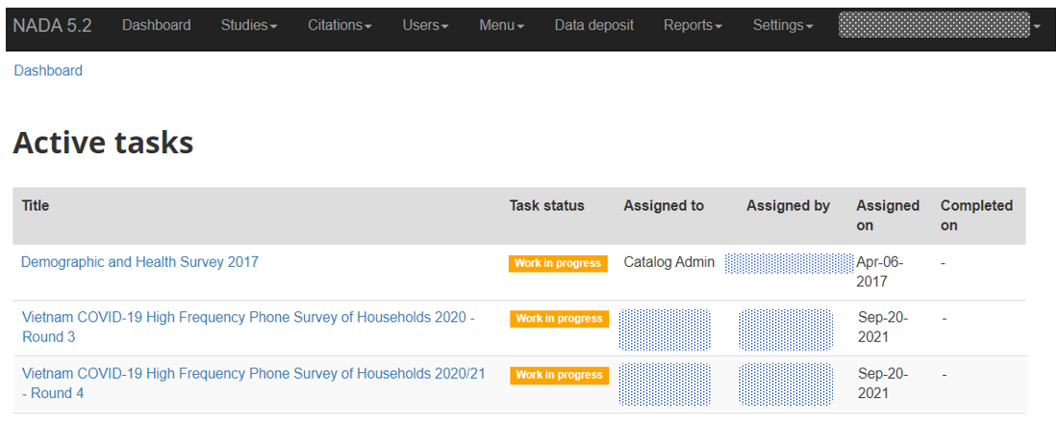
A curator/admin can view their tasks by using this url: Catalog url+
/admin/datadeposit/tasks/my_tasks
Tasks are listed in order starting with deposit projects assigned to the curator/admin, followed by deposits assigned by the admin to others.
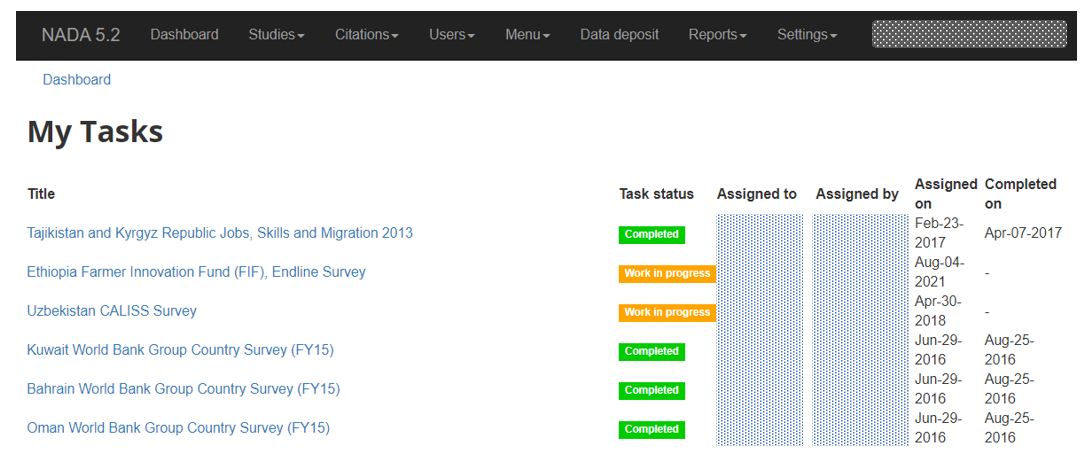
# Edit deposits (Manage projects)

The Edit link opens a Manage Projects page where an administrator can manage a deposit project from the following tabs:
# Project information
The administrator can review all submitted project information on one page including study description, embargo notes (if provided), a list of uploaded files and citations. From this tab, an administrator can also:
view a summary of the deposit. Contents of this page can be printed or saved by right clicking and selecting the desired action.
download the metadata in DDI xml and RDF format. These files are machine readable and can be ingested by metadata editors like Nesstar Publisher or uploaded to NADA
NOTE: Citations provided by the depositor are displayed in the project information but not included in the DDI, these will need to be added to the citation repository and attached to the study separately.
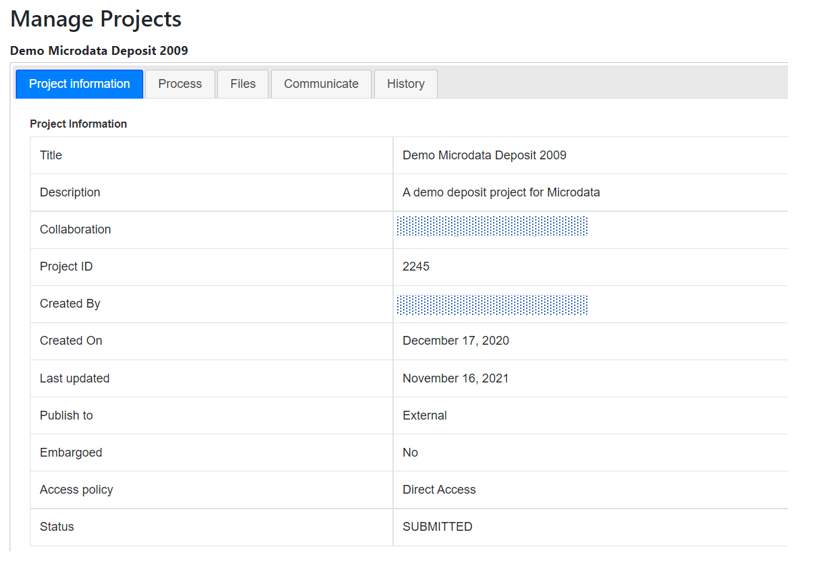
# Process (Update Status)
From this tab, an administrator can select and update the status of the deposit to any of the available statuses (draft, accepted, processed, closed) and notify the depositor as well as collaborators by email. Reopen sets the status of a project to draft.
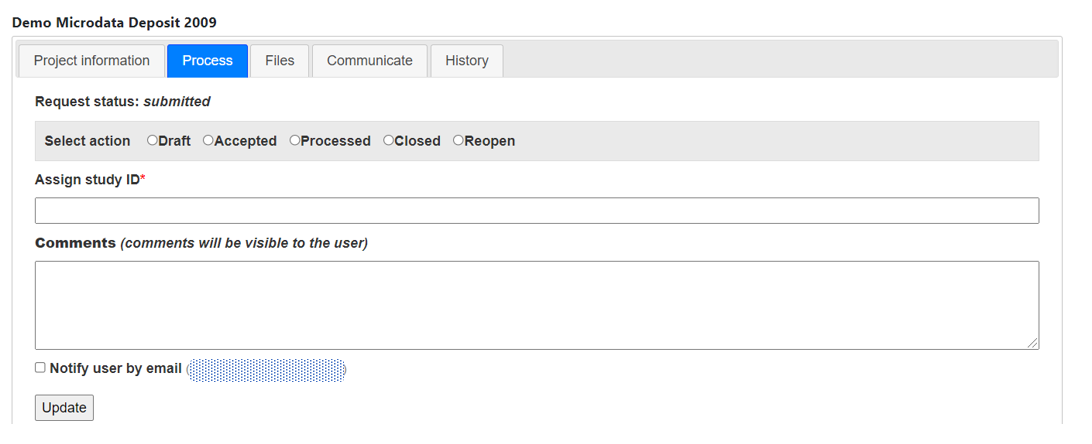
NOTE: Since the data deposit system does not automatically publish or add content to the catalog and archive, when the administrator reviews and accepts a deposit, they will transfer the deposited resources to the archive and file them under a unique study ID. This ID will also be used to identify the study in the NADA catalog if the data gets listed in the catalog. The deposit, archiving and publishing processes are not directly linked, so recording the study ID in data deposit when updating the deposit status helps to identify the deposit project with the study in the archive and catalog.
# Files (Access uploaded files)
This tab lists all the files uploaded to the project, indicates where they are stored, and provides their download links.
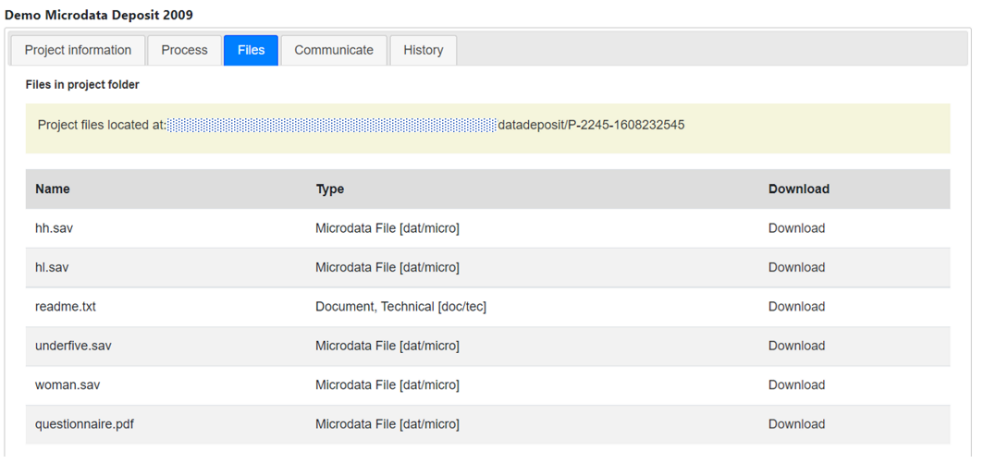
# Communicate
The Communicate tab allows the administrator to email depositors and collaborators regarding deposits without leaving the deposit site. Emails sent this way are logged in the project deposit history and are useful for reference e.g if updates on embargo dates are sent via email.
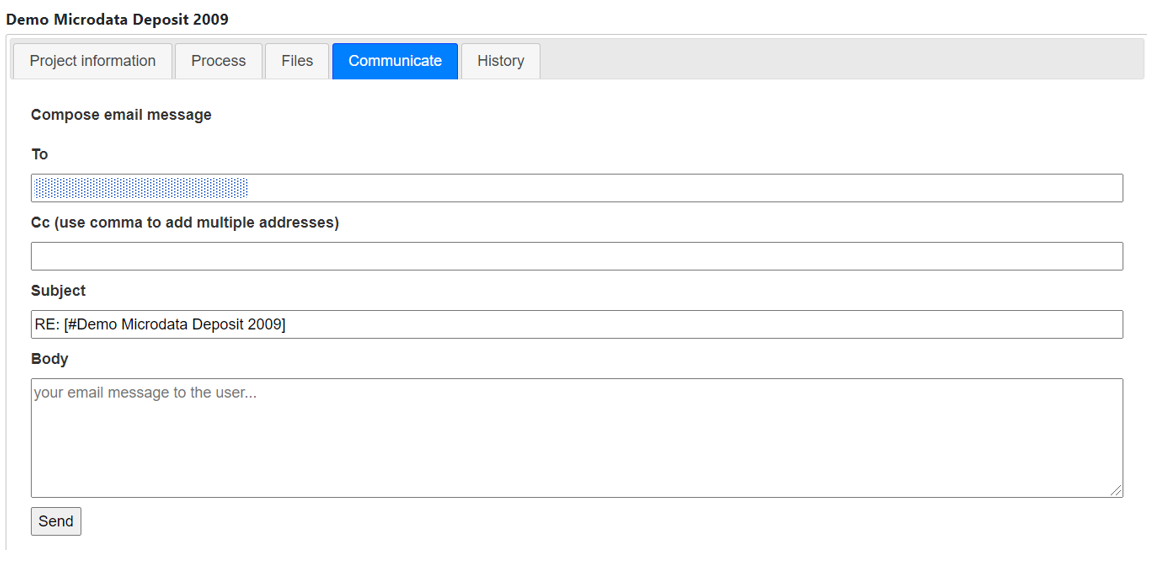
# Deposit History
The deposit history tab provides a log of changes made to the deposit. If a depositor updates a deposit, the administrator is informed of the changes in the deposit.
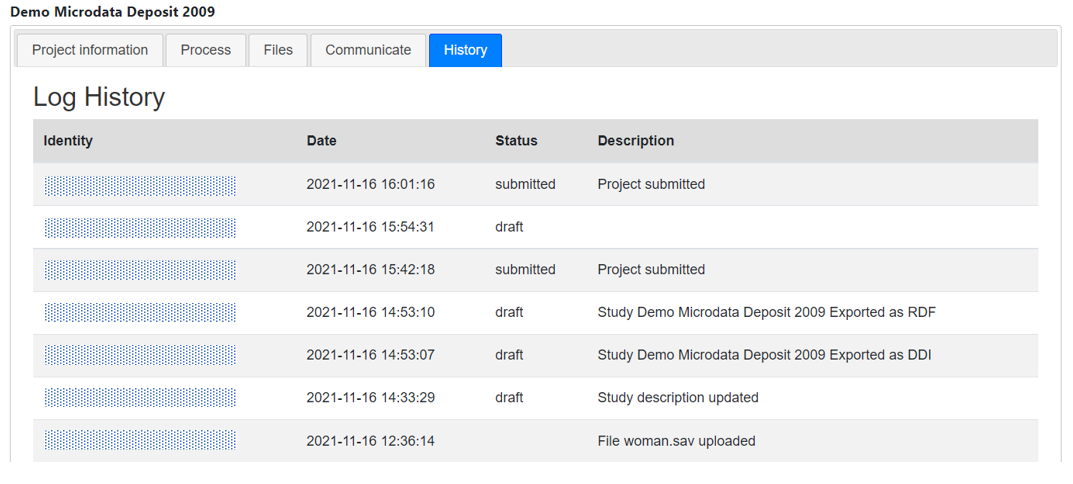
# Delete projects

The delete link enables the administrator to delete deposits projects. To avoid inadvertent deletion, the system will request the confirmation before deleting a project.
# Translating NADA
NADA was developed using English as the "base" language. It can however be translated, and translations can be shared. To translate NADA, click on Translate in the Settings menu.
Translating NADA is done using a user interface as described below. The output of a translation will consist of a series of PHP files (with extension [.php]) that can be uploaded on the server where NADA is installed. Instructions on where to save these files, and on how to activate a new language, are provided below. The IHSN will make translations originating from reputable organizations available on the NADA website.
NADA can be translated into any language that uses an alphabet compatible with [encoding]? This includes languages like Arabic that require a right-to-left display of strings (note that the NADA interface will not change; only the labels will be shown in right-to-left mode).
Note also that the application allows translation from English to English. This option is used to modify the display of labels/text in the NADA interface. It allows catalog administrators to adapt the user interface to specific terms used in their organization.
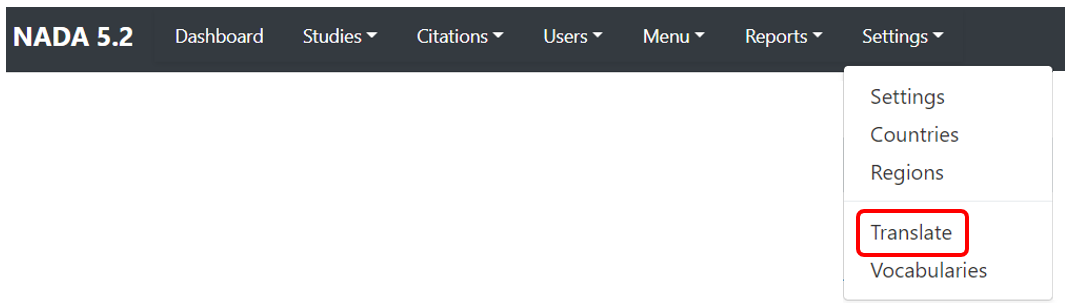
# Adding or selecting the new language
@todo - add a button in the UI.
Select the language and click Edit.
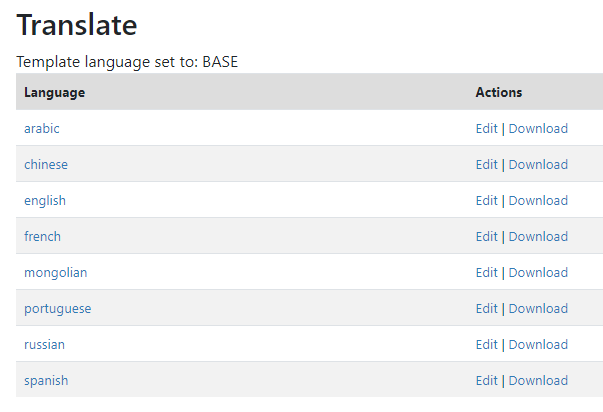
# Translating content in the user interface
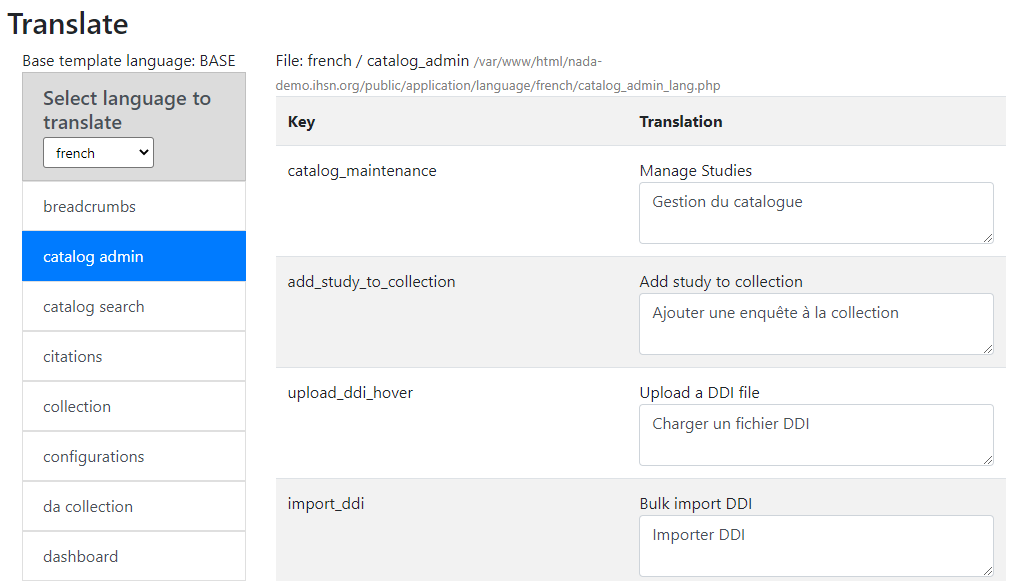
The items for which no translation is available will be displayed with a red background. Enter your translation in the box. Note that if the length of the translation is significantly longer than the text in English, the text may not display properly in the interface (when used in menus, buttons, or other locations with limited space).
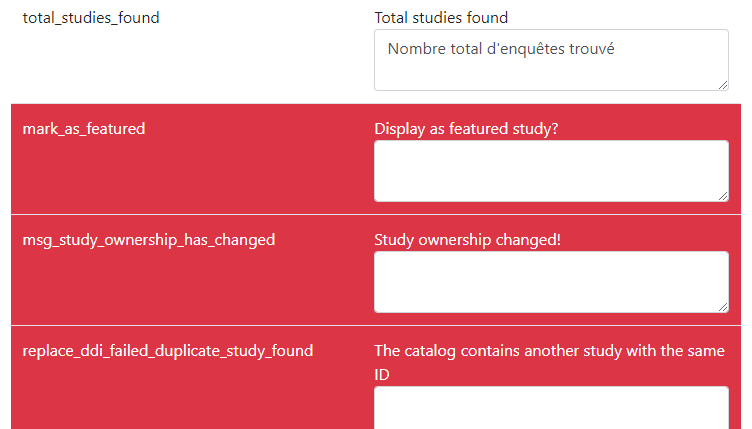
After translating a section, make sure to Save it.

To translate the text in an optimized manner, it will in some cases be important to know where the translation will be used. This will ensure not only that the translation is correct in the specific context where it is used but will also allow translators to verify that the translation will fit in the allocated space where it will be used (in some cases, this space can be fixed and limited; when the translation of a string significantly exceeds the length of the English text, it may result in display issues).
The following table provides information on the NADA pages where the translation contained in different sections/files will be used:
# Activating the translation
The Download option in the Translate summary table allows you to download the PHP files containing the translations and share them with other NADA users.

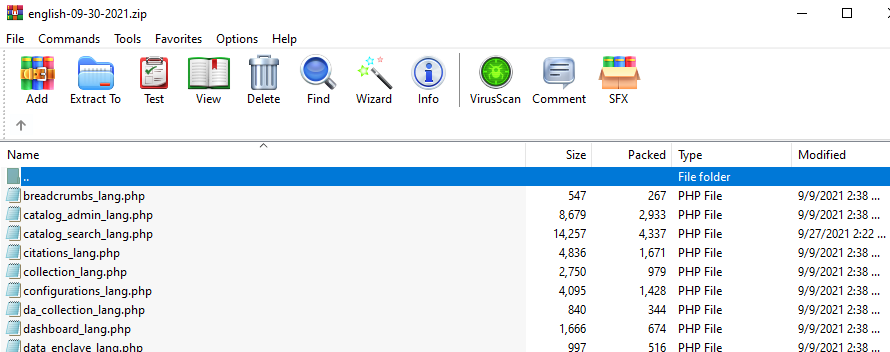
How to use these files in my NADA?
# Backup and restore
To backup NADA, you need to backup the database and NADA application directory separately.
Depending on your database type, follow the steps below to create a backup.
Backup and restore MySQL database
Backup and restore Microsoft SQL Server database
# Backup and restore MYSQL database
Depending on your hosting environment, you can backup and restore a MYSQL database using the following methods:
Command line tools mysqldump and mysqlimport
MySQLWorkBench GUI
PHPMYADMIN
[a) Backup and restore using MySQL via command line]{.underline}
MySQL provides a command line tool called MYSQLDUMP. This should be included with your installation of MYSQL.
Steps to use MYSQLDUMP:
Depending on your operating system, open the command line or shell terminal. For Windows, open the command window "cmd.exe" or "Command Prompt" from the start menu.
Run the following command to backup the database:
mysqldump -u dbuser -p [db_name] > [dumpfilename.sql]
-u - is the user name for the database
-p - enter the password or leave it empty to enter password in interactive mode
[db_name] - put the nada database name
[dumpfilename.sql] - enter the output file name
Example: Exports the database nada4 into a file nada4.sql
mysqldump -u root -p nada4 > nada4.sql
Note
For more information about using the command, see: https://dev.mysql.com/doc/refman/5.6/en/mysqldump.html (opens new window)
Steps to restore a database backup using MYSQLIMPORT
From the command line, run the command:
mysqlimport -u [user name] -p[password] [db_name] [db_backup.sql]
-u - is the user name for the database
-p - enter the password or leave it empty to enter password in interactive mode
[db_name] - database name where the backup will be restored to
[db_backup.sql] - enter the backup file name
Note
For more information about using the tool, read: http://dev.mysql.com/doc/refman/5.6/en/mysqlimport.html (opens new window)
[b) Backup database using MySQLWorkBench]{.underline}
MySQLWorkBench (https://www.mysql.com/products/workbench/ (opens new window)) is a free tool available for various operating systems and provides a visual tool for database administration. To download the software, visit: https://www.mysql.com/products/workbench/ (opens new window)
To backup using MySQLWorkBench, follow the steps:
Launch the MySQL WorkBench application
On launching the application for first time, you will need to setup a "New Server Instance". This is needed to setup a connection to the database to run queries and backup/restore databases.
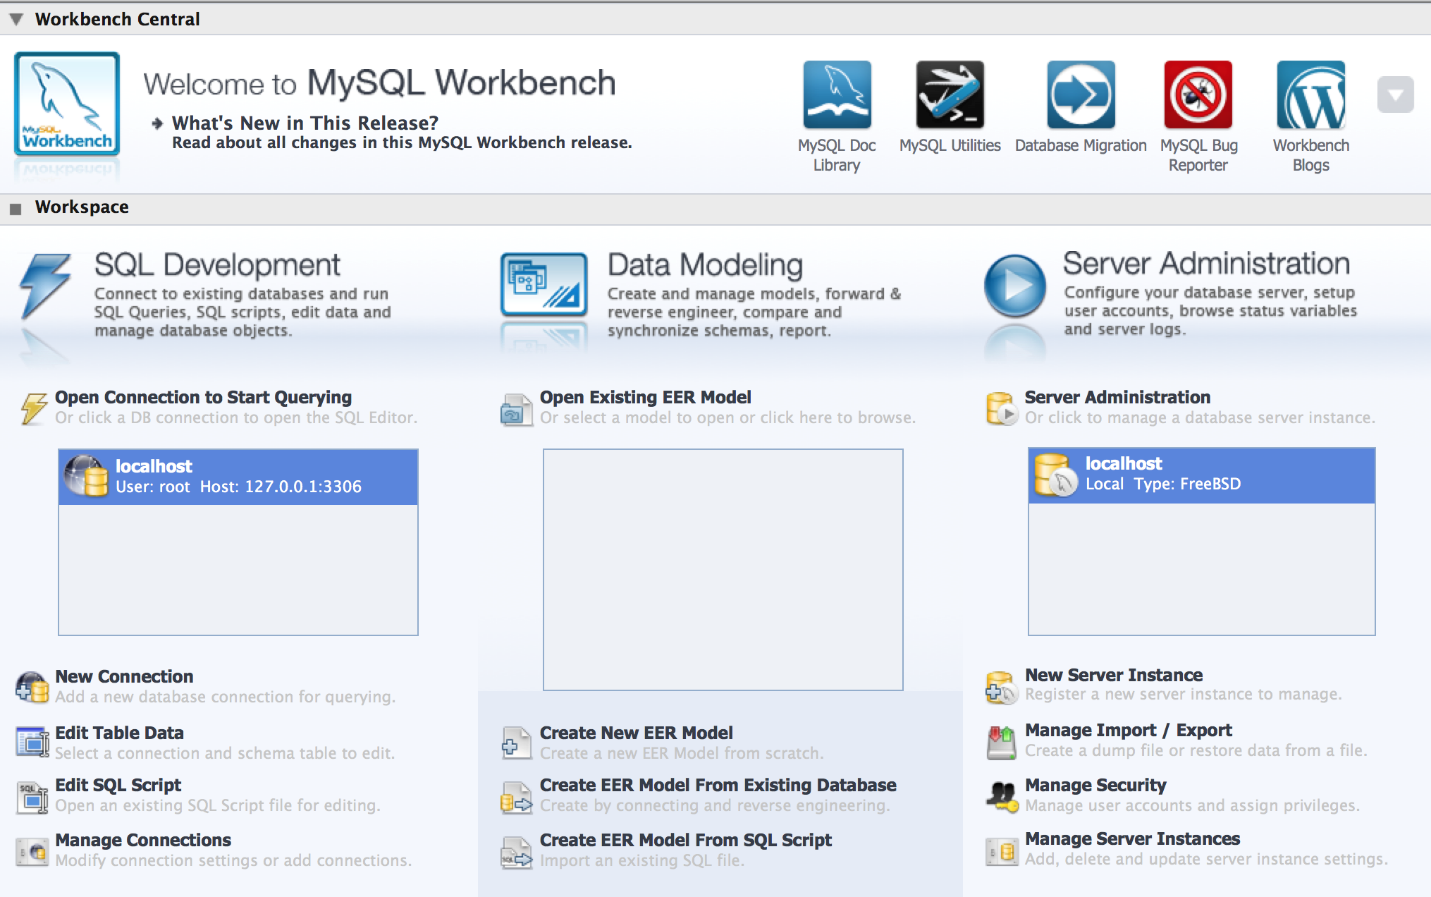
Steps to Create New Server Instance:
Select New Server Instance option within Server Administrator.
Provide connection details such as the database server host name, user name, password to access the database.
Test the database connection and save it as new instance.
Double click on Server instance you have created OR Click on Manage Import/Export option and Select Server Instance.
Under "Server Administration", you have the options to import and export database.
To backup an existing database:
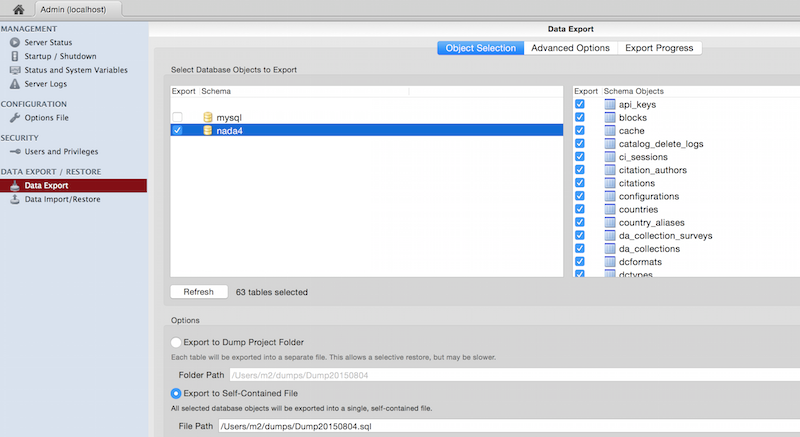
Select Data Export under DATA EXPORT/RESTORE. Select the database for export and then pick the option at the bottom Export to Self-Contained File, take note of the file path as this is where the backup file will be created. Now click on the "Start Export" button to export the database.
# Restore
To restore the database using MySQLWorkBench, use the menu option Data Import/Restore under the DATA EXPORT/RESTORE. The steps to import are:
Click on the option "Import from Self-Contained File" and then provide the path to the backup file (.sql).
Default target Schema option: You can either leave it empty or fill in with the name of the database where you want the backup to be restored. If you provide a name of an existing database, the backup will overwrite the existing database.
# Use of the API by data users
The use of the NADA API for catalog administration has been documented in multiple sections of the Administrator's Guide. Some API functions are also accessible to the public. This section describes the public-facing functionalities of the API.
When a NADA catalog is published, a web page must provide all necessary documentation (technical and legal) to users.
[restrictions apply?]
# Getting metadata via API
How to query the catalog to extract metadata
# Getting data via API
Catalog administrators may decide to make some data accessible to users via API. In such case, the data are stored in the web server in a MongoDB database. Visitors to the catalog can query and access the data using the API as described below. Note that access restrictions may apply.