Adding microdata

Creating a Microdata entry can be done in two different ways using the administrator interface and the API:
- By uploading pre-existing metadata (typically generated using a specialized metadata editor, like the Nesstar Publisher application for microdata) via the web interface.
- By generating and uploading new metadata using the web interface (but with limited capability to document variables; this is thus not a recommended option).
- By uploading pre-existing metadata (typically generated using a specialized metadata editor, like the Nesstar Publisher application for microdata) using the API.
- By generating and uploading new metadata programatically, using R or Python and the API.
Metadata standard: the DDI Codebook
For microdatasets, NADA makes use of the DDI Codebook (or DDI 2.n) metadata standard.
The documentation of the DDI Codebook metadata standards is available at https://ihsn.github.io/nada-api-redoc/catalog-admin/#tag/Survey. A Schema Guide is also available, which provides more detailed information on the structure, content, and use of the metadata standards and schemas.
For microdata, the use of a specialized DDI metadata editor to generate metadata is highly recommended (like the Nesstar Publisher or the World Bank's Metadata Editor). Indeed, the DDI should contain a description of the variables included in the data files, preferably with summary statistics. Generating variable-level metadata can be a very tedious process as some datasets may include hundreds, even thousands of variables. Metadata editors have the capacity to extract the list of variables and some metadata (variable names, labels, value labels, and summary statistics) directly from the data files. The alternatives to generating the metadata using a specialized editor are to enter the metadata in NADA, or to enter them in R or Python scripts.
Loading metadata (web interface)
If you have used a specialized metadata editor like the Nesstar Publisher software application to document your microdata, you have obtained as an output an XML file that contains the study metadata (compliant with the DDI Codebook metadata standard), and a RDF file containing a description of the related resources (questionnaires, reports, technical documents, data files, etc.) These two files can be uploaded in NADA.
In the administrator interface, select Studies > Manage studies and the collection in which you want to add the dataset (if you have not created any collection, the only option will be to upload the dataset in the Central catalog; this can be transferred to another collection later if necessary). Then click on Add study.

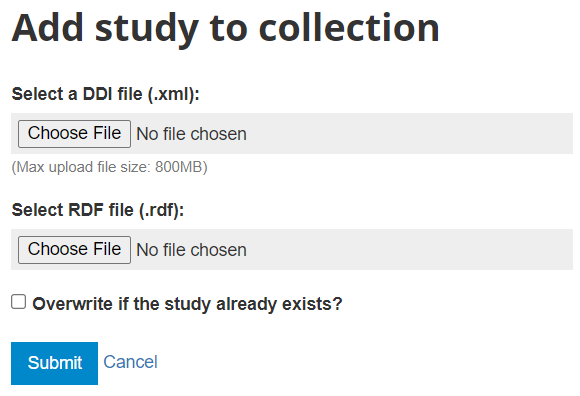
In the Select a DDI file and Select RDF file, select the relevant files. Select the "Overwrite if the study already exists" option if you want to replace metadata that may have been previously entered for that same study. A study will be considered the same if the unique identification number provided in the DDI metadata field "study_desc > title statement > idno" is the same (in the user and administrator interface, IDNO will be labeled "Reference No"). Then click Submit.
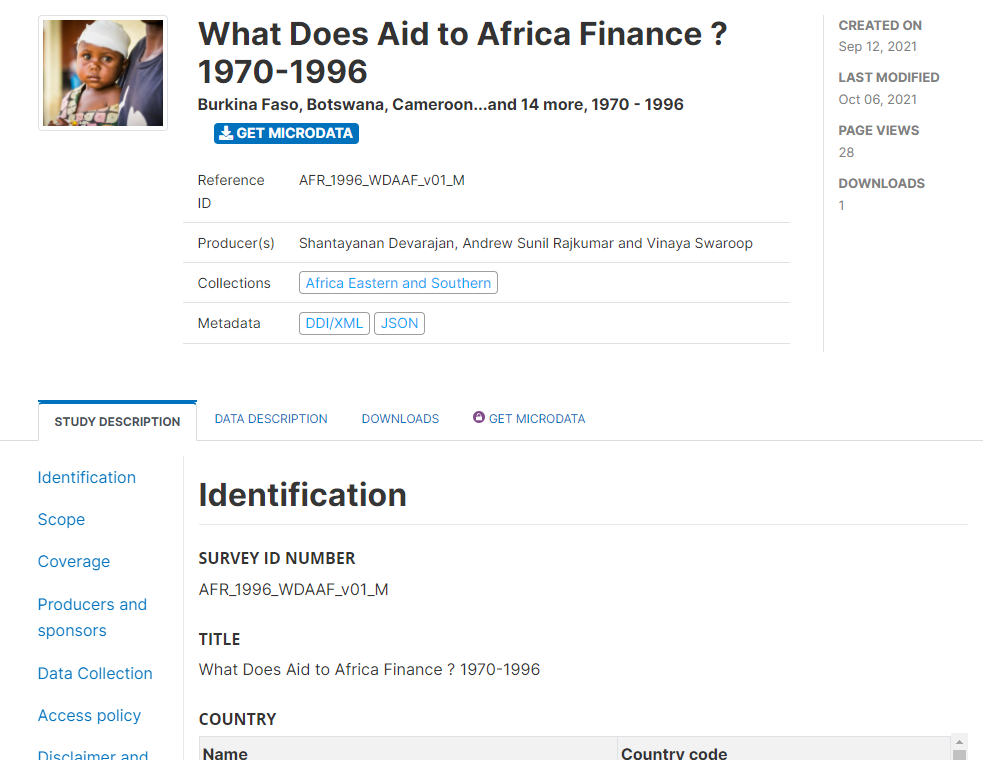
The metadata will be uploaded, and an Overview tab will be displayed, providing you with the possibility to take various actions.
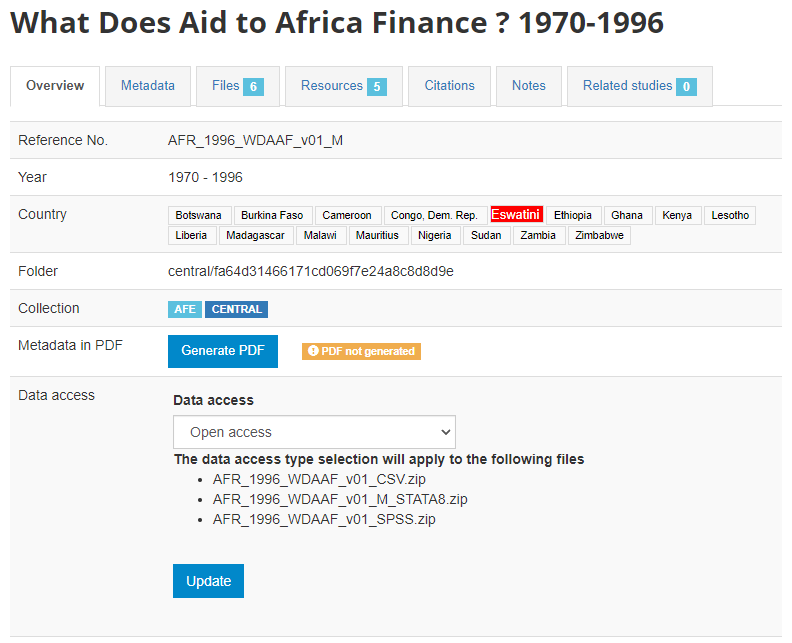
In Country, the names that are not compliant with the reference list of countries will be highlighted in red. By clicking on any of these country names, you will open the page where the mapping of these non-compliant names to a compliant name can be done. This is optional, but highly recommended to ensure that the filter by country (facet) shown in the user interface will operate in the best possible manner. See Countries.
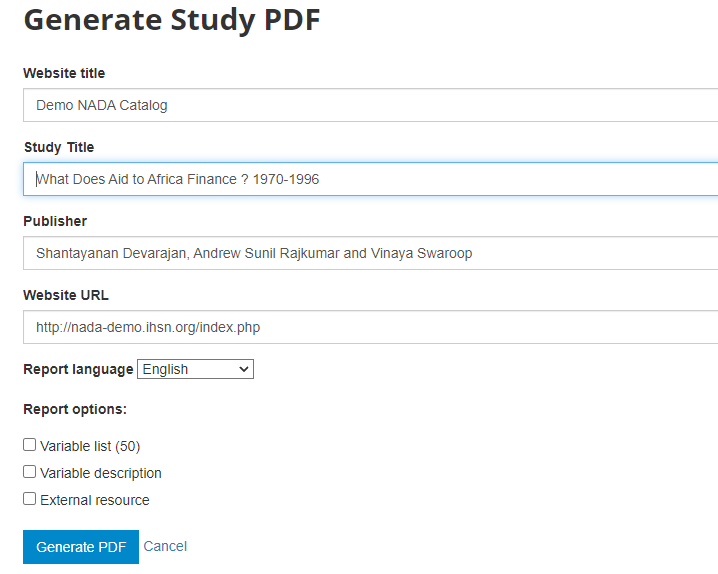
Metadata in PDF: Allows you to generate a PDF version of the metadata (applies to microdata only).

Data access: This is where you will indicate the access policy for microdata. The restrictions associated with some of these access policies will apply to all files declared as "Data files" in NADA (see description of tabs "Files" and "Resources" below. NADA must be informed of what files are "Data files"; it is very important when you document and upload external resources to make sure that data files are properly identified. If a data file is uploaded as a "document" for example, it will be accessible to users no matter the access policy you apply to the dataset.
The options for Data access are:
Open data: visitors to your catalog will be able to download and use the data almost without any restriction
Direct access: visitors will be able to download the data without restriction, but the use of the data is subject to some (minor) conditions
Public Use Files (PUF): all registered visitors will be able to download the files after login; they will be asked but not forced to provide a description of the intended use.
Licensed data: registered visitors will be able to submit a request for access to the data by filling out an on-line form, which will be reviewed by the catalog administrator who can approve, deny, or request more information (see section "Managing data requests").
Data accessible in external repository: this is the option you will select when you want to publish metadata in your catalog but provide a link to an external repository where users will be able to download or request access to the data.
Data enclave: in this option, information is provided to users on how to access the data in a data enclave.
Data not accessible: in some cases, you will want to publish metadata and some related resources (report, questionnaire, technical documents, and others) but not the data.
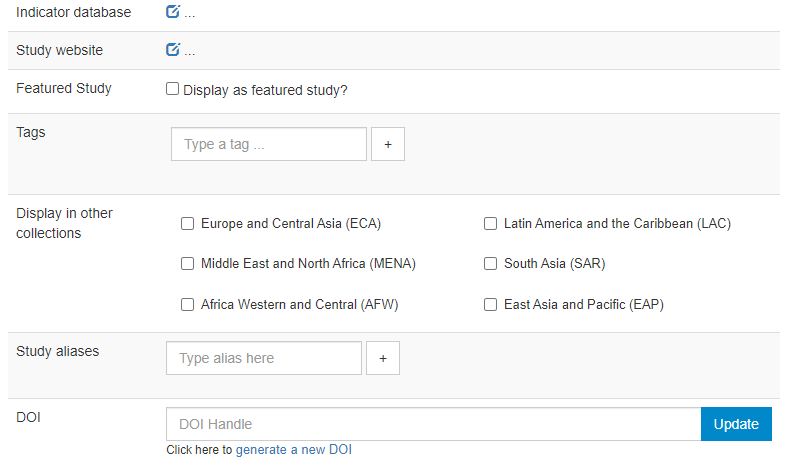
Indicator database: this applies to microdata only. The field allows administrators to provide the URL of a website were indicators generated out of the microdata are published.
Study website: a link to an external website dedicated to the survey.
Featured study: This allows administrators to mark entries as "featured". Featured studies will be shown on top of the list of entries in NADA catalogs, with a "Featured" pill.
Tags: Enter tags (each one with an optional tag group; tag groups will typically be used for creating custom facets; see section on Adding facets).
Display in other collections: The list of collections (if any) created in the catalog will be displayed. You can select the collections (other than the one in which you are publishing the dataset) in which you want your dataset to be visible. These collections will show but not own the dataset.
Study aliases: This field can be used to enter alternative names by which the dataset may be referred to.
DOI: The system allows administrators to request the issuance of a DOI for the dataset.
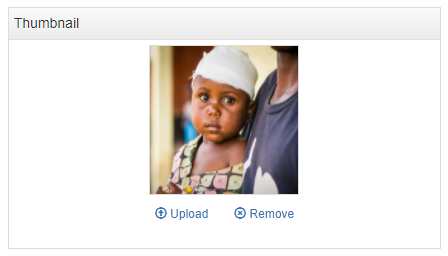
An image file can be selected to be used as thumbnail in the catalog. This thumbnail will be visible in the catalog listing page, and in the banner of the dataset page.
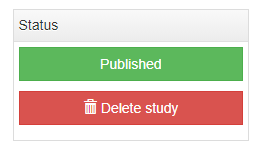
By default, the metadata you just published will be in draft mode in your catalog, i.e. not visible to users. To make the metadata visible in your catalog, click on "Draft" to convert the status to "Published". You can at any time unpublish a dataset; it will then become invisible to users, but will not be deleted from your catalog.
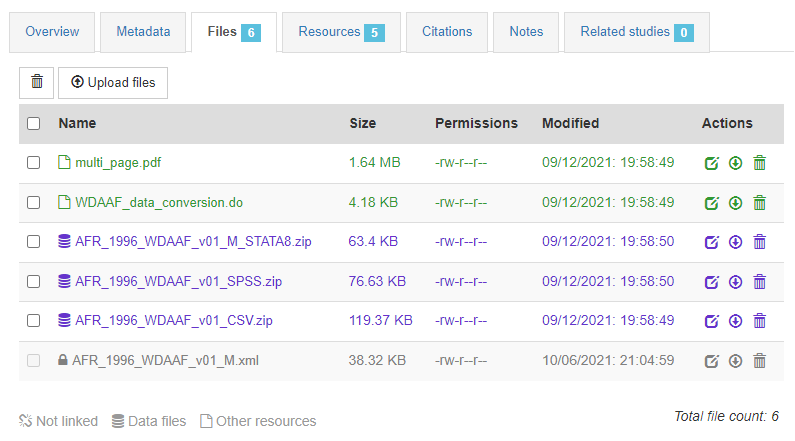
In the Files tab, you have the option to upload the files (data files or external resources) that you want users to be able to access from the online catalog. Some files have already been uploaded (the XML and RDF files); others will have to be manually uploaded to the web server.
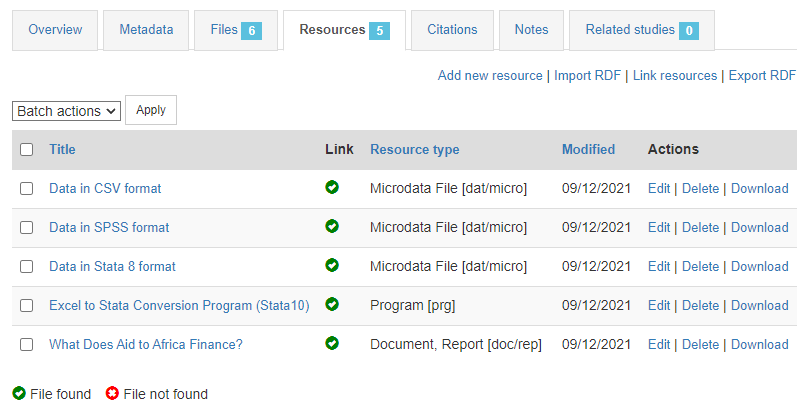
In the Resources tab, you will see a list of external resources, which should correspond to the files you uploaded. A green icon should appear next to the "Link", indicating that a file has indeed been identified that corresponds to the resource. If you see a red icon, click on "Link resources" to try and fix the issue. If the problem persists, the filename identified in the RDF metadata probably does not match the name of the uploaded file, or the file has not been uploaded yet (see Files tab).
That's it. Your data and metadata are now visible to all users who have access to your catalog.
From scratch (web interface)
If you want to add a microdata entry to your catalog using the web interface, but do not have metadata ready to be uploaded (in the form of a DDI-compliant XML file and an optional RDF file), you have the possibility to create a new entry in the NADA administrator web interface. Note however that this option is limited to the study description section of the DDI metadata standard. The study description of the DDI standard describes the overall aspects of the study (typically a survey). Other sections of the DDI are used to document each data file (file description), and each variable (variable description). In the current version of the metadata editor embedded in the NADA web interface, the file and variable description sections are not included. For that reason, the use of this option is not recommended except for cases when no file and variable description is available. In other cases, the use of a specialized metadata editor (like the Nesstar Publisher) or the more complex programatic option (described below) are recommended. Documenting files and variables (when available) adds rich metadata that will increase the visibility, discoverability, and usability of your datasets.
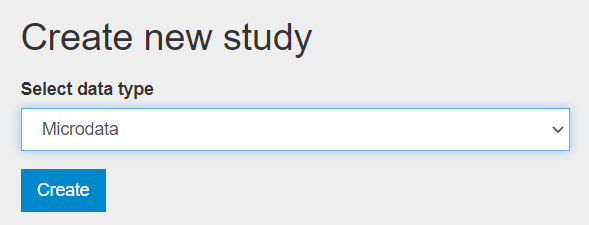
To document a micro-dataset from scratch using the web interface, select "Add study" in the dashboard page, then select the option microdata in the Create new study box. Then click Create.
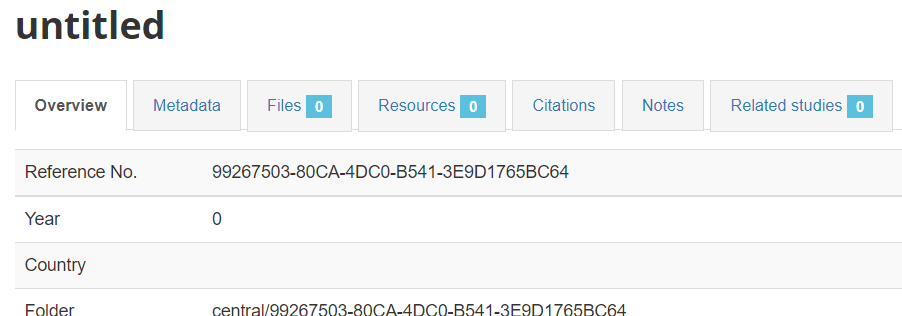
The Overview tab of a new, empty entry will be displayed.
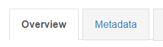
Click on the Metadata tab to open the (limited) DDI metadata editor. The left navigation bar allows you to navigate in the metadata entry form. Enter a much information as you can in the metadata fields, then click Save.
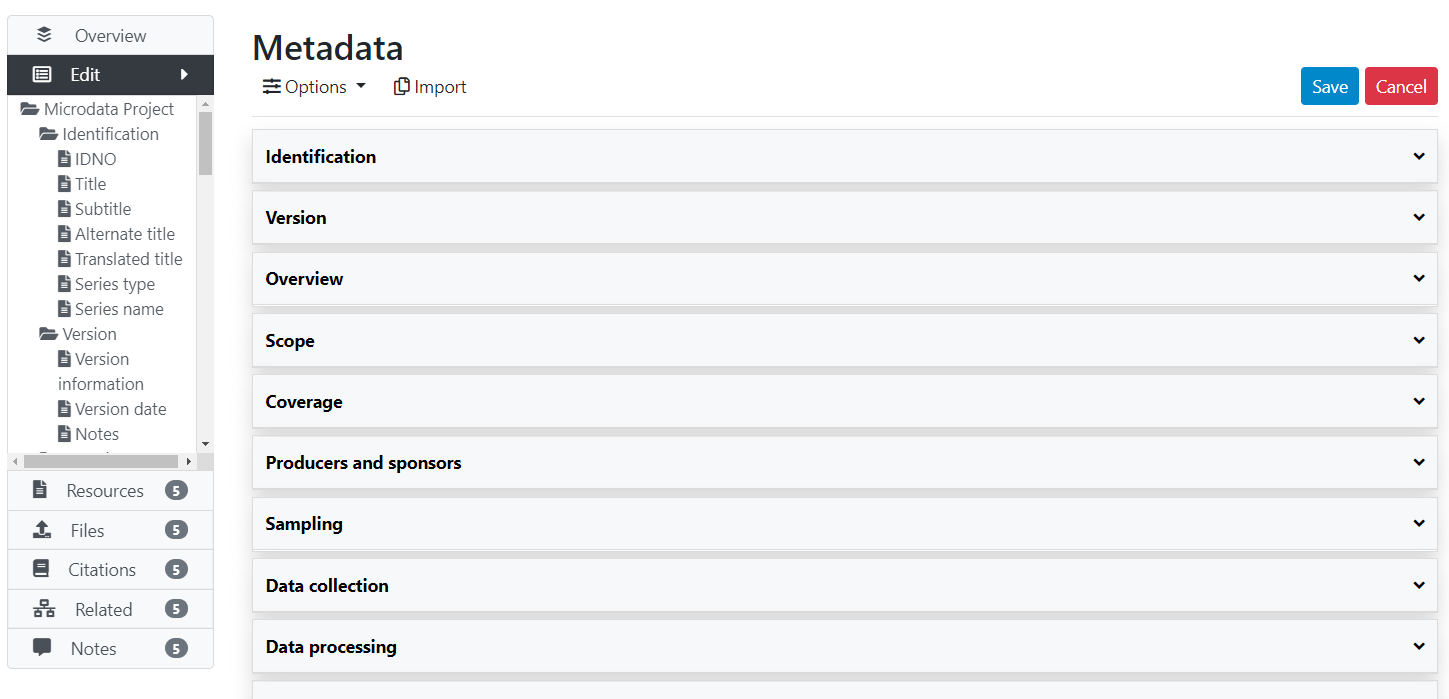
Once you have entered and saved metadata, proceed as explained in the previous section to upload files, select options, add a thumbnail, and publish your metadata. To add external resources, use the Add resource in the External resources page.
Loading metadata (API)
If you have used a specialized metadata editor like the Nesstar Publisher software application to document your microdata, you have obtained as an output an XML file that contains the study metadata (compliant with the DDI Codebook metadata standard), and a RDF file containing a description of the related resources (questionnaires, reports, technical documents, data files, etc.) These two files can be uploaded in NADA using the API and the R package NADAR or the Python library Pynada. We provided an example in section "Getting started -- Publishing microdata", which we replicate here.
library(nadar)
library(readxl)

# Set administrator API key and catalog URL
# The API key must be kept strictly confidential and never be entered in clear in a script,
# to avoid accidental sharing. A recommended option is to read it from an external file.

my_keys <- read.csv("C:/CONFIDENTIAL/my_keys.csv", header = F, stringsAsFactors = F)
set_api_key(my_keys[5,1])  # We assume here that the key is stored in cell A5
set_api_url("http://nada-demo.ihsn.org/index.php/api/")  # Enter the URL of your catalog
set_api_verbose(FALSE)

# Set the default folder, where the DDI and RDF files are stored.
# This folder has a sub-folder /Doc where the external resource is located (the
# resources must be stored in a folder with a relative path corresponding to the
# path provided in the RDF file)

setwd("C:/demo_nada_files/try_micro")

# Upload the DDI (only contains the dataset metadata; does not contain data)

import_ddi(xml_file = "./AFR_1996_WDAAF_v01_M.xml",
           repositoryid = "central",
           overwrite = "yes",
           access_policy = "open",  # This is where we set the access policy
           published = 1)  # Set this to 0 to upload as draft

# Upload the RDF and the resource files
# The location (relative path) of the resource files is provided in the RDF file;
# As long as the files are found in the correct folders, they will be uploaded to
# the web server and made accessible in the NADA catalog. To avoid entering the
# same resources multiple times, we delete all resources (in case any had been
# uploaded previously) before running the function.

external_resources_delete_all(dataset_idno = "AFR_1996_WDAAF_v01_M")

external_resources_import(dataset_idno = "AFR_1996_WDAAF_v01_M",
                          rdf_file = "./AFR_1996_WDAAF_v01_M.rdf",
                          skip_uploads = FALSE,
                          overwrite = "yes")

# We want to make the data accessible from the NADA catalog; the data files must
# therefore be uploaded on the web server. It is essential to declare the type
# as "microdata" (dctype = "dat/micro") as this will allow NADA to apply the
# appropriate access restrictions corresponding to the access policy for the
# dataset (in this case, we entered option access_policy = "open" in the
# ddi_import function, so the data files will be made directly accessible from
# the catalog without requiring users to register or request permission).

external_resources_add(
  idno = "AFR_1996_WDAAF_v01_M",
  dctype = "dat/micro",
  title = "Data in CSV format",
  overwrite = "yes",
  file_path = "./Data/AFR_1996_WDAAF_v01_CSV.zip"
)

external_resources_add(
  idno = "AFR_1996_WDAAF_v01_M",
  dctype = "dat/micro",
  title = "Data in Stata 8 format",
  overwrite = "yes",
  file_path = "./Data/AFR_1996_WDAAF_v01_M_STATA8.zip"
)

external_resources_add(
  idno = "AFR_1996_WDAAF_v01_M",
  dctype = "dat/micro",
  title = "Data in SPSS format",
  overwrite = "yes",
  file_path = "./Data/AFR_1996_WDAAF_v01_SPSS.zip"
)

# Add a thumbnail

thumbnail_upload(idno = "AFR_1996_WDAAF_v01_M", thumbnail = "./logo.JPG")
import pynada as nada
import pandas as pd
import os

# Set administrator API key and catalog URL
# The API key must be kept strictly confidential and never be entered in clear in a script,
# to avoid accidental sharing. A recommended option is to read it from an external file.

my_keys = pd.read_csv("C:/CONFIDENTIAL/my_keys.csv", header = None)
nada.set_api_key(my_keys.iat[4, 0])  # Assuming the key is stored in cell A5
nada.set_api_url('https://nada-demo.ihsn.org/index.php/api/')  # Enter the URL of your catalog

# Set the default folder, where the DDI and RDF files are stored.
# This folder has a sub-folder /Doc where the external resource is located (the
# resources must be stored in a folder with a relative path corresponding to the
# path provided in the RDF file)

os.chdir("demo_nada_files/try_micro")

# Upload the DDI

nada.import_DDI(file = "AFR_1996_WDAAF_v01_M.xml",
                overwrite = "yes",
                repository_id = "central",
                access_policy = "open",  # This is where we set the access policy
                published = 1)  # Set this to 0 to upload as draft

# Upload the RDF and the resource files
# The location (relative path) of the resource files is provided in the RDF file;
# As long as the files are found in the correct folders, they will be uploaded to
# the web server and made accessible in the NADA catalog. To avoid entering the
# same resources multiple times, we delete all resources (in case any had been
# uploaded previously) before running the function.

nada.delete_all_resources("AFR_1996_WDAAF_v01_M")

nada.import_RDF(dataset_id = "AFR_1996_WDAAF_v01_M",
                file = "AFR_1996_WDAAF_v01_M.rdf")

# We want to make the data accessible from the NADA catalog; the data files must
# therefore be uploaded on the web server. It is essential to declare the type
# as "microdata" (dctype = "dat/micro") as this will allow NADA to apply the
# appropriate access restrictions corresponding to the access policy for the
# dataset (in this case, we entered option access_policy = "open" in the
# ddi_import function, so the data files will be made directly accessible from
# the catalog without requiring users to register or request permission).

nada.add_resource(dataset_id = "AFR_1996_WDAAF_v01_M",
                  dctype = "dat/micro",
                  title = "Data in CSV format",
                  file_path = "Data/AFR_1996_WDAAF_v01_CSV.zip",
                  overwrite = "yes")

nada.add_resource(dataset_id = "AFR_1996_WDAAF_v01_M",
                  dctype = "dat/micro",
                  title = "Data in Stata 8 format",
                  file_path = "Data/AFR_1996_WDAAF_v01_M_STATA8.zip",
                  overwrite = "yes")

nada.add_resource(dataset_id = "AFR_1996_WDAAF_v01_M",
                  dctype = "dat/micro",
                  title = "Data in SPSS format",
                  file_path = "Data/AFR_1996_WDAAF_v01_SPSS.zip",
                  overwrite = "yes")

# Add a thumbnail

nada.upload_thumbnail(dataset_id = "AFR_1996_WDAAF_v01_M", file_path = "logo.JPG")
From scratch (API)
If you do not have DDI-compliant metadata readily available, you can generate the metadata using R or Python, then publish it using the NADA API and the NADAR package or PyNADA library.
As the DDI schema is relatively complex, the use of a specialized DDI metadata editor like the Nesstar Publisher may be a better option to document microdata. But this can be done using R or Python. Typically, microdata will be documented programmatically when (i) the dataset is not too complex, and/or (ii) when there is no intent to generate detailed, variable-level metadata. We provide here an example of the documentation of a simple micro-dataset using R and Python.
@@@@@@ Provide a complete example in R and Python
library(nadar)
library(readxl)

# Set administrator API key and catalog URL
# The API key must be kept strictly confidential and never be entered in clear in a script,
# to avoid accidental sharing. A recommended option is to read it from an external file.

my_keys <- read.csv("C:/CONFIDENTIAL/my_keys.csv", header = F, stringsAsFactors = F)
set_api_key(my_keys[5,1])  # We assume here that the key is stored in cell A5
set_api_url("http://nada-demo.ihsn.org/index.php/api/")  # Enter the URL of your catalog
set_api_verbose(FALSE)
import pynada as nada
import pandas as pd
import os

# Set administrator API key and catalog URL
# The API key must be kept strictly confidential and never be entered in clear in a script,
# to avoid accidental sharing. A recommended option is to read it from an external file.

my_keys = pd.read_csv("C:/CONFIDENTIAL/my_keys.csv", header = None)
nada.set_api_key(my_keys.iat[4, 0])  # Assuming the key is stored in cell A5
nada.set_api_url('https://nada-demo.ihsn.org/index.php/api/')  # Enter the URL of your catalog